Inspection plays a crucial role in manufacturing, and understanding what is inspection is essential for success. You need to use the right inspection types to detect defects early, reduce waste, and improve product quality. Studies show that quality-related issues can cost manufacturers billions each year, mainly due to assembly line inconsistencies and human errors. AI-powered inspection helps you identify defects quickly and keeps your production efficient.
Here are eight practical inspection types you should know:
| Inspection Type | Brief Description |
|---|---|
| Visual Inspection | Checks surface flaws using the naked eye or magnifiers |
| Dimensional Inspection | Measures product dimensions for accuracy |
| Non-Destructive Testing | Examines materials without causing damage |
| In-Process Inspection | Monitors quality during production |
| First Article Inspection | Verifies the first item in a new batch |
| Automated Inspection | Uses machines or AI to detect defects |
| Statistical Sampling | Inspects random samples to infer overall quality |
| Final Product Inspection | Assesses finished goods before delivery |
What Is Inspection
Definition
When you ask what is inspection, you look for a process that checks products, components, or systems against specific standards. Inspection means you compare actual results to expected standards. You use inspection to verify that each item meets quality assurance requirements. You rely on inspection to confirm quality compliance and maintain quality standards throughout production. Inspection forms the backbone of quality assurance because it helps you catch deviations from standards before they reach customers. You use inspection to ensure that every product aligns with quality standards and passes quality assurance checks.
Importance in Manufacturing
You need to understand what is inspection to appreciate its impact on manufacturing. Inspection supports quality assurance by helping you meet quality standards and maintain quality compliance. You use inspection to protect safety, reduce maintenance costs, and improve management decisions. Inspection ensures that your products meet quality standards and pass quality assurance tests before shipping. You rely on inspection to prevent supply chain disruptions and uphold quality compliance. Inspection also helps you comply with legal standards and maintain workplace safety.
Tip: Regular inspection helps you detect issues early, saving you time and money.
Here is a summary of why inspection is critical in manufacturing:
| Reason | Explanation |
|---|---|
| Safety | Inspections protect employee health, reduce workplace injuries, and demonstrate compliance with laws. |
| Maintenance | Regular inspections help detect issues early, reducing repair costs and preventing equipment abuse. |
| Management | Inspections aid in cost control, budgeting, and improving equipment procurement based on inspection data. |
| Product Quality | Quality inspections ensure products meet standards before shipping, preventing supply chain disruptions. |
You use inspection to maintain quality assurance, meet quality standards, and achieve quality compliance. Inspection gives you confidence that your products meet all required standards and pass quality assurance checks.
Quality Inspection Types
You need to use the right quality inspection types to keep your production line efficient and your products reliable. Each type of quality inspection targets specific stages of the process, helping you catch defects early and maintain strict quality control. When you understand these inspection types, you can build a strong quality control system that reduces defects and supports consistent quality.
Note: Choosing the right quality inspection method helps you prevent defects from reaching your customers and keeps your quality control process strong.
Here are eight practical quality inspection types you should consider for your manufacturing operations:
| Quality Inspection Type | What It Does |
|---|---|
| Visual Inspection | Detects surface defects and visible flaws using the naked eye or magnification tools. |
| Dimensional Inspection | Measures product dimensions to ensure they meet quality control standards. |
| Non-Destructive Testing | Examines materials for internal defects without causing damage, supporting ongoing quality. |
| In-Process Inspection | Monitors quality during production to catch defects before they progress further. |
| First Article Inspection | Checks the first item produced in a batch to confirm it meets all quality requirements. |
| Automated Inspection | Uses machines or AI to identify defects and support rapid quality control. |
| Statistical Sampling | Selects random samples for inspection to infer the overall quality of a batch. |
| Final Product Inspection | Assesses finished goods to verify they meet all quality control and customer requirements. |
You can also find other quality inspection types in industry standards. For example, incoming inspection checks raw materials and documentation before production. In-process inspection, sometimes called first-article or patrol inspection, helps you catch defects early. Final or pre-shipment inspection ensures finished goods meet specifications before delivery. Periodic or re-qualification inspection validates critical dimensions or performance at scheduled intervals.
When you use these quality inspection types, you strengthen your quality control system. You reduce the risk of defects, improve product quality, and support compliance with industry standards. Each inspection type plays a unique role in your overall quality control strategy, helping you deliver reliable products and maintain customer trust.

Inspection Methods
You need to choose the right inspection methods to maintain high standards and reduce defects in your manufacturing process. Each method offers unique benefits and fits specific stages of production. Below, you will find practical explanations for eight essential inspection methods.
Visual Inspection
What It Is
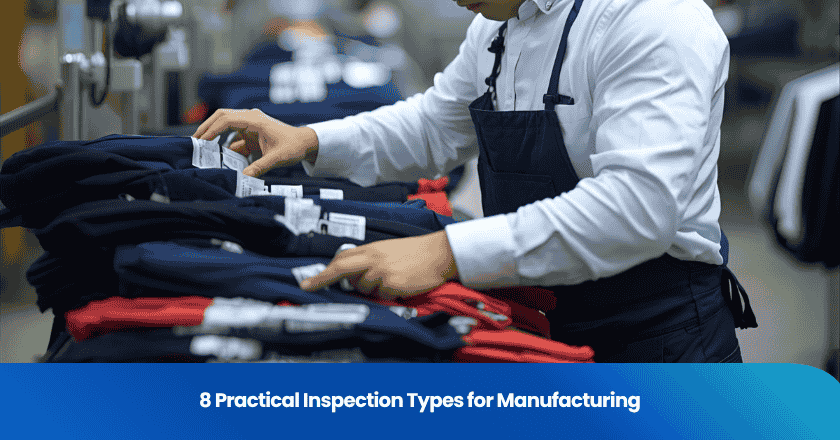
Visual inspection is the process of examining products or components with your eyes or magnification tools. You look for surface flaws, misalignments, and physical damage.
How It Works
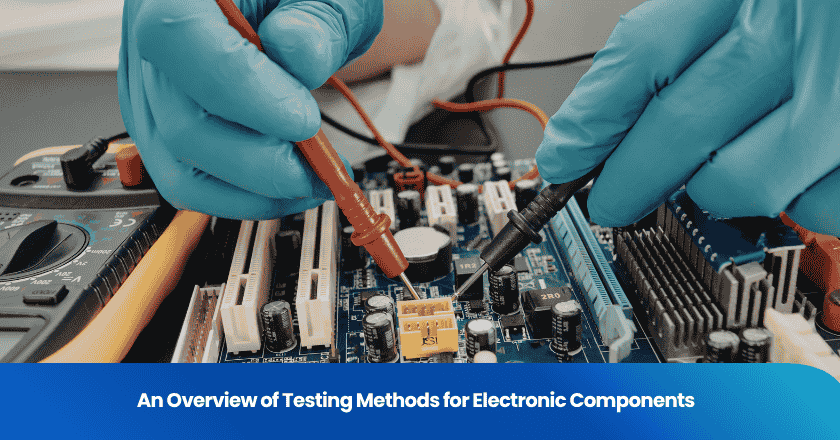
You inspect items under good lighting, sometimes using magnifiers or cameras. You check for common defects such as solder joint issues, misplacement, PCB errors, contamination, and burn marks.
Applications
You use visual inspection in the automotive industry to spot paint defects and assembly errors. In aerospace evaluations, you check for surface cracks and alignment problems. This method is also common in electronics and consumer goods.
Pros
- Quick and easy to implement
- No special equipment required for basic checks
- Effective for surface-level defect detection
Cons
- Limited accuracy for internal defects
- Subject to human error and fatigue
- Not suitable for high-volume automated processes
Recommended Tools/Technologies
- Magnifying glasses
- Inspection cameras
- Automated visual inspection systems
Tip: Automated visual inspection can reduce defect rates by up to 50% and boost productivity by 30%.
Dimensional Inspection
What It Is
Dimensional inspection verifies that product measurements match specified tolerances. You measure length, width, height, angles, and other critical dimensions.
How It Works
You use precision tools to check dimensions against engineering drawings. You compare actual measurements to standards and record results for quality control.
Applications
You apply dimensional inspection in automotive assembly to ensure parts fit together. In aerospace, you verify critical tolerances for safety. This method helps prevent recalls due to poor fitting or malfunction.
Pros
- Ensures products meet exact specifications
- Reduces performance issues and safety hazards
- Prevents costly recalls
Cons
- Time-consuming for complex parts
- Requires skilled operators
- May need calibration of instruments
Recommended Tools/Technologies
| Tool Name | Typical Precision |
|---|---|
| Dial Indicator | High precision |
| Gage Blocks | Exact standards |
| Surface Plate | 3–10 microns |
Micrometers offer accuracy of ±0.0001 in. For angle measurements, you use protractors, bevel protractors, sine bars, and angle gauge blocks.
- Dial indicators
- Gage blocks
- Surface plates
- Micrometers
- Sine bars
Non-Destructive Testing
What It Is
Non-destructive testing allows you to examine materials and components for internal and surface defects without causing damage.
How It Works
You use physical principles such as sound waves, magnetic fields, or dyes to reveal flaws. You inspect items without altering their structure.
Applications
You rely on non-destructive testing in the automotive industry to check welds and castings. In aerospace evaluations, you detect cracks in critical components. This method is vital for safety-critical products.
Pros
- Preserves the integrity of inspected items
- Detects internal and surface defects
- Cost-effective compared to destructive testing
Cons
- Requires specialized equipment
- Needs trained personnel
- May have limitations for certain materials
Recommended Tools/Technologies
- Ultrasonic testing devices
- X-ray or radiographic systems
- Magnetic particle testers
- Dye penetrant kits
- Eddy current testers
Common techniques include:
- Ultrasonic testing
- X-ray or radiographic testing
- Magnetic particle testing
- Dye penetrant testing
- Visual testing
- Eddy current testing
Note: Non-destructive testing is less expensive than destructive testing and helps you avoid costly shutdowns.
In-Process Inspection
What It Is
In-process inspection monitors product quality during production. You check items at various stages to catch defects early.
How It Works
You perform inspections at key points in the manufacturing cycle. You use sensors, cameras, and measurement systems to verify quality.
Applications
You use in-process inspection in automotive assembly lines to prevent defective parts from moving forward. In aerospace, you monitor critical steps for compliance. This method supports continuous improvement.
Pros
- Early defect detection reduces rework and scrap
- Minimizes production delays
- Provides feedback for process optimization
Cons
- May slow down production if not automated
- Requires integration with production systems
- Needs trained staff for manual checks
Recommended Tools/Technologies
- 3D scanning
- Laser measurement systems
- Vision inspection cameras
- Coordinate measuring machines (CMM)
- AI-powered defect detection
First Article Inspection
What It Is
First article inspection verifies the first item produced in a batch. You confirm that it meets all design and quality requirements before mass production.
How It Works
You inspect the initial product for dimensions, materials, finishes, and assembly. You compare results to engineering drawings and specifications.
Applications
You use first article inspection in automotive and aerospace industries when launching new products or changing designs. This method prevents costly mistakes and establishes a baseline for future production.
Pros
- Confirms production accuracy
- Prevents errors before full-scale manufacturing
- Improves supplier-buyer communication
Cons
- Time-consuming for complex products
- May delay production start
- Requires detailed documentation
Recommended Tools/Technologies
You must conduct first article inspection for new products, design changes, material substitutions, or after production holds.First article inspection is essential for verifying design dimensions, material quality, and assembly integrity.
Automated Inspection
What It Is
Automated inspection uses machines, sensors, and AI to detect defects and measure quality. You rely on technology for consistent and rapid checks.
How It Works
You set up cameras, sensors, and software to inspect products automatically. These systems analyze images and data to identify defects and measure dimensions.
Applications
You use automated inspection in the automotive industry for high-volume production. In aerospace, you check critical components for compliance. This method is vital in medical device manufacturing for inspecting surgical trays and component placement.
Pros
- High accuracy and consistency
- Operates 24/7 for nonstop throughput
- Reduces manual labor and human error
Cons
- High initial investment
- Requires technical expertise
- Needs regular maintenance
Recommended Tools/Technologies
- Automated inspection systems identify misalignments, cracks, and packaging issues.
- They measure dimensions and count items.
- These systems regulate temperature, flow, or speed.
Optical inspection algorithms analyze captured images to classify and detect defects with high precision.
Automated inspection improves real-time quality control and ensures products meet standards faster than manual methods.
Statistical Sampling
What It Is
Statistical sampling evaluates product quality by inspecting a representative sample instead of every item. You use this method to infer the quality of entire batches.
How It Works
You select random samples from production and inspect them for defects. You follow structured plans based on standards like ANSI/ASQ Z1.4 and Z1.9.
Applications
You use statistical sampling in automotive and aerospace industries for high-volume production. This method helps you manage costs and risks while maintaining quality.
Pros
- Improves inspection efficiency
- Reduces costs by limiting the number of items inspected
- Provides statistical validity and reliability
Cons
- May miss defects in uninspected items
- Requires careful planning and execution
- Not suitable for critical safety components
Recommended Tools/Technologies
- Sampling plans (ANSI/ASQ Z1.4, Z1.9)
- Attribute sampling tools
- Data analysis software
- Statistical sampling allows you to evaluate product quality efficiently.
- Inspection sampling plans help you manage costs and risks.
- Attribute sampling is valuable for maintaining standards in high-volume environments.
Final Product Inspection
What It Is
Final product inspection assesses finished goods before delivery. You verify that products meet all quality and customer requirements.
How It Works
You inspect completed items for defects, compliance, and performance. You use advanced technologies to check surface and internal features.
Applications
You use final product inspection in automotive and aerospace industries before shipping. This method ensures that only compliant products reach customers.
Pros
- Ensures customer satisfaction
- Prevents defective products from leaving the factory
- Supports compliance with standards
Cons
- May delay shipment if defects are found
- Requires thorough documentation
- Needs skilled inspectors or advanced systems
Recommended Tools/Technologies
- Automated visual inspection (AVI)
- Drones with high-resolution cameras
- Robotic crawlers
- Augmented reality (AR) overlays
- AI-powered image analysis
- High-speed cameras
- Automated optical inspection (AOI)
- X-ray inspection systems
Note: Final product inspection is critical for outgoing quality control and pre-shipment inspection.
You need to select the right inspection methods for each stage of production. The most widely adopted inspection methods include incoming quality control, in-process quality control, final quality control, and outgoing quality control.
You should align your inspection plan with quality control objectives and integrate it with your supply chain strategy. The initial step in any inspection process involves taking a random sample from the manufacturing facility. This sample serves as a benchmark for determining the acceptable quality level for the entire production batch.
Applications in Manufacturing
Matching Methods to Needs
You need to match inspection methods to your specific applications to achieve reliable evaluation and maintain high quality. Different industries require unique approaches for effective evaluation. The table below shows how you can align methods with various applications:
| Inspection Method | Industry/Application | Key Features |
|---|---|---|
| Automated Optical Inspection | High-volume production, SMT assembly | Maintains quality control, excels at surface-level evaluation |
| X-ray Inspection | Complex assemblies (e.g., BGAs, chip-scale packages) | Detects hidden defects, misalignments, and voids |
| Manual Inspection Tools | Component placement and alignment checks | Allows close evaluation using magnification |
| Machine Vision Systems | Manufacturing, healthcare, logistics | Automates quality control, adapts to complex evaluation tasks |
| Visual Inspection | Automotive, oil and gas, aerospace | Detects defects, ensures compliance, maintains infrastructure |
You can see that each method supports different applications. For example, automated visual inspection helps automotive manufacturers detect paint defects and alignment issues. In the oil and gas sector, visual inspection focuses on pipelines and storage tanks. Aerospace applications rely on visual inspection for cracks and stress fractures. You should select methods that fit your evaluation needs and industry requirements.
Factors to Consider
When you choose inspection methods for evaluation, you must consider several factors to ensure the best fit for your applications:
- Assess product risk levels, including complexity, end-use, and safety hazards.
- Understand industry standards and compliance requirements for your sector.
- Align inspection types with your operational model and product lifecycle.
- Choose methods based on product characteristics and evaluation goals.
- Evaluate your internal resources and capabilities for conducting evaluation.
- Select external service providers with relevant industry knowledge for specialized evaluation.
Tip: Careful evaluation of these factors helps you select the most effective methods for your applications and ensures consistent quality.
You improve your evaluation process by matching methods to your applications and considering these factors. This approach leads to better quality, fewer defects, and higher customer satisfaction.
Choosing Inspection Methods
Tips for Selection
Selecting the right inspection methods requires a structured approach. You should start by defining your quality objectives and understanding the specific requirements of your manufacturing process. To make informed decisions, consider these important criteria:
1. Ensure documentation and traceability. Keep detailed records of each inspection to identify trends and hold suppliers accountable.
2. Collaborate with suppliers. Set clear quality agreements and share inspection results to align expectations.
3. Implement standard operating procedures for incoming inspections. Consistent, documented steps help every inspector follow the same process.
4. Use an inspection management solution. Centralize workflows, data, and checklists for better control.
You should also evaluate the complexity of your products and the risks associated with defects. Choose methods that match your production volume and the criticality of each component. When you align your inspection methods with your quality goals, you improve reliability and reduce the risk of non-conformance.
Tip: Regularly review your inspection methods to ensure they still meet your evolving quality standards.
Implementation Advice
Effective implementation of inspection methods ensures consistent quality and process efficiency. You need a clear plan and well-trained inspectors. The table below highlights best practices for introducing new methods:
| Best Practice | Description |
|---|---|
| Develop an inspection plan | Careful planning and execution create a strong quality inspection program. |
| Train inspectors | Ongoing training keeps your team updated on standards and technologies. |
| Utilize advanced technologies | Automation and digital tools improve reliability and customer satisfaction. |
| Conduct regular audits | Audits help you find improvement areas and maintain compliance. |
| Define clear scope and objectives | Clear goals focus your inspection methods and improve efficiency. |
You should monitor the effectiveness of your inspection methods and adjust them as needed. Use feedback from audits and production data to refine your approach. When you invest in training and technology, you strengthen your quality system and support continuous improvement.
You gain long-term success in manufacturing when you understand different inspection types. You improve quality and reduce risks by choosing the right inspection method for your needs. Regular inspection leads to:
- Enhanced quality through early issue detection
- Reduced recalls and improved safety
- Higher customer satisfaction
You should evaluate your current processes and apply suitable inspection methods. For deeper learning, explore these resources:
- Machine inspection for maintenance and efficiency
- Quality control in manufacturing for best practices
FAQ
What is the main goal of quality inspection in manufacturing?
You use quality inspection to ensure products meet required standards. This process helps you detect defects early, reduce waste, and deliver reliable goods to your customers.
How often should you perform inspections during production?
You should schedule inspections at critical points in your process. Regular checks help you catch issues early and maintain consistent quality throughout production.
Which inspection method works best for high-volume manufacturing?
Automated inspection suits high-volume environments. You benefit from fast, consistent results and reduced human error. Machine vision and AI-powered systems often provide the best efficiency.
Can you combine different inspection types in one process?
Yes, you can combine multiple inspection types. For example, you might use visual inspection for surface defects and dimensional inspection for precise measurements. This approach strengthens your quality control.
Grow your business with TradeAider Service
Click the button below to directly enter the TradeAider Service System. The simple steps from booking and payment to receiving reports are easy to operate.


