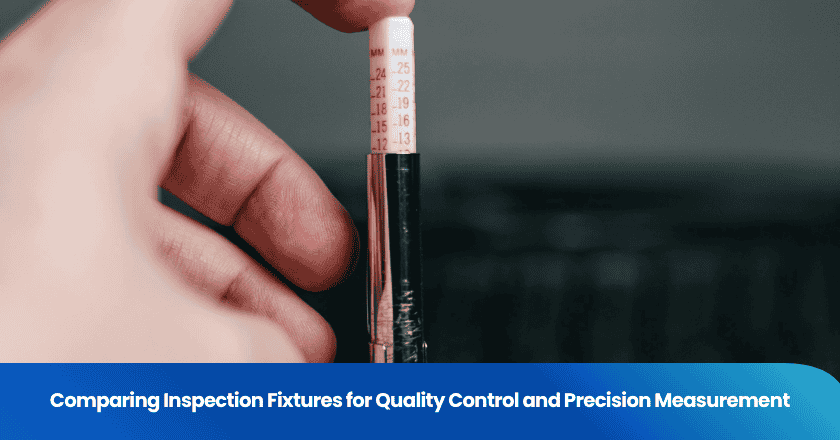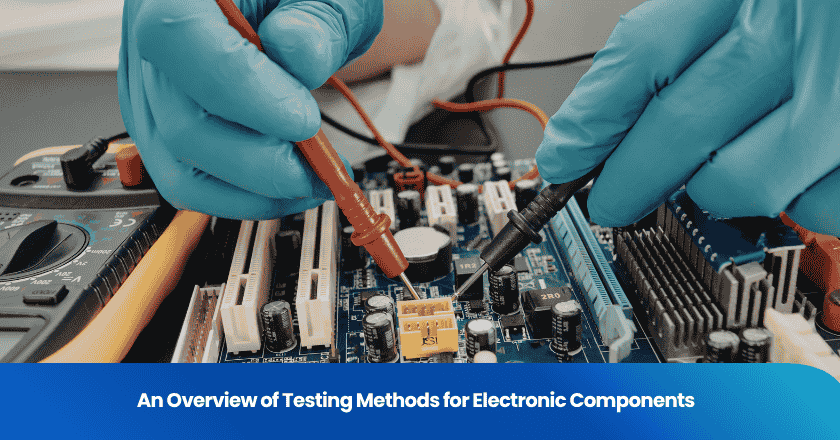
When you choose an inspection fixture, you make decisions that affect both accuracy and product quality. The right fixture ensures each part is measured consistently and helps prevent errors before they reach your customers. Manufacturers who invest in purpose-built fixtures and use a documented datum strategy see more repeatable results. With proper calibration and process control, you can reduce scrap rates and improve satisfaction. Standardizing your approach with real-time monitoring allows you to catch defects early and keep your production stable.
Inspection fixture basics
Definition and working principle
An inspection fixture is a specialized tool that holds, supports, or locates a part during measurement or testing. You use it to ensure that each component stays in the correct position, which helps you get reliable and repeatable results. The working principle centers on stability and consistency. When you use an inspection fixture, you reduce the risk of movement or misalignment, which can affect measurement accuracy.
Key principles behind inspection fixtures include:
- Reliability: The fixture must have enough strength and rigidity to last through repeated use.
- Manufacturability: You should find the design practical for your production environment.
- Economy: Cost-effectiveness remains important in fixture selection.
- Artistic quality: A well-designed fixture improves operator comfort and satisfaction.
Role in quality control
Inspection fixtures play a vital role in quality control. You rely on them to catch defects early and ensure products meet specifications before they leave the factory. Visual inspection, supported by fixtures, helps you identify flaws quickly. Automated systems using inspection fixtures provide uniform assessments, so you can maintain consistent quality.
| Contribution of Inspection Fixtures | Description |
|---|---|
| Precision Assurance | Fixtures immobilize components, reducing dimensional drift and cosmetic issues. |
| Time Efficiency | They expedite loading and verification, decreasing setup cycles and improving throughput. |
| Measurement Fidelity | CMM fixtures enforce reference frames, ensuring measurements adhere to tolerances. |
| Metallurgical Reliability | In welding, fixtures maintain joint specifications, enhancing strength and consistency. |
| Workflow Improvement | Auto checking fixtures provide reference points, streamlining inspection processes. |
Role in precision measurement
You use inspection fixtures to achieve high precision in measurement tasks. These fixtures help you verify dimensions, positions, and geometric features with accuracy. For example, control jigs check specific dimensions and geometries, while other fixtures confirm critical points for assembly. Some fixtures detect distortions, such as lack of parallelism or flatness, so you can spot defects immediately. By using inspection fixtures, you save time and ensure measurements remain consistent across multiple parts.
Types of inspection fixtures
When you explore the types of fixtures used in manufacturing, you find that each serves a unique purpose in quality control and precision measurement. Understanding these differences helps you select the right inspection fixtures for your process.
CMM fixtures
CMM fixtures play a crucial role in both quality control and precision measurement. You use these fixtures to secure parts on a coordinate measuring machine (CMM), ensuring stable clamping and accurate positioning. The six-point positioning principle prevents deformation, so you avoid errors from over-tightening or loose clamping. Clean surfaces on both the part and fixture are essential for reliable results. CMM fixtures handle a wide range of components, from shafts and discs to complex aerospace blades and automotive engines. You can measure diameters, lengths, hole patterns, and even intricate contours with high accuracy.
| Application Area | Typical Use Case |
|---|---|
| Shaft and Disc-Type Parts | Measure diameters, lengths, and geometric tolerances |
| Housing and Casing Parts | Check hole positions, depths, and threaded holes |
| Aerospace and Automotive Parts | Inspect profiles, contours, and critical dimensions |
Multi-station metrology fixtures
Multi-station metrology fixtures help you boost throughput and maintain accuracy. These fixtures combine several measurement stations into one platform. You can inspect multiple features or parts without moving them between different setups. This approach saves time and keeps the orientation consistent, which improves both speed and measurement reliability. Multi-station fixtures are ideal for batch inspections, assembly verification, and equipment calibration. You often see them in environments where you need to evaluate many parts quickly and efficiently.
Tip: Multi-station metrology fixtures reduce handling errors and streamline your inspection workflow.
Checking fixtures and gauges
Checking fixtures and gauges provide fast, practical solutions for production line checks. You use checking fixtures to verify dimensions and assembly accuracy, while gauges offer quick go/no-go assessments. These types of fixtures are common in high-volume manufacturing, where you need to confirm that parts meet basic specifications. Checking fixtures deliver medium-level accuracy, making them suitable for routine quality control. In contrast, inspection fixtures designed for laboratory use offer higher precision for final inspections.
| Feature | Inspection Fixture (Lab) | Checking Fixture (Production) |
|---|---|---|
| Accuracy | High (micron-level) | Medium (millimeter-level) |
| Usage | Final inspection | In-process checks |
| Cost | Higher | Lower |
You can also find dedicated fixtures for single parts, modular systems for varied lines, and universal fixtures for different geometries. Assembly fixtures help you verify the accuracy of assembled components, especially in complex products like PCBs.

Comparison criteria
When you compare inspection fixtures for quality control and precision measurement, you need to look at several important criteria. These factors help you decide which fixture best fits your process and ensures reliable results.
Accuracy and repeatability
Accuracy and repeatability are at the core of any inspection fixture. You want to make sure that every measurement reflects the true dimensions of your part. Dimensional accuracy ensures that your products meet strict tolerances and customer requirements. Repeatability means you can measure the same part multiple times and get consistent results.
| Criteria | Description |
|---|---|
| Purpose | Devices used to hold parts in a fixed position for consistent inspection. |
| Design | Often custom-built for specific products, made from materials like aluminum or steel. |
| Functionality | Ensures correct positioning during measurement to prevent human error. |
| Types | Go/No-Go Fixtures, Checking Fixtures, Gauges. |
| Accuracy | Ensures parts are manufactured to precise tolerances. |
| Consistency | Enables repeatable measurements, reducing human error. |
| Compliance | Ensures products meet regulatory standards and customer requirements. |
You may face challenges such as misalignment, which can affect quality control and require rework. Regular calibration helps you maintain accuracy. Wear and tear on fixtures can also reduce effectiveness over time, so timely maintenance is essential.
Ease of use and setup
You want inspection fixtures that are easy to use and quick to set up. User-friendly operation reduces the learning curve for new operators. Minimal setup time allows you to switch parts quickly, which is ideal for high-volume production. Intuitive interfaces and clear instructions help you avoid mistakes and speed up the inspection process.
| Feature | Description |
|---|---|
| High-Speed Performance | Engineered for rapid measurements, minimizing downtime with drive speeds up to 606 mm/s. |
| User-Friendly Operation | Intuitive interfaces reduce learning curves, enabling quick adaptation to new tasks. |
| Minimal Setup Time | Designed for quick part switching without lengthy calibration, ideal for high-volume production. |
| Low Maintenance Requirements | Built for durability, requiring minimal maintenance to maintain peak performance. |
Checking fixtures and assembly fixtures often provide fast and repeatable inspections. You can quickly place parts in the fixture for go/no-go verification, which enhances efficiency and reduces operator error.
Cost and maintenance
Cost and maintenance play a big role in your decision. Custom-built inspection fixtures may have a higher upfront cost, but they offer better fit and performance for specific parts. Modular or universal fixtures can save money if you need flexibility for different products. Maintenance is another key factor. Continuous use leads to wear and tear, which can cause inconsistent results. Regular checks and timely replacement keep your fixtures working at their best.
Note: Wear and tear on fixtures can reduce effectiveness. Even minor slippage can cause inconsistent results, so you should schedule regular maintenance.
You also need to consider compliance with industry regulations. Safety codes, energy efficiency standards, and local fire codes can influence the materials and design of your fixtures. These requirements may affect both the initial cost and ongoing maintenance.
Application suitability
Not every inspection fixture fits every application. You need to match the fixture to your specific inspection needs. For example, high-speed production lines benefit from fixtures designed for rapid measurements and minimal setup. Laboratory environments may require fixtures that offer the highest precision and support advanced measurement technologies.
- Misalignment issues can arise if you work with a variety of workpieces. Proper design and regular calibration help you avoid these problems.
- Environmental factors, such as lighting and energy efficiency, can influence fixture effectiveness. Regulations may require you to use energy-efficient solutions or flame-retardant materials.
- Technological advancements, like 3D scanning and autonomous metrology systems, now allow you to inspect complex geometries and automate decision-making. These innovations improve both accuracy and efficiency.
When you select an inspection fixture, always consider the operational environment, the skill level of your operators, and the specific requirements of your inspection process. This approach ensures you achieve reliable results and maintain product quality.
Pros and cons summary
Quality control fixture advantages and drawbacks
When you use a quality control inspection fixture, you gain several important benefits in your production process:
- You achieve consistency in product quality because the fixture creates repeatable testing conditions.
- You reduce human error by removing subjective judgment and operator fatigue from the inspection process.
- You receive real-time feedback, which lets you take immediate corrective actions and improve your First Pass Yield (FPY).
- You can trace test results, which helps you meet compliance and quality standards.
- You can scale your inspection process to maintain quality, even as production volumes change.
Note: Current research does not report any significant drawbacks for automated quality control fixtures in industrial applications. You can rely on these fixtures to support your quality goals.
Selection guidelines
Assessing inspection needs
You should start by understanding what your inspection process requires. Consider every step, from checking raw materials to verifying finished products. Use the table below to organize your assessment:
| Factor | Description |
|---|---|
| Factory Compliance Checks | Verify certifications, health, safety, and labor conditions. |
| Production Plan Assessment | Confirm schedules, material availability, and machine efficiency. |
| Product Specifications Verification | Ensure dimensions, design, and appearance meet standards. |
| Quality Management System Review | Evaluate quality control plans and inspection methods. |
| Pre-Production Sample Inspection | Check samples against design and prototypes before mass production. |
| Raw Materials and Components Checks | Inspect quality and validate supplier certifications. |
| Production Monitoring | Review reports and maintain communication for guideline adherence. |
| Packaging and Labeling Checks | Ensure packaging and labeling meet regulations. |
This approach helps you identify where inspection fixtures will add the most value.
Matching fixture to application
You need to match the fixture to your specific application. Start by identifying the type of fixture that fits your process. Choose materials that provide the right balance of durability and precision. Review the requirements for accuracy, structure, and markings. The table below summarizes key points:
| Requirement | Description |
|---|---|
| Qualified accuracy | Meets the necessary precision for inspection. |
| Reasonable structure | Supports effective inspection processes. |
| Material selection | Matches the fixture to the application’s needs. |
| Compliance with painting | Ensures durability and clear markings. |
| Clear signs and markings | Helps with identification and correct use. |
| Complete documentation | Supports operation and compliance. |
You should also consider tolerance requirements for different surfaces.
Practical selection tips
Follow these practical tips to make your fixture selection process smoother:
1. Prepare by choosing a fixture that matches your inspection environment and task.
2. Activate the fixture manually or with automated systems, using remote control if needed.
3. Adjust illumination to highlight defects or features.
4. Inspect the area using visual cues, and consider fixtures with cameras or sensors for detailed analysis.
5. Capture and analyze data with integrated sensors or connected devices.
6. Optimize lighting and fixture settings based on your findings.
7. Shut down and maintain fixtures regularly to ensure long-term performance.
Tip: Regular maintenance and calibration keep your inspection fixtures accurate and reliable.
You use inspection fixtures for quality control to ensure consistency and speed, while precision measurement fixtures focus on achieving the highest accuracy. Proper fixture selection improves product quality by minimizing part variability and supporting reliable setups. You benefit from mechanical consistency and better planning, which leads to higher throughput. For best results, follow this checklist:
1. Define fixture purpose and specifications.
2. Select durable materials.
3. Create detailed drawings.
4. Prototype and validate.
5. Test under real conditions.
6. Prepare for production and maintenance.
7. Train operators and review regularly.
FAQ
What is the main purpose of using inspection fixtures in testing?
You use inspection fixtures to hold parts steady during testing. This setup helps you get accurate and repeatable results. Fixtures make sure each part stays in the same position every time you perform testing.
How do inspection fixtures improve testing efficiency?
Inspection fixtures speed up testing by reducing setup time. You can quickly place parts in the fixture and start testing right away. This process helps you test more parts in less time and keeps your workflow smooth.
Can you use the same fixture for both quality control and precision measurement testing?
You can sometimes use the same fixture for both types of testing. However, you should check if the fixture meets the accuracy needed for precision measurement testing. Some fixtures work better for quick quality control testing, while others suit detailed measurement testing.
What factors should you consider when selecting a fixture for testing?
You should look at the type of testing you plan to do. Consider the part's size, shape, and required accuracy. Make sure the fixture supports the testing method and fits your production environment. Always check if the fixture allows easy and safe testing.
How often should you calibrate inspection fixtures used in testing?
You should calibrate inspection fixtures on a regular schedule. Frequent testing can cause wear, which affects accuracy. Regular calibration ensures your testing results stay reliable and helps you catch problems before they impact your testing process.
Grow your business with TradeAider Service
Click the button below to directly enter the TradeAider Service System. The simple steps from booking and payment to receiving reports are easy to operate.


