- About Us

- Our Services
- Your Industry
- Resources
- News & Blog
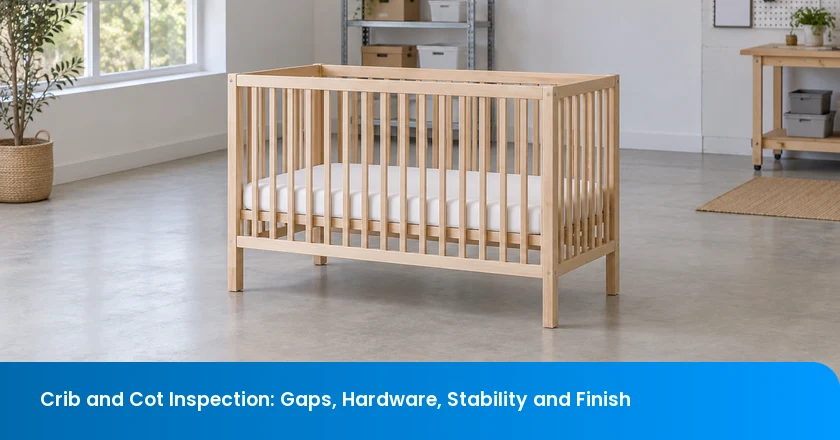
Baby crib quality inspection should connect entrapment gaps with the joints and mattress support that control those gaps. Start with the correct product category, assemble the delivered configuration, and check the specified openings, hardware retention, structural performance and finish. A cot that looks smooth and feels steady can still have an unresolved support or spacing defect. Factory observations help the importer decide what needs correction; they do not replace the applicable laboratory testing or certification.
What a Crib Inspection Must Establish
- Gap results belong to a named location, assembly configuration and approved measurement method.
- Hardware engagement and mattress-support performance need more evidence than a parts count or a hand-shake check.
- Rework must resolve affected structural and gap requirements; a matching finish also needs the relevant material evidence.
Identify the Crib Type Before Choosing the Standard
Identify the crib category and destination before choosing the checklist. “Cot” is a market term, not a sufficient regulatory classification. Rigid-sided baby cribs and cots may follow a different regulatory route from foldable fabric travel products or bedside sleepers. Dimensions, construction, intended use and the supplied instructions should agree with the classification in the technical file.
For the United States, full-size cribs and non-full-size cribs have different references. The official September 9, 2026 regulatory snapshot shows 16 CFR part 1219 incorporating ASTM F1169-25 for full-size cribs. Part 1220 incorporates ASTM F406-24 with specified exclusions for non-full-size cribs. Using the entire latter standard without those exclusions would misstate the rule. These US references are not a substitute for checking the requirements of another destination.
Ask the technical owner to identify the applicable edition, test clauses and any effective-date provisions for the goods being placed on the market. The inspection team needs the resulting controlled methods, not just a standard number on a purchase order. If the classification is unresolved, settle it before interpreting a measured gap as compliant or commissioning a test sequence that may not apply.
Build the Inspection Brief Around the Delivered Configuration
Before assigning the visit, review TradeAider’s company background and confirm which crib checks the proposed inspection scope can support. Provider background helps you evaluate the organization; the actual method, equipment and personnel available for this product still need confirmation.
Build the brief around the delivered crib: model and drawing revision, intended mattress reference, hardware list, assembly instructions and permitted mattress-support positions. State which configurations the approved procedure requires. Otherwise, a report can describe a correctly measured sample assembled in the wrong position.
Include the approved reference sample where available, but identify what it controls. A color sample can establish an appearance reference; it cannot establish a structural test result. Supply the defect criteria, required test equipment, sampling instructions and the person authorized to resolve discrepancies. Separate routine factory measurements from work that needs a suitably equipped laboratory.
Confirm access to packed goods and the permission to assemble, test or retain samples. Some required procedures may affect whether a tested unit can return to saleable stock. Agree that disposition before the visit, rather than allowing the factory to select a convenient display crib and treat it as representative of the shipment.
Record a Baseline Before Applying the Test Sequence
Record the initial dimensions and assembly condition against a sample identifier before applying the approved test sequence. Later observations should refer to that same unit, its support position and the relevant stage of testing. This makes a change in a joint or opening distinguishable from a difference between two samples.
Photograph the assembled crib from enough angles to locate each joint, then take close views of the measured interfaces. Include the instrument or probe identification in the record and note any assembly difficulty. The inspection checklist below organizes evidence; the actual limits and test conditions must come from the applicable controlled procedure.
| Inspection area | Baseline to record | Evidence needed after checking |
|---|---|---|
| Entrapment gaps | Opening location, mattress reference and support position | Result from the specified measurement or probe method |
| Hardware retention | Fastener identity, joint location and installed condition | Engagement, retention and any change under the required sequence |
| Frame and support | Assembly alignment, attachments and starting condition | Movement, damage and affected gap results |
| Finish | Surface location, coating reference and visible condition | Defect disposition and relevant chemical evidence |
Keep photographs and measurements together. A close-up with no location reference may show a gap accurately while leaving the reviewer unable to identify which side or support connection it belongs to. Conversely, an overview photograph seldom provides enough detail to resolve a disputed measurement. Link both views to the same finding and sample, with the criterion used for the decision.
TradeAider’s inspection-standard guidance can help frame the broader inspection criteria and reporting discussion. Attach the crib-specific requirements to that discussion so generic defect categories do not become an improvised substitute for the product method.
Entrapment Gaps: Measure the Location and Configuration
An entrapment gap is a particular opening in a particular configuration. Identify its location, then apply the relevant method with the required mattress or test fixture and support position. A result between slats does not settle a result around the mattress support. Different interfaces can expose different hazards and may require different probes, loading conditions or acceptance criteria.
The US Consumer Product Safety Commission (CPSC) lists component spacing, openings, hardware and mattress-support performance among full-size crib safety requirements. This breadth matters: measuring one convenient slat spacing is not a complete crib assessment. The guidance identifies requirement areas; it does not provide the complete laboratory procedure for every opening.
During the agreed inspection, map the accessible openings rather than recording a single “gap OK” entry. Distinguish slat spacing, corner interfaces and the relationship between the intended mattress and surrounding structure. Record the actual configuration beside the result. A measurement taken with a different mattress, or before the specified test stage, cannot automatically answer the question posed by the approved procedure.
Pay particular attention to what changes after a structural observation. If the mattress support shifts, the relevant surrounding gap may change even though the side rails remain intact. Preserve the sequence of observations and refer any required follow-up to the technical owner. Do not push components into a favorable position for a photograph or add an unapproved filler to make an opening appear smaller.
Where the factory lacks the required fixture or method, report the check as not performed and explain the missing resource. That is more useful than an estimated pass. The buyer can then arrange the proper verification and keep the affected decision open without confusing a visual screening result with a completed test.
Hardware Retention: Check the Joint, Not Just the Parts Count
Count the supplied hardware, then inspect what it does when installed. A complete bag can contain the wrong bolt length, an incorrect washer or a fastener that seats poorly in the intended joint. Compare the parts with the controlled bill of materials and instructions, including any features that prevent loosening or incorrect assembly.
A CPSC recall of IKEA SNIGLAR cribs illustrates why engagement matters: the mattress-support bolts were not long enough, allowing the support to detach and collapse. The February 2011 recall notice associated that failure with entrapment and suffocation hazards. Its repair instructions were specific to those recalled models; their bolt details should not be turned into a universal crib fastener specification.
For the inspected model, record the installed joint condition against its approved drawing and method. Look for cross-threading, damaged threads, split wood, displaced inserts, missing retention features and connections that cannot be assembled as instructed. An inspector should not compensate for a mismatch by choosing an alternative screw from the factory workshop.
Where torque is specified, use the specified procedure and suitable equipment. Do not invent a universal tightening value or assume that greater force makes a joint safer. Excessive tightening can damage the joint, while an apparently flush head may conceal poor engagement. The useful record identifies the fastener, the joint and the observed result, with any uncertainty explicitly attached to that connection.
If a joint loosens during an agreed sequence, preserve the evidence before any adjustment. Photograph its condition and identify the affected sample. Re-tightening and then reporting only the improved feel removes the very observation that the technical reviewer needs to assess the failure and define the correction.
Stability: Check the Frame and Mattress Support Together
Check frame stability and mattress-support integrity together. An assembled cot may stand level while a support connection remains vulnerable. Conversely, floor unevenness can produce rocking that is not evidence of a defective frame. Record the test surface and setup so the reviewer can separate those possibilities before interpreting the result.
The DaVinci crib recall expansion announced in October 2015 described a metal bracket that could break, creating an uneven sleeping surface or a gap. The notice identified entrapment, fall and laceration hazards. This is a specific historical failure mechanism, not evidence that the inspected model shares the defect: it explains why the support and the opening it creates belong in the same investigation.
Observe attachment points, frame alignment, support seating and any damage during the approved procedure. Use the required loads, fixtures and sequence only where the agreed inspection arrangement can execute them correctly. A hand shake can reveal an obvious loose assembly, but it cannot establish compliance with a defined structural test. Distinguish that screening observation from the formal result in the report.
Compare the final condition with the baseline. Note whether movement is reversible, whether a joint has changed and whether the method calls for another gap assessment. Avoid concluding “stable” solely because the crib has not tipped or collapsed; the relevant acceptance criteria may address other forms of structural performance.
TradeAider’s pre-shipment inspection service covers finished-goods checks such as dimensions, function and packaging within the agreed scope. Its stated readiness is 100% of the order quantity completed and at least 80% packed for export. Schedule pre-shipment inspection (PSI) at that stage and confirm the specific crib checks in advance; a PSI report is not a replacement for required laboratory certification.
Finish Checks: Separate Surface Defects from Chemical Evidence
Separate physical surface defects from chemical evidence. Inspect accessible rails, corners, slats and joints for splinters, sharp edges, peeling coating, exposed fasteners and rough repairs. Record where the defect occurs and how it can be reached in the assembled product. A general photograph of an attractive finish does not resolve a localized hazard.
For US children’s products, paint and similar surface coatings are subject to a lead limit of 90 parts per million (ppm). The CPSC lead-in-paint guidance distinguishes that coating requirement from the separate limits and testing for underlying materials. A smooth surface or a “non-toxic” marketing description does not demonstrate that the applicable chemical requirement has been met.
Match the relevant test evidence to the actual finish and product materials. Check the coating identity, color or formulation references where relevant, and the connection between the tested material and the goods presented. A report for an earlier finish cannot simply be attached to a changed coating without review of whether it still provides an adequate basis.
For visible defects, use the agreed appearance and safety criteria rather than treating every mark alike. A minor color variation and a splinter on an accessible rail have different implications. Keep the location, extent and proposed disposition clear so a cosmetic acceptance decision does not accidentally close a physical hazard.
Repair also needs traceability. Record which units were refinished and which material was used, then verify the finished condition and the relevant supporting evidence. Do not accept a repair merely because the color now matches the sample. If the factory cannot identify the coating used for touch-up, route that evidence gap to the responsible technical reviewer before closing the finding.
Resolve Structural Failures Before Accepting Workmanship
An acceptable workmanship sample cannot close an unresolved structural or entrapment finding. Keep those findings identifiable in the disposition, with the affected units, responsible reviewer and required next verification. Missing test evidence and a demonstrated test failure are different problems, but neither should disappear inside an overall appearance score.
For US children’s products, the domestic manufacturer or importer issues the Children’s Product Certificate (CPC) on the required testing basis. The CPSC certificate guidance explains that responsibility. Reconcile the applicable certification evidence with the model and production changes; the factory inspection report serves a different purpose and cannot take over the certifier’s role.
Workmanship sampling still has a place. An acceptance quality limit (AQL) plan can organize the agreed lot sampling and defect decision. Use TradeAider’s AQL calculator to support that sampling discussion, while defining safety-related escalation separately. A sample acceptance number should never be used as a reason to overlook an unresolved crib hazard.
Make the final status actionable: accepted observations, failed requirements, unperformed checks and outstanding documents should be distinguishable. The importer needs to know what would change the decision, not simply that the factory promises to improve. For a correction, identify the changed units and the evidence required to show that the relevant requirements have been satisfied.
Illustrative Example: Repaired Joints, Unresolved Gaps
Consider an illustrative order of 480 rigid-sided wooden cots. A loose-joint finding leads to an engineering-approved rework on 240 units identified in the production records. The completed goods and approved verification methods are available. During follow-up, the corrected sample feels steadier, but a subsequent gap check under the approved procedure still fails at the mattress-support interface. This is a hypothetical example, not a TradeAider client result.
The rework has improved one observation without resolving the related interface requirement. The importer should keep the 240 reworked units on hold and send the failed verification to the technical owner. The decision follows from the remaining gap failure, not from assuming that every repaired joint must be defective. A favorable hand-feel result does not cancel the measured finding.
The technical owner reviews the approved correction and its effect on the support interface, authorizes any further change and determines the necessary conformity assessment. Verification then repeats the required interacting structural and gap checks, reconciles the reworked units with the records and supplies the evidence needed for the importer’s disposition. The other 240 units are not automatically released: their own evidence and inspection decisions still apply. No universal repair, test force or replacement fastener follows from this example.
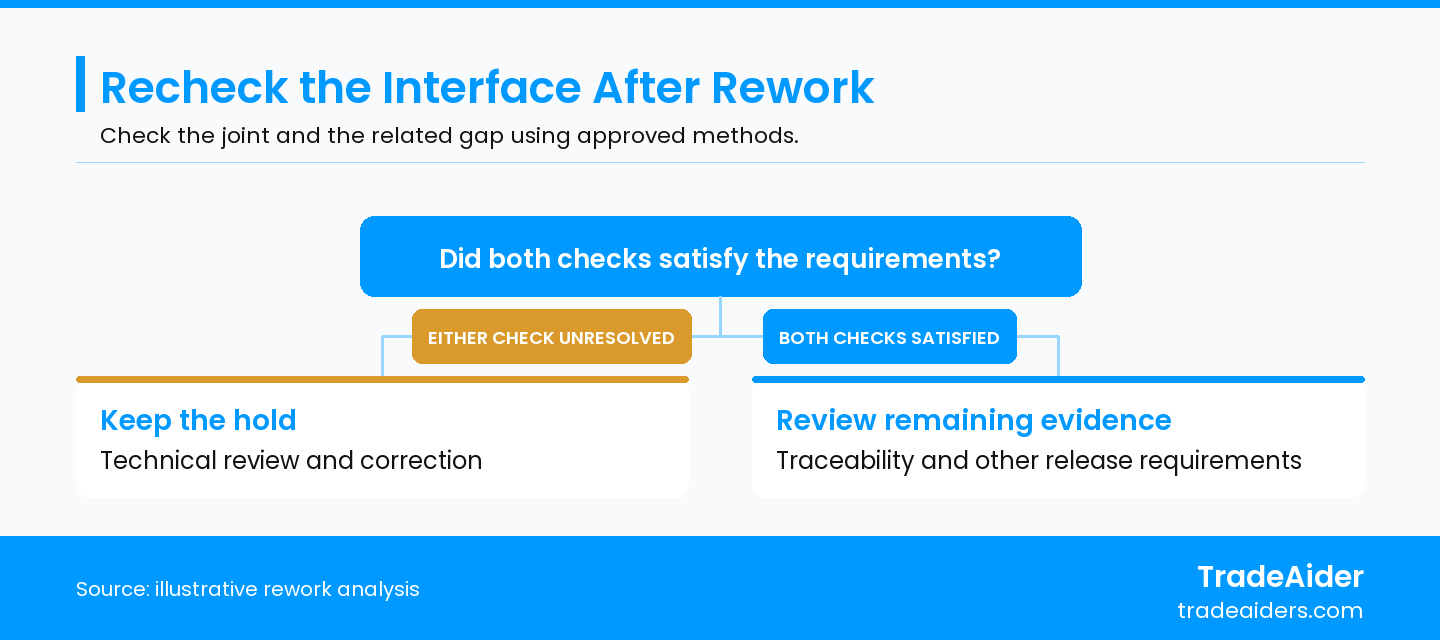
Rework closes only when the affected requirements are verified; other release requirements still apply.
Prepare a Crib Inspection Request with Clear Acceptance Criteria
Provide the controlled model configuration and acceptance criteria when arranging the inspection. Send the destination and product classification, drawings, hardware list, assembly instructions, intended mattress reference and required support positions. Include the approved methods, equipment needs and any unresolved test or rework findings.
State the order quantity, packing status, factory location and access arrangements. Ask the inspection team to confirm which checks can be performed during the factory visit and which require separate arrangements. This lets you define the expected report: identified samples, measurements, photographs, functional observations and packaging findings within the agreed scope.
Contact TradeAider to plan your crib inspection with those materials so the team can confirm a practical visit scope. Keep laboratory evidence, certification responsibilities and the final shipment decision assigned to their responsible owners, with the inspection findings available to support that decision.
Frequently Asked Questions
Can a two-finger mattress check replace the specified gap method?
No. Finger size and applied pressure vary, so that check cannot replace the required measurement or probe procedure. Give the inspector the applicable method, mattress reference and configuration. Consumer screening advice may help someone notice a concern, but it is not the acceptance method for a factory test report.
Can the inspector approve a substitute bolt that fits the hole?
Fit alone is not approval. The substitute may differ in engagement, material, strength or retention behavior. Refer the proposed change to the responsible technical owner and establish the required verification. The inspector can document the discrepancy and subsequent results; selecting a convenient replacement is not the same as engineering approval.
Can the same inspection cover a travel cot or bedside sleeper?
Only after its classification and applicable requirements are confirmed. Similar marketing names do not make fabric-sided, folding and bedside products equivalent to rigid-sided cribs. Identify the actual construction and intended use, then scope the relevant methods rather than transferring this checklist as a complete compliance program.
Can repaired paint be accepted by comparing the color?
No. Color comparison can address appearance, but it does not identify the coating chemistry or establish applicable lead compliance. Record the touch-up material and affected units, review the relevant evidence and inspect the repaired surface. A visual match resolves only the appearance question it actually tests.
Related Articles

Grow your business with TradeAider Service
Click the button below to directly enter the TradeAider Service System. The simple steps from booking and payment to receiving reports are easy to operate.