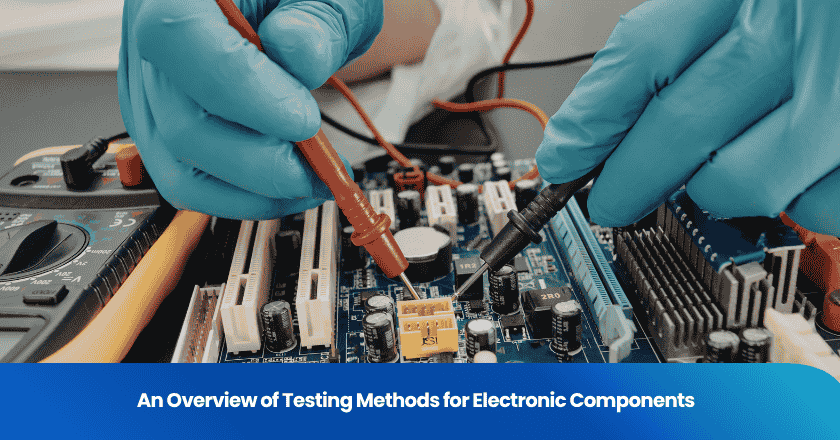
Inspection tools in quality control play a vital role in maintaining product standards. Professionals rely on manual, automated, non-destructive, measurement, and digital or software-based inspection techniques. They select inspection tools based on accuracy, reliability, and suitability for specific tasks. Quality management depends on matching the right tools to inspection techniques, which ensures effective monitoring and improvement. The careful choice of inspection tools supports consistent quality control and strengthens quality management systems.
Inspection tools in quality control
Manual tools
Manual tools form the foundation of many inspection techniques in quality control. Operators use these tools for direct measurement and assessment during inspections. Common manual inspection tools include calipers, micrometers, and gauges. Calipers measure the distance between two sides of an object. Micrometers provide precise thickness or diameter readings. Gauges, such as plug or ring gauges, verify whether parts meet dimensional standards.
Quality control tools like check sheets and control charts also support manual inspection. Check sheets help record inspection results systematically. Control charts track process variations over time. These tools allow inspectors to identify trends and take corrective action quickly.
Manual inspection techniques remain essential for simple, quick, or low-volume inspections. They offer flexibility and immediate feedback, making them valuable in many quality control systems.
Digital and automated tools
Digital and automated tools have transformed inspection systems in modern manufacturing. These inspection tools in quality control increase speed, accuracy, and consistency. Coordinate measuring machines (CMMs) and 3D scanners represent advanced digital inspection techniques. CMMs use probes to measure the geometry of objects with high precision. 3D scanners capture surface data rapidly, creating digital models for analysis.
Automated inspection systems often use cameras and sensors to perform real-time inspections. These systems detect defects, measure dimensions, and verify assembly quality. Software-based quality control tools analyze inspection data, generate reports, and support decision-making.
| Digital/Automated Tool | Function | Typical Use Case |
|---|---|---|
| CMM | Dimensional measurement | Precision parts inspection |
| 3D Scanner | Surface and shape analysis | Reverse engineering, QC |
| Camera System | Visual inspection, defect detection | Automated production lines |
| Inspection Software | Data analysis, reporting | Quality management systems |
Digital inspection techniques reduce human error and support high-volume inspections. They integrate with other quality control tools to streamline processes and improve traceability.
Non-destructive tools
Non-destructive inspection techniques allow inspectors to evaluate materials and components without causing damage. These inspection tools in quality control are critical for industries where safety and reliability matter most. Common non-destructive tools include ultrasonic testers, X-ray machines, and borescopes.
Ultrasonic testers use sound waves to detect internal flaws. X-ray inspection systems reveal hidden defects inside components. Borescopes provide visual access to hard-to-reach areas, such as inside pipes or engines.
Non-destructive inspection techniques support defect detection and ensure product integrity. They play a vital role in quality control systems for aerospace, automotive, and construction industries.
Measurement devices
Measurement devices serve as the backbone of many inspection techniques in quality control. These tools provide quantitative data for process control and product verification. Examples include height gauges, surface roughness testers, and hardness testers.
Height gauges measure vertical dimensions with high accuracy. Surface roughness testers assess the texture of machined parts. Hardness testers determine material strength and suitability for specific applications.
Quality control tools in this category ensure that products meet strict specifications. Measurement devices support inspections at every stage, from raw materials to finished goods. They integrate with inspection systems to provide reliable data for continuous improvement.
Effective use of measurement devices enhances inspection accuracy and supports robust quality control systems.
Inspection techniques
Visual inspection
Visual inspection stands as one of the most common inspection techniques in quality control. Inspectors use their eyes or magnifying devices to examine products for surface flaws, color inconsistencies, or assembly errors. This inspection process often serves as the first line of defense in defect detection. For example, inspectors may check for scratches on metal parts or missing components in an assembly line. Visual inspection works well for quick assessments and can identify obvious defects before further testing.
Dimensional inspection
Dimensional inspection focuses on verifying the physical measurements of products. Inspectors use calipers, micrometers, or automated systems to compare actual dimensions to specified tolerances. This inspection technique ensures that parts fit together correctly and function as intended. For instance, in automotive manufacturing, inspectors measure the diameter of engine components to confirm they meet design requirements. Dimensional inspection plays a key role in maintaining consistency and preventing assembly issues.
Functional testing
Functional testing evaluates whether a product performs its intended function under normal or simulated conditions. Inspectors conduct tests such as pressing buttons, running motors, or applying loads to verify performance. This inspection technique helps identify failures that visual or dimensional inspections might miss. For example, inspectors may test electrical circuits to ensure proper operation or run a pump to check for leaks. Functional testing supports quality control by confirming that products meet operational standards.
Data-driven methods
Data-driven methods represent advanced inspection techniques that rely on statistical analysis and digital tools. Inspectors collect data from various inspections and tests, then use software to identify trends or patterns. These inspection techniques help organizations predict potential failures and improve processes. For example, inspectors may use control charts to monitor process stability or apply machine learning algorithms for automated defect detection. Data-driven methods enhance quality control by providing actionable insights and supporting continuous improvement.
Tip: Combining multiple inspection techniques increases the effectiveness of the inspection process and strengthens overall quality control.
Benefits
Accuracy and consistency
Accurate and consistent results form the backbone of quality assurance. Inspection tools help teams achieve reliable measurements and repeatable outcomes. When operators use precise test equipment, they reduce the risk of human error. Consistent testing ensures that product quality meets established standards every time. For example, using calibrated devices for each test allows inspectors to detect even minor deviations. This approach supports quality control by maintaining uniformity across batches.
Note: Consistency in testing builds trust in product quality and strengthens quality assurance systems.
Efficiency and productivity
Inspection tools increase efficiency by streamlining the testing process. Automated systems can test multiple products quickly, reducing manual labor. Digital tools collect and analyze data in real time, allowing teams to make faster decisions. As a result, companies can test more products in less time. This boost in productivity helps organizations meet deadlines and respond to market demands. Efficient testing also frees up resources for other quality assurance activities.
- Automated testing reduces bottlenecks in production.
- Real-time data collection speeds up quality control feedback.
- Teams can focus on continuous improvement.
Cost and risk reduction
Effective use of inspection tools lowers costs and minimizes risks. Early detection of defects through regular testing prevents expensive recalls and rework. Quality assurance teams can identify problems before products reach customers. This proactive approach protects brand reputation and reduces liability. By investing in reliable test methods, organizations avoid waste and optimize resource use. Lower costs and reduced risks contribute to long-term business success.
Tip: Preventive testing and quality assurance save money and protect product quality throughout the production cycle.
Selection and quality management
Criteria for choosing tools
Quality management professionals evaluate several factors when selecting inspection techniques and tools. They consider the type of product, required accuracy, and the stage of production. They assess whether manual, automated, or non-destructive inspection systems best fit the application. Cost, ease of use, and compatibility with existing quality management system processes also influence decisions. Teams often review the reliability and repeatability of each test method. They prioritize tools that support consistent inspection and align with overall quality control objectives.
| Criteria | Description |
|---|---|
| Accuracy | Precision needed for inspection |
| Application | Product type and production stage |
| Integration | Fit with quality management system |
| Cost | Budget and long-term value |
| Usability | Training and ease of operation |
Tip: Choosing the right inspection technique ensures that inspection systems deliver reliable results and support continuous improvement.
Matching tools to needs
Quality management teams match inspection techniques to specific requirements. They analyze the complexity of the product and the risks involved. For high-risk components, they select advanced inspection systems such as non-destructive testing. For routine checks, they use manual or digital inspection techniques. Teams consider the volume of production and the speed needed for inspection. They adapt their approach to fit the goals of the quality management system. By aligning tools with needs, they optimize inspection and testing processes.
- High-precision parts require advanced inspection techniques.
- Large-scale production benefits from automated inspection systems.
- Safety-critical products demand non-destructive inspection.
Overcoming challenges
Implementing inspection techniques in quality management presents challenges. Teams may face resistance to new tools or inspection systems. Training and clear communication help overcome these barriers. They address data management issues by integrating digital inspection techniques with the quality management system. Regular calibration and maintenance ensure that tools deliver accurate test results. Teams monitor inspection effectiveness and adjust strategies as needed.
Note: Successful quality management depends on adapting inspection techniques and tools to changing requirements and maintaining a robust quality control process.
Inspection tools in quality control include manual, digital, non-destructive, and measurement devices. These tools improve accuracy, efficiency, and risk management. Teams should align tool selection with quality management goals for best results.
Tip: Regularly evaluate inspection tools, provide training, and schedule maintenance. This approach ensures reliable performance and supports continuous improvement in any quality control process.
FAQ
What are the most common inspection tools in quality control?
Inspectors often use calipers, micrometers, gauges, cameras, and measurement devices. These tools help verify dimensions, detect defects, and ensure products meet standards.
How do automated inspection tools improve quality control?
Automated tools increase speed and accuracy. They reduce human error and provide consistent results. Teams use these systems for high-volume inspections and real-time data analysis.
Why is non-destructive testing important?
Non-destructive testing allows inspectors to check materials and components without causing damage. This method ensures product safety and reliability, especially in industries like aerospace and automotive.
How do teams choose the right inspection tool?
Teams consider product type, required accuracy, and production stage. They evaluate cost, usability, and compatibility with existing systems. Selection depends on inspection needs and quality goals.
Can digital inspection tools integrate with quality management systems?
Yes. Digital tools often connect with quality management systems. They support data collection, reporting, and process improvement. Integration helps teams monitor quality and make informed decisions.
Grow your business with TradeAider Service
Click the button below to directly enter the TradeAider Service System. The simple steps from booking and payment to receiving reports are easy to operate.


