You face the challenge of catching every defect before it reaches your customers. Even a single missed flaw during tooling inspection can lead to costly recalls, wasted materials, and damaged reputation. When you perform tooling inspection with precision, you prevent defects and ensure each part meets strict standards. Consider how tooling inspection, done effectively, can transform your workflow. Reliable tooling inspection brings measurable gains. You set the foundation for higher efficiency, better quality, and greater customer satisfaction by prioritizing tooling inspection.
The Role of Quality Control in Manufacturing
Why Quality Inspection Matters
You play a vital role in manufacturing by ensuring every product meets strict quality standards. Quality inspection stands as the backbone of your operation. You use it to catch defects early, prevent costly recalls, and protect your company’s reputation. When you implement quality inspection at every stage, you build trust with your customers and maintain a competitive edge.
Quality control responsibilities extend across the entire production process.
- You ensure products meet quality expectations from start to finish.
- You test raw materials and inspect products during production.
- You conduct final checks before shipping.
- You develop and maintain documentation, such as SOPs and inspection criteria.
- You analyze quality data to identify trends and drive improvements.
Quality inspection helps you reduce the risk of defective products. You regularly update procedures, schedule inspections, and train your team to spot issues. You use data-driven methods to monitor process variations and perform random sampling. You also maintain detailed records for traceability and root cause analysis. These actions help you isolate defects before they reach your customers.
Tip: Consistent quality inspection can reduce defect-related costs by up to 30%. You also improve product reliability by verifying raw materials and standardizing inspections at every stage.
Impact on Product Quality and Compliance
You influence product quality and compliance through rigorous quality inspection. You measure effectiveness using key steps:
1. Pre-Production Assessment ensures raw materials meet standards.
2. In-Process Inspection detects flaws during manufacturing.
3. Final Quality Assessment confirms finished products meet requirements.
You track key performance indicators such as defect rates, production yield, and cost of quality. These metrics help you make data-driven decisions and improve efficiency.
Quality inspection ensures you meet international regulations and compliance standards. You align your processes with ISO 9001 for quality management, ISO 14001 for environmental responsibility, and other standards like AS 9100, OSHA, GMP, and HACCP. By enforcing these standards, you prevent expensive recalls, improve customer satisfaction, and protect your brand image. Quality assurance and quality control together create a culture of excellence, ensuring every product meets or exceeds expectations.
Essential Tools for Tooling Inspection
Effective tooling inspection relies on your ability to select and use the right instruments. You improve accuracy, speed, and reliability by understanding the strengths of each tool. This section explores the most essential inspection tools you need on the shop floor.
Calipers, Micrometers, and Gauges
You use calipers, micrometers, and gauges to measure dimensions with precision. These tools form the backbone of your daily inspection routine.
- Calipers help you measure internal, external, and depth dimensions. You rely on them for quick checks and first-line inspections.
- Micrometers provide extremely precise linear measurements. You use them to verify that components meet tight specifications, especially in metalworking and CNC machining. The anvil and spindle design allows you to measure small objects with high accuracy. Proper use of micrometers reduces costs and waste, while sharpening your analytical skills.
- Dial indicators and test indicators enable you to detect small deviations. You check alignment and flatness during machining, ensuring parts fit together perfectly.
- Gauges come in many forms, such as thread gauges, Go/No Go gauges, and depth gauges. You perform quick dimensional checks and confirm that parts meet required tolerances.
Tip: Regularly calibrate your measuring tools to maintain accuracy and prevent costly errors.
Visual and Magnifying Inspection Tools
You depend on visual and magnifying inspection tools to spot surface defects and micro-imperfections that may escape measurement devices. These tools allow you to perform non-destructive testing and ensure product integrity.
You use visual inspection to catch obvious flaws, while magnifying devices help you detect micro-defects. Advanced methods like ultrasonic and radiography provide deeper insights into material integrity. You choose the right technique based on the type of defect and the material being inspected.
Note: Visual inspection remains essential, but combining it with advanced non-destructive testing increases your chances of catching hidden defects.
Automated Inspection Systems
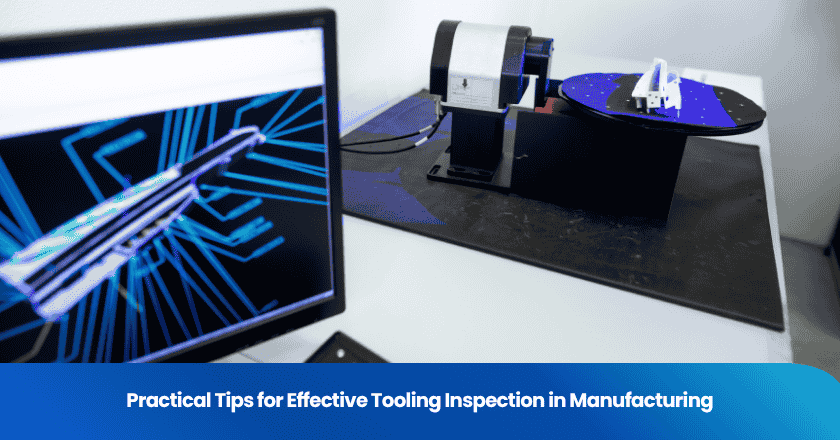
You enhance your inspection process by integrating automated systems. These systems use machine vision, sensors, and software to deliver fast, accurate, and consistent results.
Automated inspection systems outperform manual methods in speed and accuracy. You benefit from continuous operation and high precision, especially when inspecting large volumes. AI-powered visual inspection systems analyze high-resolution images and detect subtle defects that human inspectors may miss. These systems adapt to new defect types over time, improving your defect detection rates and supporting digital manufacturing inspection tools.
You achieve higher throughput and better quality control by combining manual and automated inspection tools. You select the right system based on your production needs, defect types, and desired inspection speed.
Tip: Automated systems require regular updates and calibration to maintain peak performance.
Best Practices for Quality Inspection Techniques
Using Checklists for Manufacturing Inspections
You improve quality control by using well-designed checklists during every stage of manufacturing. Checklists help you maintain consistency and prevent human error. You ensure that every inspection follows the same standards, regardless of who performs it or where it takes place. When you use a checklist, you avoid skipping important steps and track your progress with ease.
A comprehensive checklist covers all critical areas. You include unique identifiers, production line location, visual inspection details, weight, material strength, operational functionality, packaging, defect logs, assessment, and auditor’s signature. This methodical approach supports quality control and makes your final inspection more reliable.
1. Unique identifier (Product ID, SKU, etc.)
2. Location on the production line
3. Visual inspection (appearance, size, color, etc.)
4. Weight (within acceptable range)
5. Materials (strength and durability)
6. Operations (functionality)
7. Packaging (secureness and print clarity)
8. Defect log (description and severity)
9. Assessment (acceptable condition)
10. Auditor's signature
You incorporate input from all stakeholders and update your checklists regularly. This ensures consistency across all locations and keeps your inspection techniques current. You also address safety equipment, hazardous materials, machinery, electrical systems, personal protective equipment, emergency procedures, environmental compliance, employee training, and documentation.
Tip: Checklists reduce human error by providing step-by-step guidance and documenting completed tasks. You enhance compliance and accountability in every final inspection.
Accurate Measurement and Record-Keeping
You achieve effective quality control by focusing on accurate measurement and thorough record-keeping. You use clear and concise language in your documentation, making it accessible to everyone on your team. You include comprehensive details such as location, date, and specific measurements. Standardized templates and forms help you maintain consistency during inspections and final inspection.
1. Use clear and concise language
2. Provide comprehensive details
3. Standardized templates and forms
4. Consistent terminology
5. Digital documentation
6. Real-time updates
7. Visual aids
You transition to digital records for easier access and traceability. You use mobile devices to update documentation in real time, which helps you avoid missing important details. You add photos or videos to provide context to your written findings. You keep production procedures, quality control records, supplier agreements, certifications, permits, safety records, training records, and maintenance logs up to date.
Detailed record-keeping supports traceability in quality control. You document materials, processes, and outcomes, which allows you to monitor quality and identify deviations from standards. You use traceability systems to manage recalls and isolate affected items, reducing financial and reputational risks. You rely on these records during final inspection to demonstrate compliance and facilitate corrective actions.
Note: Accurate documentation is essential for quality control and final inspection. You ensure all records are current before inspections begin.
Visual Inspection Methods
You use visual inspection methods to identify tooling defects and maintain high standards in quality control. You rely on surface inspection to detect scratches and cracks. You apply statistical process control to monitor product quality in real time. You measure size, shape, and orientation using dimension inspection tools. You employ computer vision systems to analyze visual data and spot abnormalities that may escape human eyes.
You combine these inspection techniques to strengthen your final inspection process. You catch visible and hidden defects, ensuring every product meets your quality control standards. You select the most effective method based on the type of defect and the material being inspected.
Tip: You improve final inspection results by combining manual and automated visual inspection methods. You increase your chances of catching defects and maintaining product integrity.
Analog vs. Digital Inspection Techniques
Choosing the Right Tool for the Job
You face a choice between analog and digital inspection tools every day. Each method offers unique strengths for specific manufacturing environments. Analog tools, such as dial indicators and mechanical gauges, deliver reliable results in dusty or rough conditions. You can depend on them for general measurements and long-term durability. Digital inspection tools excel in low-light areas and specialized tasks that demand high precision. You benefit from their fast data capture and easy integration with digital records.
Accuracy remains a top priority. Both analog and digital methods achieve clinically acceptable levels, often below 0.10 mm. Analog impressions maintain a mean trueness of 0.054 mm, but you may notice increased variability. Digital scans improve mean trueness to 0.039 mm and reduce variability, which helps you maintain tighter tolerances.
Environmental factors also influence your decision. In dusty or high-temperature areas, you select cameras with protective housings or cooling systems. Vibrations require ruggedized equipment to ensure consistent results.
| Environmental Factor | Consideration for Inspection Tools |
|---|---|
| Dusty or Rough Environments | Use cameras with protective housings and cooling systems. |
| High Temperatures | Cameras with built-in cooling or heat-resistant enclosures. |
| Vibrations | Ruggedized cameras designed to withstand industrial vibrations. |
Tip: Match your inspection tool to the environment and task for optimal results.
Metric vs. Imperial Measurements
You encounter metric and imperial measurement systems across global manufacturing sites. Standardizing measurements ensures consistency and reduces errors. You use comprehensive databases to convert data and create actionable intelligence for design and inspection. 3D body scanning helps you gather precise data for fit models and avatars, supporting quality control in diverse markets.
You compare market-specific data to adjust sizing and tolerances. This approach helps you meet customer expectations and regulatory requirements in every region. You maintain accuracy and traceability by choosing the right measurement system for your workflow.
Note: Consistent measurement standards support global quality control and simplify cross-border manufacturing.
Integrating Manufacturing Inspections into Daily Workflow
Regular Calibration and Maintenance
You ensure the reliability of manufacturing inspections by making calibration and maintenance part of your daily routine. When you follow a set schedule, you keep your inspection tools accurate and extend their lifespan. Use this table to guide your daily, weekly, and monthly tasks:
| Frequency | Maintenance Task |
|---|---|
| Daily | Visual inspections of machine tools |
| Weekly | Lubrication of moving parts and humidity control |
| Monthly | Comprehensive assessments, including pump checks |
You should also plan comprehensive equipment inspections at least once a year. Many facilities benefit from twice-yearly checks for better performance. Regular calibration prevents instrument drift, supports compliance, and reduces costs by avoiding rework or downtime. Accurate tools help you maintain consistency in manufacturing inspections and deliver products that meet specifications.
| Key Takeaway | Explanation |
|---|---|
| Prevents Instrument Drift | Regular calibration avoids gradual inaccuracies that compromise quality. |
| Supports Compliance | Regulatory bodies require detailed calibration records. |
| Reduces Costs | Avoids rework, waste, and downtime, saving up to $20,000 per incident. |
| Improves Consistency | Accurate tools ensure consistent product specifications and fewer defects. |
Tip: Schedule calibration and maintenance as part of your standard operating procedures for manufacturing inspections.
Continuous Improvement and Traceability
You drive quality by making continuous improvement and traceability core elements of manufacturing inspections. Traceability lets you track products and learn from the data you gather. When you identify inefficiencies or recurring problems, you can make informed changes that streamline production and reduce waste.
- Track each product and process step to uncover patterns and weaknesses.
- Use traceability data to improve forecasting and resource planning.
- Access genealogical data to spot bottlenecks and optimize in real time.
- Log inspection data using apps that link results to the correct part, order, and shift.
- Record defects immediately for quick action and better visibility.
- Create custom dashboards to monitor metrics like Right-First-Time and yield.
- Set alerts for quality limits to prevent small issues from escalating.
- Use advanced sensors to gather real-time data on temperature, pressure, and vibration.
- Analyze collected data to reveal mechanical issues and optimize workflows.
- Maintain detailed records for every step to support audits and compliance.
You make manufacturing inspections more effective by using these methods. You ensure that every inspection adds value, supports ongoing improvement, and strengthens your ability to deliver high-quality products.
You now have practical strategies to strengthen your tooling inspection process. Focus on regular calibration, detailed record-keeping, and combining manual with automated inspections.
- Use checklists to ensure consistency.
- Apply accurate measurement techniques.
- Integrate inspections into your daily workflow.
Try one new inspection method this week. Review your current routines and look for ways to improve quality and efficiency. Your commitment to better inspection drives manufacturing success.
FAQ
What is the most important step in tooling inspection?
You must always verify calibration before using any inspection tool. Accurate calibration ensures your measurements remain reliable and your inspection results meet quality standards.
How often should you calibrate inspection tools?
You should calibrate your inspection tools according to a set schedule. Most facilities perform calibration monthly or quarterly. Always check your company’s guidelines and industry requirements.
Can you combine manual and automated inspection methods?
Yes, you can combine both methods. Manual inspection helps you catch visible defects, while automated systems increase speed and consistency. Using both improves your overall inspection accuracy.
Why is traceability important in manufacturing inspections?
Traceability lets you track every product and process step. You can quickly identify defects, isolate affected batches, and support compliance during audits. This process protects your reputation and reduces risk.
Grow your business with TradeAider Service
Click the button below to directly enter the TradeAider Service System. The simple steps from booking and payment to receiving reports are easy to operate.


