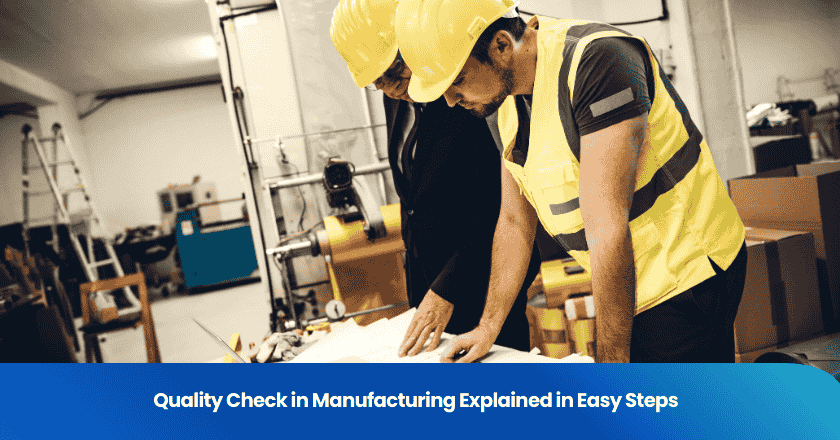
You want to perform a quality check in manufacturing with confidence and clarity. Start by understanding that every step you take should support consistency in your process. Consistency helps you catch errors early, reduce waste, and deliver reliable products. When you follow a structured approach to quality check, you build trust in your manufacturing outcomes. Focus on applying the same standards and methods each time, because consistency transforms good practices into great results.
What is a Quality Check?
A quality check is a step-by-step process you use to make sure your products meet specific standards. You use this process to confirm that every item matches your expectations for performance, appearance, and safety. Quality checks form the backbone of quality control in manufacturing. When you follow a clear quality check routine, you help prevent defects and ensure product quality stays high.
Purpose of Quality Checks
You perform quality checks to catch problems before they reach your customers. These checks help you identify issues early, so you can fix them quickly. Quality control relies on regular inspections and tests at different stages of production. You might check raw materials, monitor assembly lines, or test finished products. Each quality check gives you valuable information about your process. This information supports your quality assurance efforts and helps you maintain control over your operations.
Tip: Use a checklist for each quality check. This keeps your inspections consistent and thorough.
Why Quality Matters
Quality matters because it protects your reputation and your bottom line. When you focus on product quality, you reduce returns, complaints, and wasted resources. Customers trust you more when they know you care about quality assurance. Strong quality control systems also help you meet industry regulations and safety standards. You can use data from each quality check to improve your process over time. This commitment to quality leads to better products and happier customers.
- Quality control supports continuous improvement.
- Quality assurance builds customer confidence.
- Product quality drives business success.
Define Standards
Setting Quality Criteria
You must define clear quality standards before you start any manufacturing process. These standards set the expectations for your products and guide your team. When you set quality criteria, you decide what makes a product acceptable. You look at factors like appearance, performance, and safety. You also consider customer requirements and industry regulations.
To create strong quality criteria, follow these steps:
1. Identify the key features of your product.
2. Decide the acceptable range for each feature.
3. Write these requirements in simple language.
4. Share the criteria with your team.
Tip: Involve your team when you define clear quality standards. Their input helps you spot potential problems early.
Quality criteria help you measure each product against a consistent benchmark. You use these standards to check if your products meet expectations. When you set clear criteria, you reduce confusion and improve quality across your operations.
Quality Manual and SOPs
You need written procedures to support your quality efforts. A quality manual explains your approach to quality control. It describes your goals, standards, and responsibilities. Standard Operating Procedures (SOPs) give step-by-step instructions for each task. You use SOPs to make sure everyone follows the same process.
A quality manual and SOPs help you:
- Train new employees
- Maintain consistency
- Track changes in your procedures
- Meet regulatory requirements
You should review your procedures regularly. Update them when you find better ways to improve quality. Clear documentation keeps your team aligned and supports continuous improvement.
Note: Store your quality manual and SOPs in a place where everyone can access them easily.
Pre-Production Inspection
Pre-production inspection sets the foundation for consistent quality in your manufacturing operations. You check materials and components before production begins. This step helps you avoid costly mistakes and ensures your products meet your standards.
Raw Material Verification
You start with material inspection. You examine raw materials and components to confirm they match your specifications. You check for defects, contamination, and inconsistencies. You compare each batch against your quality criteria. You record your findings and reject anything that does not meet your requirements.
A thorough raw material verification process includes:
- Reviewing supplier certificates and test reports
- Inspecting physical properties such as color, texture, and dimensions
- Testing samples for performance and durability
- Documenting results for traceability
Tip: Use a checklist during material inspection to keep your process organized and consistent.
You protect your manufacturing processes by catching problems early. You reduce the risk of defects in finished products and maintain high quality standards.
Supplier Communication
You must communicate your quality expectations to suppliers. Clear communication helps you build strong relationships and ensures suppliers understand your requirements. You share your inspection criteria, quality standards, and documentation needs.
Effective supplier communication involves:
1. Providing written specifications and drawings
2. Discussing inspection procedures and frequency
3. Requesting regular updates and feedback
4. Addressing issues promptly and professionally
You create a partnership focused on quality. You encourage suppliers to improve their processes and deliver better materials. You support your manufacturing goals by maintaining open and honest communication.
Note: Schedule regular meetings with suppliers to review quality performance and resolve any concerns.
Pre-production inspection strengthens your entire manufacturing process. You set the stage for reliable production and consistent product quality.
Inspection Tools
Tool Selection
You need the right tools for every inspection. The tools you choose depend on the type of product and the inspection criteria you set. You might use calipers, micrometers, gauges, or digital measuring devices. Each tool helps you measure specific features such as length, width, or surface finish. You should match your inspection tools to the requirements of your process. For example, you use a torque wrench to check fastener tightness or a colorimeter to verify paint consistency.
When you select inspection tools, consider these factors:
- Accuracy and precision of the tool
- Ease of use for your team
- Compatibility with your inspection process
- Durability and maintenance needs
Tip: Create a table listing each inspection tool and its purpose. This helps your team understand which tool to use for each inspection step.
| Inspection Tool | Purpose |
|---|---|
| Caliper | Measure dimensions |
| Gauge | Check tolerances |
| Colorimeter | Verify color accuracy |
| Torque Wrench | Test fastener tension |
You improve inspection efficiency when you use the right tools. You also reduce errors and ensure consistent results.
Calibration
You must calibrate your inspection tools regularly. Calibration ensures that your measurements remain accurate over time. You compare your tool against a known standard and adjust it if needed. You schedule calibration based on usage frequency and manufacturer recommendations.
Follow these steps for effective calibration:
1. Identify which inspection tools need calibration.
2. Use certified standards for comparison.
3. Record calibration results in a logbook.
4. Replace or repair tools that fail calibration.
Note: You should train your team on proper calibration procedures. This prevents mistakes and keeps your inspection process reliable.
Regular calibration supports high-quality inspection outcomes. You maintain trust in your measurements and avoid costly production errors.
In-Process Quality Control
Routine Inspections
You play a key role in maintaining manufacturing quality control by performing routine inspections. These inspections help you catch issues early and keep your production line running smoothly. You use quality inspection as a tool to monitor each stage of the process. Routine inspections allow you to spot defects before they become bigger problems. You check products, equipment, and workstations at regular intervals. This approach supports your quality control processes and ensures that every item meets your standards.
You should follow a quality inspection program that outlines when and how to perform these checks. Your program might include:
- Visual checks for surface defects
- Measurements of critical dimensions
- Functional tests for moving parts
- Sampling of products at set intervals
Tip: Use a checklist for each quality inspection. This keeps your routine inspections consistent and thorough.
Routine inspections form the backbone of manufacturing quality control. You use these quality control methods to maintain high quality and reduce waste.
Using AQL
You can strengthen your quality control processes by using Acceptable Quality Limit (AQL) standards. AQL helps you decide how many items to inspect and what level of defects is acceptable. You use AQL as part of your quality inspection program to balance efficiency and quality. This method allows you to sample a batch instead of checking every item.
You select an AQL level based on your product and customer requirements. For example, a lower AQL means stricter quality control. You follow these steps in your quality inspection:
1. Define your batch size.
2. Choose your AQL level.
3. Use an AQL chart to find your sample size.
4. Inspect the selected items.
5. Accept or reject the batch based on the results.
AQL supports your manufacturing quality control by providing clear guidelines. You use this approach to make informed decisions and improve your quality control methods. Your quality inspection program becomes more efficient and reliable.
Note: Review your AQL levels regularly to match changes in your quality standards.
Quality Inspections During Production
Monitoring and Testing
You need to monitor your manufacturing process closely to maintain high quality. You perform quality inspection at different stages to catch problems early. You use monitoring to track production conditions and spot any changes that could affect product quality. You check machines, materials, and workstations for consistency. You also use testing to confirm that products meet your standards. You might run functional tests, measure dimensions, or check surface finishes. You record your results and compare them to your quality criteria.
You should set up a schedule for quality inspection and testing. You decide how often to inspect and what methods to use. You select the right tools for each inspection. You train your team to follow the same procedures every time. You use data from your inspections to improve your process and prevent defects.
Tip: Use simple visual controls, like colored tags or charts, to highlight inspection results and make issues easy to spot.
Checklists
You rely on checklists to keep your quality inspection process organized. You create a checklist for each stage of production. You list the steps for inspection, the features to check, and the standards to meet. You use the checklist during every inspection to make sure you do not miss anything. You mark each item as you complete it. You review the checklist after each inspection to confirm that you followed all steps.
A sample checklist for quality inspection might include:
| Step | Feature to Check | Standard | Completed |
|---|---|---|---|
| Visual Inspection | Surface finish | No scratches | ☐ |
| Dimensional Testing | Length, width, height | Within tolerance | ☐ |
| Functional Testing | Moving parts | Operates smoothly | ☐ |
You update your checklists as your quality standards change. You use feedback from your team to improve the inspection process. You keep records of completed checklists for traceability and continuous improvement.
Note: Checklists help you maintain control and consistency in your quality inspection routine.
Final Product Quality Check
Visual Inspection
You begin the final quality inspection by performing a thorough visual inspection. You look for surface defects, color inconsistencies, and any signs of damage. You check each product for scratches, dents, or irregularities that could affect product quality. You compare the appearance of each item to your quality standards. You use a tailored checklist to guide your inspection and ensure you do not miss any critical details.
A visual inspection helps you confirm product consistency. You identify issues that may have occurred during production or handling. You record your findings and separate any items that do not meet your quality criteria. You use clear lighting and magnification tools to improve your inspection accuracy.
Tip: Always inspect products from multiple angles to catch hidden defects.
Functional and Dimensional Testing
You move to functional and dimensional testing after completing the visual inspection. You verify that each product works as intended and meets all required measurements. You use specialized equipment for quality inspection, such as gauges, calipers, or electronic testers. You check moving parts, electrical functions, and mechanical features. You measure dimensions like length, width, and height to confirm they fall within acceptable tolerances.
You follow a detailed checklist for each testing step. You document your results and compare them to your product quality standards. You reject any items that fail functional or dimensional testing. You use these inspection results to improve your manufacturing process and prevent future defects.
| Testing Step | Feature Checked | Standard Met | Pass/Fail |
|---|---|---|---|
| Functional Testing | Moving parts | Operates | |
| Dimensional Inspection | Length, width, etc. | Within spec |
You complete the final quality inspection by reviewing all findings. You ensure only products that meet every quality requirement reach your customers. You maintain product consistency and support continuous improvement in your manufacturing operations.
Record and Analyze Results
Documentation
You must document every step of your quality inspection process. Accurate records help you track product quality and support your quality control system. You create inspection reports, log test results, and store completed checklists. These documents allow you to review your quality control procedures and identify trends over time. You organize your records by date, batch number, and inspection type. You keep digital copies for easy access and backup.
Tip: Use a standardized template for your inspection reports. This ensures consistency and makes it easier to compare results.
You rely on documentation to prove compliance with your quality management system. You use these records during audits and when you need to investigate defects. You also share documentation with your team to support process improvements and maintain control over your operations.
Sample Documentation Table:
| Date | Batch No. | Inspection Type | Result | Inspector |
|---|---|---|---|---|
| 2024-06-01 | 1023 | Visual Inspection | Pass | Alex |
| 2024-06-01 | 1023 | Dimensional Check | Fail | Jamie |
Data Analysis
You analyze your inspection data to strengthen your quality control system. You look for patterns in defects, process errors, and product quality issues. You use charts and graphs to visualize your findings. You compare results across different batches and production lines. You identify areas where your quality control procedures need improvement.
You use data analysis to guide process improvements. You set targets for defect reduction and monitor progress over time. You share insights with your team to support quality assurance and control. You adjust your quality inspection schedule based on your analysis.
Note: Regular data analysis helps you make informed decisions and maintain a strong quality control system.
You build a culture of continuous improvement by recording and analyzing results. You ensure your quality management system supports reliable production and high product quality.
Corrective and Preventive Actions
Addressing Defects
You must act quickly when you find defects during your quality inspection. You identify the root cause of each issue and decide on the best solution. You separate defective products from good ones to prevent them from reaching customers. You record every defect in your documentation system. You use this information to spot patterns and improve your process.
You can follow these steps to address defects:
a. Isolate the defective item.
b. Investigate the cause using inspection data.
c. Decide if you can rework or must scrap the product.
d. Update your team about the issue and solution.
e. Record the action taken for future reference.
Tip: Always communicate clearly with your team when you find defects. This helps everyone stay informed and focused on quality.
You support your manufacturing goals by preventing defects from recurring. You build a stronger process and reduce waste.
CAPA Process
You use the Corrective and Preventive Actions (CAPA) process to strengthen your quality control system. CAPA helps you fix problems and stop them from happening again. You start by analyzing the defect and identifying its root cause. You then develop a corrective action plan to address the immediate issue. You also create a preventive action plan to avoid similar problems in the future.
A typical CAPA process includes:
| Step | Description |
|---|---|
| Identify | Find the defect or issue |
| Analyze | Determine the root cause |
| Correct | Take action to fix the problem |
| Prevent | Implement changes to avoid recurrence |
| Review | Check effectiveness of actions |
You review the results of your CAPA actions regularly. You adjust your procedures based on what you learn. You involve your team in every step to ensure everyone understands the changes. You use CAPA to drive continuous improvement and maintain high product quality.
Note: CAPA is essential for maintaining compliance and building a culture of quality in your manufacturing operations.
Manufacturing Quality Control Tips
Best Practices
You can strengthen your manufacturing quality control by following proven best practices. Start by training your team on inspection procedures and standards. Well-trained employees understand what to look for and how to report issues. Use clear documentation for every step in your process. Accurate records help you track trends and identify areas for improvement.
Regularly review your inspection tools and calibrate them as needed. Reliable equipment ensures precise measurements. Develop checklists for each stage of production. Checklists keep inspections consistent and thorough. Encourage open communication among team members. When everyone shares information, you catch problems early and maintain control over your process.
Tip: Schedule routine audits of your quality control system. Audits help you spot weaknesses and reinforce good habits.
You should also set measurable goals for defect reduction. Use data analysis to monitor progress and adjust your approach. Continuous improvement drives better results in manufacturing.
Best Practices Table
| Practice | Benefit |
|---|---|
| Team Training | Fewer inspection errors |
| Tool Calibration | Accurate measurements |
| Checklist Use | Consistent inspections |
| Data Analysis | Process improvement |
Common Mistakes
You may encounter common mistakes that weaken manufacturing quality control. Skipping inspections or rushing through them often leads to missed defects. Failing to calibrate tools can result in inaccurate measurements. Ignoring documentation makes it hard to track problems and solutions.
Some teams neglect communication, which causes confusion and delays. Overlooking feedback from employees can prevent you from finding better ways to control quality. Not updating procedures when standards change leaves your process outdated.
Note: Avoid these mistakes by staying organized and proactive. Regular training and open communication help you maintain strong control over your manufacturing operations.
You can prevent most errors by following best practices and learning from past experiences. Strong manufacturing quality control supports reliable production and high product quality.
You strengthen your manufacturing process by following clear quality check steps. You set standards, inspect materials, use calibrated tools, and document results. You focus on consistency to catch errors early. You drive continuous improvement by analyzing data and taking corrective actions. You review procedures often and adapt them for better outcomes. You encourage your team to embrace continuous improvement. You build a culture where continuous improvement leads to reliable products. You achieve success through continuous improvement and ongoing review.
Remember: Continuous improvement transforms your manufacturing quality and supports long-term growth.
FAQ
What is the difference between quality control and quality assurance?
Quality control focuses on inspecting products and detecting defects. Quality assurance sets up systems and procedures to prevent defects. You use both to maintain high product standards.
How often should you perform quality checks during production?
You should perform quality checks at every critical stage of production. Routine inspections help you catch issues early and maintain consistent product quality.
Which inspection tools do you need for basic quality checks?
You need calipers, gauges, and visual inspection aids for most basic checks. Select tools based on your product’s features and required accuracy.
Why is calibration important for inspection tools?
Calibration ensures your inspection tools provide accurate measurements. You maintain trust in your results and avoid costly errors by calibrating tools regularly.
What should you do if you find a defect during inspection?
Isolate the defective item. Record the issue. Investigate the cause. Decide if you can rework or must scrap the product. Communicate findings with your team.
Grow your business with TradeAider Service
Click the button below to directly enter the TradeAider Service System. The simple steps from booking and payment to receiving reports are easy to operate.

