- About Us

- Our Services
- Your Industry
- Resources
- News & Blog
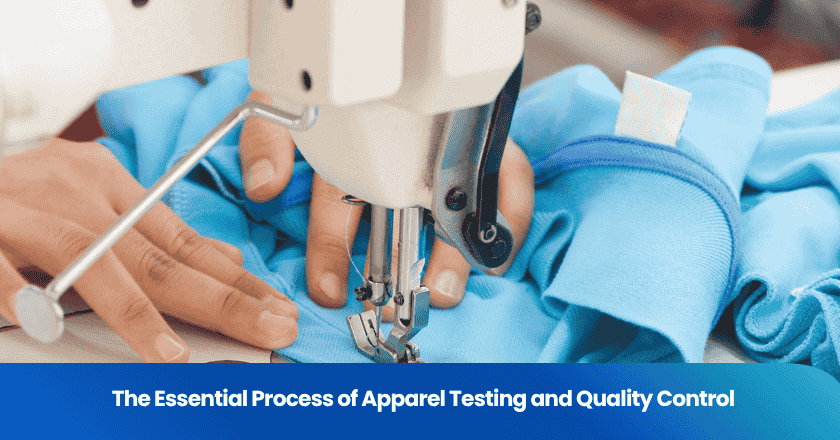
As a clothing buyer, you understand the risks of sourcing products that shrink, fade, or fail after minimal use. These issues often stem from inadequate apparel testing and poor quality control. To protect your brand and supply chain, robust testing and quality assurance are essential. They ensure that every garment meets stringent safety, performance, and durability standards. By implementing reliable quality control processes, you safeguard your brand reputation and consistently deliver products that meet your customers' expectations.
Key Takeaways
• Apparel testing and quality control ensure garments meet safety, durability, and performance standards, protecting your brand and customers.
• Strong inspection procedures include fabric testing, garment testing, and performance testing to catch defects early and maintain high quality.
• A detailed quality control checklist covers fabric inspection, construction, measurement, fit, and accessories to reduce defects and improve customer satisfaction.
• Supplier vetting, in-process inspections, and final quality checks help maintain consistent product quality throughout production.
• Documenting inspection results and following industry standards support continuous improvement and build customer trust.
Importance of Apparel Testing and Quality Control
Product Reliability
As a buyer, you need every garment you source to meet durability and performance expectations. Reliable products begin with rigorous apparel testing and quality control. By inspecting each batch for defects—such as weak seams, colorfastness issues, or fabric flaws—you minimize the risk of product failure. This ensures consistent quality, reduces costly returns, and enhances customer satisfaction. More importantly, it protects your business reputation by ensuring every shipment meets the high standards your clients demand.
Customer Satisfaction
You expect comfort, fit, and durability from every apparel item. Quality control ensures that each product matches your expectations. When you receive a garment that fits well and feels good, you feel satisfied with your purchase. Careful inspection of garment construction, measurement, and accessories leads to fewer complaints and higher customer loyalty. You build trust with your customers by providing products that meet their needs. Happy customers often return and recommend your apparel to others.
Industry Standards
You must follow strict standards in the apparel industry. These standards cover safety, labeling, and performance. Apparel testing and quality control help you meet these requirements. You avoid legal issues and ensure your products are safe for use. Meeting industry standards also means you can sell your products in more markets. You show your commitment to apparel quality assurance by following established guidelines. This process supports your business growth and keeps your products competitive.
Tip: Always review the latest quality standards to keep your garment production up to date.
Quality Inspection Procedures
You need strong quality inspection procedures to ensure every garment meets high standards. These procedures help you catch problems early and deliver reliable products. You can break down quality inspection procedures into three main areas: fabric testing, garment testing, and performance testing. Each area uses different methods to check for defects and maintain quality.
Fabric Testing
You start with fabric testing because the fabric forms the foundation of every garment. You want to check for colorfastness, shrinkage, strength, and chemical safety. You use both chemical and physical tests during this stage. Chemical tests help you find harmful substances in the fabric. Physical tests measure properties like tear strength and abrasion resistance.
• Best Practices for Fabric Testing:
a. Select suppliers who follow strict textile and apparel inspections.
b. Request fabric samples before full production.
c. Use standardized tests for color, strength, and chemicals.
d. Document all results for future reference.
Note: Early fabric inspection prevents costly mistakes later in the production process.
Garment Testing
You move to garment testing after you approve the fabric. This step checks the finished product for construction quality, seam strength, and overall appearance. You want to make sure each garment matches the design and fits as expected. You also look for defects like loose threads, uneven stitching, or missing trims.
• Key Steps in Garment Testing:
◦ Inspect each garment for workmanship and construction.
◦ Measure garments to confirm they match size charts.
◦ Check accessories and trims for secure attachment.
◦ Use textile and apparel inspections to verify compliance with safety standards.
A simple table can help you organize your garment inspection:
| Inspection Point | What to Check | Tools Needed |
|---|---|---|
| Seams | Strength, evenness | Seam tester |
| Measurements | Length, width, fit | Measuring tape |
| Trims & Accessories | Attachment, quality | Visual check |
| Appearance | Stains, defects, finish | Visual check |
Performance Testing
You finish with performance testing to see how the garment holds up during real use. You want to know if the product will last through washing, stretching, and daily wear. Performance testing includes both lab and real-life tests. You might wash the garment several times or stretch it to check for shape retention.
• Performance Testing Checklist:
◦ Wash and dry the garment multiple times.
◦ Test for color fading and shrinkage.
◦ Stretch and pull seams to check durability.
◦ Record all results as part of your quality control procedures.
Tip: Regular performance testing helps you maintain high product quality and customer satisfaction.
You should always monitor production and inspect samples at different stages. Quality inspection procedures work best when you combine supplier vetting, sample testing, and ongoing production checks. This approach helps you catch issues early and deliver garments that meet your quality standards.
Garment Quality Control Checklist
A strong garment quality control checklist helps you catch problems before they reach your customers. You use this checklist to guide every garment inspection procedure. Each step focuses on a different part of the garment, making sure you meet all quality standards. You also use documentation and standardized systems to keep your process consistent.
Fabric Inspection
You start your garment quality control checklist with fabric inspection. This step checks the fabric for flaws and ensures it meets your quality requirements. You look for color consistency, texture, and any visible defects. You also check for stains, holes, or uneven dyeing. Use the 4-point or 10-point system to score the fabric. These systems help you rate the severity of defects and decide if the fabric passes or fails.
• Checklist for Fabric Inspection:
a. Spread the fabric on a flat surface.
b. Check for color uniformity and texture.
c. Look for holes, stains, or misprints.
d. Rate each defect using the 4-point or 10-point system.
e. Record your findings in the quality control checklist.
Tip: Consistent documentation during fabric inspection helps you track recurring issues and improve future orders.
Construction and Workmanship
Next, you examine the construction and workmanship of the garment. This part of the garment quality control checklist focuses on how well the garment is made. You check seams, stitches, and finishing. You want to see even stitching, strong seams, and no loose threads. You also look for puckering, skipped stitches, or other defects that affect quality.
• Checklist for Construction and Workmanship:
◦ Inspect all seams for strength and evenness.
◦ Check stitch density and alignment.
◦ Look for loose threads or unfinished edges.
◦ Confirm that buttons, zippers, and fasteners work properly.
◦ Note any defects in your quality control checklist.
A table can help you organize your inspection:
| Area Checked | What to Look For | Pass/Fail | Notes |
|---|---|---|---|
| Seams | Strength, evenness | ||
| Stitching | Density, alignment | ||
| Finishing | No loose threads | ||
| Fasteners | Functionality |
Measurement and Fit
You continue your garment quality control checklist with measurement and fit. Accurate sizing is key to customer satisfaction. You use measuring tapes and size charts to check if the garment matches the required dimensions. You also perform a fit test to see how the garment looks and feels on a model or mannequin. This step helps you catch sizing errors before shipping.
• Checklist for Measurement and Fit:
a. Lay the garment flat and measure all key points.
b. Compare measurements to the approved size chart.
c. Perform a fit test on a model or mannequin.
d. Record any discrepancies in your quality control checklist.
e. Mark garments that do not meet standards for rework or rejection.
Note: Consistent measurement and fit checks reduce returns and improve customer trust in your apparel.
Accessories and Trims
The last step in your garment quality control checklist covers accessories and trims. You inspect buttons, zippers, labels, and decorative elements. You want to make sure each accessory is attached securely and matches the garment’s design. You also check for sharp edges or loose parts that could cause safety issues.
• Checklist for Accessories and Trims:
◦ Inspect all buttons and zippers for secure attachment.
◦ Check labels for correct information and placement.
◦ Examine decorative trims for quality and consistency.
◦ Note any defects in your quality control checklist.
◦ Remove or repair any unsafe or defective accessories.
Callout: Always follow textile and apparel inspections guidelines when checking accessories and trims. This ensures you meet safety and quality standards.
You should use a garment quality control checklist for every garment inspection procedure. This checklist helps you follow industry standards and maintain high quality. You also use documentation to track inspection results and identify trends. Standardized systems like the 4-point or 10-point system make your inspections more objective and reliable. Textile and apparel inspections require careful attention to detail at every step.
A complete quality control checklist supports your commitment to quality. You protect your reputation and deliver garments that meet customer expectations. When you follow a detailed checklist, you reduce defects and improve the overall quality of your apparel.
Quality Control Checklist and Best Practices
A strong quality control checklist guides you through every stage of garment production. You use this checklist to maintain quality and reduce defects. Each step in your quality control checklist helps you deliver a reliable garment to your customers. You need to focus on supplier vetting, in-process inspections, and final quality checks to ensure your product meets expectations.
Supplier Vetting
You start your quality control checklist by choosing the right suppliers. Reliable suppliers help you get high-quality fabric and trims for your garment. You review their past performance and request samples before making decisions. You also check if they follow industry standards for garment production. A good supplier supports your quality control efforts from the beginning.
• Review supplier certifications and past records.
• Request fabric and garment samples for inspection.
• Confirm compliance with safety and quality standards.
• Add supplier evaluation results to your quality control checklist.
Tip: Strong supplier vetting reduces the risk of defects in your finished product.
In-Process Inspections
You continue your quality control checklist with in-process inspections. These inspections catch problems early in garment production. You check fabric, stitching, and construction at different stages. You use your quality control checklist to record findings and take action if you find issues.
• Inspect fabric before cutting for color and texture.
• Check stitching and seams during assembly.
• Monitor garment measurements and fit as production continues.
• Update your quality control checklist after each inspection.
A table can help you track in-process inspection results:
| Stage | What to Inspect | Pass/Fail | Notes |
|---|---|---|---|
| Fabric | Color, texture | ||
| Stitching | Strength, evenness | ||
| Measurements | Size, fit |
Final Quality Checks
You finish your quality control checklist with final quality checks. This step ensures each garment meets your standards before shipping. You inspect the finished product for defects, fit, and accessories. You also review documentation from earlier inspections to confirm all issues were fixed.
• Inspect each garment for appearance and construction.
• Check measurements and fit against size charts.
• Test accessories and trims for secure attachment.
• Record results in your quality control checklist.
Note: Final quality checks help you deliver a product that meets customer expectations.
You improve your quality control checklist by training staff, setting clear standards, and reviewing results. Continuous improvement in your quality control procedures keeps your garment quality high and your customers satisfied.
You benefit from a thorough approach to apparel testing and quality control. Each step helps you deliver a safe, reliable product. When you check every product, you protect your customers and meet industry standards. New trends like automation, digital tools, and sustainability improve your process. You can use these advances to create a better product and support your business growth.
FAQ
What is the main goal of apparel testing?
You want to make sure each garment meets safety, durability, and performance standards. Apparel testing helps you identify defects early and ensures your products match customer expectations.
How often should you perform quality control checks?
You should check quality at every stage of production. This includes before, during, and after manufacturing. Regular checks help you catch problems early and maintain high standards.
Which tools do you need for garment inspection?
You need measuring tapes, seam testers, color assessment tools, and checklists. These tools help you measure, inspect, and record results accurately.
Why do you need to document inspection results?
Documentation helps you track issues, spot trends, and improve future production. You can use records to train staff and prove compliance with industry standards.
Related Articles


Grow your business with TradeAider Service
Click the button below to directly enter the TradeAider Service System. The simple steps from booking and payment to receiving reports are easy to operate.