Visual inspection involves a careful assessment of products to identify visible defects or irregularities. Visual quality inspection takes this process further by applying structured procedures to ensure products meet high-quality standards. In manufacturing, you rely on visual inspection to catch surface flaws such as scratches and misalignments before products reach consumers. You gain several benefits of visual inspection, including:
- Early detection of defects minimizes waste and delays.
- Consistent inspections support compliance with quality control regulations.
- High-quality products increase customer satisfaction and loyalty.
- Fewer defects mean a better customer experience and fewer complaints.
Visual quality inspection ensures your products consistently meet expectations and industry requirements.
Key Takeaways
- Visual inspection helps catch defects early, reducing waste and delays in manufacturing.
- Consistent documentation during inspections supports compliance with quality control regulations.
- Using a structured checklist ensures thorough inspections and improves product quality.
- Automated visual inspection systems enhance speed and consistency, especially in high-demand environments.
- Regular training and audits help maintain high standards and improve the effectiveness of visual inspections.
Visual Quality Inspection Overview
Definition
You use visual inspection as a systematic process to evaluate products or components by examining their appearance. This process allows you to detect visible defects such as cracks, scratches, misalignments, or contamination. International standards organizations define visual inspection as a method where you assess items against established acceptance criteria using specific tools and procedures. You follow a set sequence, often guided by a checklist, to ensure consistency and accuracy. During visual inspection, you record your observations and compare them to acceptance criteria to decide if a product meets the required quality. You also document your findings for traceability and future improvements.
Tip: Consistent documentation during visual inspection helps you maintain compliance with regulatory requirements and supports continuous improvement in your processes.
A typical visual inspection process in industrial settings includes several main components:
| Component | Description |
|---|---|
| Visual Inspection | Examining components for wear, cracks, or alignment issues |
| Standardization | Using clear procedures and checklists to reduce errors |
| Checklist | Observing damage, logging results, and triggering follow-up actions |
| Use of CMMS | Utilizing digital systems for consistent inspections and tracking |
Purpose in Quality Control
You rely on visual inspection to achieve several objectives in quality control. This process helps you identify physical defects before products reach consumers, which is especially important for high-value items. For example, in industries like automotive and food production, visual inspection allows you to filter out faulty parts and ensure product safety by checking for foreign objects, proper packaging, and accurate labeling. Research shows that you can detect up to 70% of faulty parts through visual inspection alone.
- Enhances safety by catching defects early
- Ensures compliance with industry regulations
- Maintains operational efficiency and product quality
Regulatory requirements also shape your visual inspection standards. You must document every step of the inspection process and, in some cases, inspect every item individually to meet strict guidelines. This attention to detail ensures that your products consistently meet both internal and external quality expectations.
Visual Inspection Process
Preparation
You begin the visual inspection process by preparing thoroughly. Preparation ensures that inspections run smoothly and yield reliable results. Start by reviewing the purchase order and specifications. This step helps you understand what needs to be inspected and the standards you must meet. Develop an inspection plan that outlines the scope, objectives, and criteria for the inspection. Read through product specifications for quality control and design. Use a product inspection checklist to simplify the quality checks and ensure consistency.
- Review purchase orders and specifications.
- Develop a detailed inspection plan.
- Read product specifications for quality and design.
- Use a checklist to guide your inspections.
Tip: Preparation reduces errors and helps you detect defects early in the process.
Inspection Steps
You conduct visual inspection using a series of structured steps. Each step focuses on a specific stage in the process, allowing you to maintain quality and consistency. The following table outlines the standard sequence for visual inspection in manufacturing:
| Step | Description |
|---|---|
| Receiving Inspection | Verify packages against purchase orders and check for visible damage. |
| First Stage Inspection | Ensure products meet initial quality criteria through basic visual inspections and tests. |
| Second Stage Inspection | Conduct detailed quality checks, including vendor verification and thorough measurements. |
| In-Process Inspection | Detect issues during manufacturing to maintain quality and prevent faulty products. |
| Final Inspection | Confirm that finished products meet all quality standards before release to customers. |
You may use manual or automated visual inspection techniques. Manual inspection relies on your intuition and attention to detail. Automated inspection systems provide consistent and fast results, making them suitable for high-demand environments. Automated inline inspection offers continuous real-time defect detection, allowing you to identify variations and quality inconsistencies without interrupting production.
Manual inspections can be beneficial in critical situations, but human factors such as fatigue and subjectivity may affect the quality of results. Automated systems help you maintain high consistency and scalability.
Defect Identification
You use visual inspection techniques to detect defects in products. The process involves examining products for visible cues and indicators. Surface inspection helps you identify scratches, dents, cracks, or discoloration. Dimension inspection allows you to check the size, shape, and alignment of products to ensure they meet design specifications. Computer vision uses AI to analyze visual data, detecting patterns and anomalies.
- Surface Finish: Assess smoothness, texture, and presence of scratches or nicks.
- Dimensional Accuracy: Verify that a component’s size and shape conform to engineering drawings.
- Assembly Integrity: Ensure all components are correctly installed without gaps or misalignment.
The types of visual inspection you use depend on the product and industry. You commonly identify the following defects during visual inspection:
| Defect Type | Description | Examples and Causes | Consequences |
|---|---|---|---|
| Surface Defects | Issues affecting the outer layer of products. | Particle defects, coating defects, caused by contamination, equipment malfunctions. | Functional impairments, financial ramifications, reputation damage. |
| Dimensional Defects | Variations in size or shape affecting assembly. | Warping, misalignment, caused by thermal effects, machining errors. | Safety risks, operational disruption, reputational damage. |
| Structural Defects | Flaws within the material structure. | Cracks, voids, caused by material handling errors, inadequate welding. | Safety hazards, costly repairs, legal liabilities. |
| Functional Defects | Issues that affect the intended function of the product. | Malfunctions in electronics, caused by design flaws or manufacturing errors. | Customer dissatisfaction, increased returns, impact on brand loyalty. |
Visual inspection is essential for effective quality control systems. You use it as a rapid, non-destructive method to identify and classify imperfections in products. This process ensures that products meet safety and quality standards.
Documentation
You document the results of visual inspection to maintain traceability and accountability. Proper documentation helps you track defects, monitor quality, and support continuous improvement. Use clear and concise language to ensure accessibility for all users. Include comprehensive details such as location, date, and specific conditions of the inspection. Standardized templates and forms help you maintain consistency and thoroughness. Consistent terminology prevents misunderstandings in recorded findings. Digital documentation makes storage, access, and traceability easier. Real-time updates using mobile devices help you avoid missing details. Incorporate photos or videos to provide visual context to the written findings.
Documentation improves traceability and accountability in quality control. You track raw material batches, supplier details, and material certifications. Production records log production runs, equipment used, and operator details. These records enable you to trace materials throughout the process and provide accountability for each production batch.
Follow-Up
You take follow-up actions after identifying defects during visual inspection. Document all identified defects during inspection. Initiate corrective and preventive actions (CAPA) procedures. Investigate and identify the root causes of defects. Assign responsibilities to team members to address the issues. Implement timely solutions to rectify the defects. Track CAPA activities until closure. Monitor for recurrence to ensure that the same defects do not reappear in future inspections.
- Investigate problems thoroughly.
- Pinpoint root causes of defects.
- Implement effective corrective actions.
- Aim to systematically reduce defects over time.
- Enhance product quality and operational efficiency.
You measure the effectiveness of follow-up procedures using key performance indicators (KPIs). Corrective action completion rate shows the percentage of corrective actions completed within a defined time frame. Root cause analysis effectiveness measures how well root cause analysis resolves underlying quality issues. These KPIs help you prevent recurring problems and achieve long-term quality improvements.
Note: Effective follow-up ensures that you maintain high standards in visual inspection and quality control.
Visual Inspection in Manufacturing
Application Areas
You encounter visual inspection in manufacturing across a wide range of applications. This process plays a vital role in maintaining quality and safety standards. You use visual inspection in manufacturing to check for defects, verify product specifications, and ensure compliance with industry regulations. The applications span multiple sectors, each with unique requirements for inspections.
You rely on visual inspection in manufacturing to support applications such as:
- Detecting surface defects in aerospace equipment for safety.
- Ensuring material quality and dimensional accuracy in home goods.
- Verifying labeling and packaging integrity in food and beverage production.
- Identifying labeling errors and packaging defects in pharmaceuticals.
- Inspecting paint defects and alignment issues in automotive manufacturing.
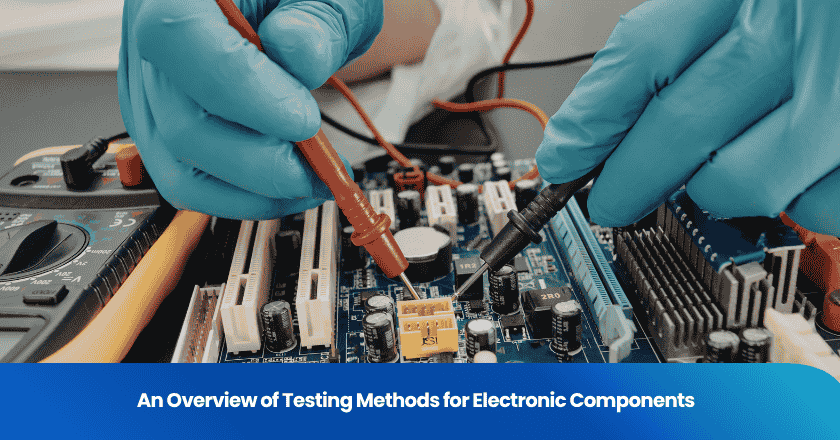
- Checking solder joint defects and placement errors in electronics.
Visual inspection in manufacturing helps you maintain high standards and deliver products that meet customer expectations. You use inspections to prevent costly recalls and improve overall quality. These applications demonstrate how visual inspection supports quality assurance across diverse manufacturing environments.
Common Methods
You apply several visual inspection methods to achieve reliable results in manufacturing. Each method offers distinct advantages for different applications. In electronics and automotive manufacturing, you often use manual visual inspection, automated optical inspection, and X-ray inspection.
1. Manual Visual Inspection (MVI): You examine products with the naked eye or basic tools. This method allows you to spot obvious defects quickly.
2. Automated Optical Inspection (AOI): You use high-resolution cameras to scan products for defects. AOI operates at high speeds and provides consistent results for large-scale inspections.
3. X-Ray Inspection (AXI): You examine internal structures of products, such as circuit boards, to detect hidden defects that other methods cannot reveal.
You select visual inspection methods based on the type of product and the required level of quality. Manual inspections work well for small batches or critical components. Automated systems handle high-volume applications and deliver consistent quality. X-ray inspection is essential when you need to identify internal defects that affect product performance.
Visual inspection in manufacturing ensures that you catch defects early, maintain compliance, and deliver products that meet industry standards. You improve quality and reduce risks by choosing the right inspection methods for your applications.
Effective Visual Inspection Procedures
Tools and Equipment
You rely on a range of tools and equipment to carry out effective visual inspection procedures in manufacturing. Magnifiers and microscopes help you observe fine details and surface imperfections. Borescopes and endoscopes allow you to inspect internal surfaces that are otherwise inaccessible. Lighting tools, such as LED torches, provide clear illumination for direct visual inspection in dark or shadowed areas. Mirrors and probes let you view difficult angles and hidden features. Measurement scales and calipers give you precise readings to verify specifications and maintain quality standards. Digital recording devices enable you to document findings and support traceability in quality control. You also use manual line-of-sight inspection for quick checks, remote visual inspection with cameras, and automated visual inspection systems for real-time evaluation. AI-driven visual inspection enhances accuracy and consistency, especially in high-volume manufacturing environments.
Best Practices
You maximize the value of visual inspection by following best practices for visual inspection. Regular audits help you maintain compliance with standards and procedures. You document inspection processes thoroughly to ensure traceability and support continuous improvement. Strict adherence to established standards and specifications guarantees consistent results. You understand AQL figures to set clear acceptance criteria for inspections. Statistical process control lets you monitor performance and identify trends in quality. You provide consistent lighting and keep inspection areas clean and organized. Controlling environmental factors, such as temperature and humidity, prevents errors during inspections. You schedule breaks for inspectors to reduce fatigue and maintain focus. Reference samples clarify acceptance criteria and support reliable decision-making. Training programs give inspectors the knowledge and judgment skills needed for effective visual inspection procedures.
Tip: Continuous improvement and regular training help you achieve higher accuracy and reliability in visual inspection.
Challenges and Solutions
You encounter several challenges during visual inspection in manufacturing. Legacy system integration can disrupt operations when you introduce new automated visual inspection systems. Process variability and adaptability make it difficult to maintain consistent inspections across different materials and production lines. Test environment consistency affects inspection accuracy and reliability. Organizational change management requires you to reskill your workforce and adapt to new procedures.
You overcome these challenges by investing in comprehensive training programs and certification for inspectors. You use innovative methods, such as thermal imaging and ultrasonic testing, to enhance traditional visual inspection. Maintaining appropriate lighting and clean inspection areas maximizes the value of visual inspection. You control temperature and humidity to prevent effects on product appearance. Regular calibration of equipment ensures accurate assessments. Reskilling your workforce supports the integration of real-time automated visual inspection solutions in manufacturing.
You strengthen quality control by following a structured visual inspection process. This approach delivers over 99% accuracy in defect detection and reduces downtime by 25%. Effective procedures and best practices help you minimize waste and improve compliance. In manufacturing, you gain long-term benefits such as cost efficiency, real-time quality control, and enhanced customer trust.
To improve visual inspection, follow these steps:
1. Assess your current inspection process.
2. Set clear goals for automation.
3. Choose the right technology partner.
4. Start small with a pilot program.
5. Build the right technology stack.
6. Leverage complementary technologies.
7. Train your team.
8. Monitor, optimize, and scale.
FAQ
What is visual inspection and why do you use it?
Visual inspection lets you examine products for defects or irregularities. You rely on this process to catch issues early and maintain high standards. You improve quality and reduce risks in manufacturing environments.
How do you prepare for a visual inspection?
You review specifications and create a checklist before starting visual inspection. You organize tools and set up proper lighting. Preparation helps you spot defects quickly and ensures consistent results.
Which tools do you need for effective visual inspection?
You use magnifiers, microscopes, and digital cameras for visual inspection. Lighting equipment and measurement tools help you see details and verify dimensions. These tools support accurate assessments and improve quality control.
What types of defects can you find during visual inspection?
You identify surface flaws, dimensional errors, and assembly issues during visual inspection. You also spot contamination and misalignment. Early detection helps you maintain product quality and prevent costly recalls.
How do you document findings from visual inspection?
You record results using standardized forms or digital systems. You include photos, dates, and defect descriptions. Clear documentation supports traceability and helps you improve future visual inspection procedures.
Grow your business with TradeAider Service
Click the button below to directly enter the TradeAider Service System. The simple steps from booking and payment to receiving reports are easy to operate.


