- Acerca de Nosotros

- Nuestros Servicios
- Su Industria
- Recursos
- Noticias y Blog
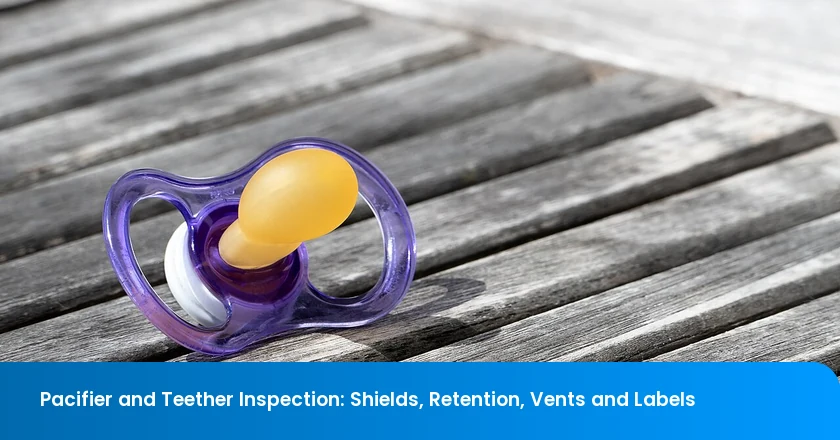
Pacifier and teether quality inspection needs two different checklists. A pacifier has a nipple and shield whose size, openings and attachment must meet market-specific requirements. A teether needs checks suited to its construction, such as seams, detachable components or liquid-filled chambers. Start by separating the products, then inspect finished units and arrange the applicable conditioned mechanical and material tests.
Choose the Checks That Apply to Each Product
Identify the SKU, destination, intended age and use, construction, material specification and production batch. For every applicable row, record the method, measured result and unit identifier. Mark a feature absent only after checking the actual design; “not applicable” should not conceal an unperformed test.
| Inspection item | Pacifier | Teether | What to record |
|---|---|---|---|
| Construction and size | Shield, nipple and handle or ring geometry under the relevant pacifier requirements. | Overall dimensions, grip and chewing features against the approved design and applicable product requirements. | Drawing/version: ___; measured feature: ___ |
| Attachment and integrity | Nipple and ring retention, including prescribed conditioning. | Joints, seams, molded sections and detachable parts using the method applicable to that design. | Component: ___; preparation/method: ___; result: ___ |
| Surface and edges | Flash, cuts, cracks, sharp edges and applicable puncture or tear resistance. | Flash, splits, damaged textures or coatings, exposed filling and applicable mechanical integrity. | Location: ___; visible defect/test outcome: ___ |
| Ventilation | Check the market-specific shield opening requirements. | Do not copy pacifier vent limits to an ordinary teether; assess any relevant feature through its own product requirements. | Opening dimensions/positions: ___; applicability: ___ |
| Liquid-filled chamber | Check only if the product actually contains one. | Inspect seams, filling and leakage; use the agreed conditioning and integrity method. | Condition: ___; leak/damage location: ___ |
| Materials and labeling | Match materials, warnings, identifiers and applicable test reports. | Match materials and actual use claims to the appropriate safety or medical-device route. | Specification/report/artwork: ___; discrepancy: ___ |
Visible defects can be recorded during shipment inspection. Formal shield, retention, integrity and chemical assessments require the specified methods, equipment and preparation. Confirm which tests the on-site team can perform and which need laboratory work before booking. TradeAider's inspection-standard guidance helps translate the approved specification into inspection and defect criteria.
Teether Inspection: Surfaces, Seams, Parts and Filling
Group teethers by construction before allocating samples: one-piece molded designs, multipart assemblies and liquid-filled designs present different inspection points. Set acceptance values and conditioning from the applicable product requirements and approved specification. Use pacifier-specific limits only when the product falls within their scope.
Inspect the chewing surfaces and molded features
Compare shape and dimensions with the approved drawing and sample. Examine raised textures, thin sections, parting lines and holes for flash, cuts, incomplete molding or cracks. Inspect any coating, print or insert for damage or visible separation. For one-piece designs, pay particular attention to thin connections between the main body and projecting features: record the location of a split rather than describing the unit only as “poor finish.”
Keep appearance and material safety separate. A smooth surface does not establish chemical compliance, and a supplier's material name does not prove that every colorant, coating or filling is covered by a report. Match the bill of materials and relevant versions to the applicable test scope. Do not use an improvised bite, smell or hand-flex check to declare the material safe. Confirm the relevant product testing scope with the testing team before accepting the material reports.
Assess joints and detachable components
For multipart teethers, inspect every seam, bonded insert, handle and attachment. Compare fit and assembly with the approved design, then use the applicable mechanical tests to assess separation or damage after the specified preparation. Inspect parts liberated during testing under the relevant product requirements. Do not assume either that every removable part is prohibited or that a pacifier's nipple-pull force is the correct teether test.
Record the unit's condition before and after testing. Distinguish a missing component in a retail pack from a component that separated during a mechanical test: the findings require different corrections. If a joint fails, identify the affected assembly or component batch before deciding whether the concern can be limited to that group.
Inspect liquid-filled designs under their intended use conditions
Check the chamber and sealed seams for leakage, visible damage and filling inconsistencies against the approved specification. Observe leakage after the agreed handling and conditioning sequence. Where instructions permit chilling or a cleaning treatment, confirm that the test plan assesses the relevant permitted use; do not add freezing or boiling unless the applicable method calls for it.
A dry chamber at room temperature does not establish resistance to every later load or temperature. Record what was actually tested, including temperature, duration and any mechanical procedure. A leak requires assessment of the failed seam or chamber and verification of the confirmed correction; a replacement label cannot resolve a physical integrity failure.
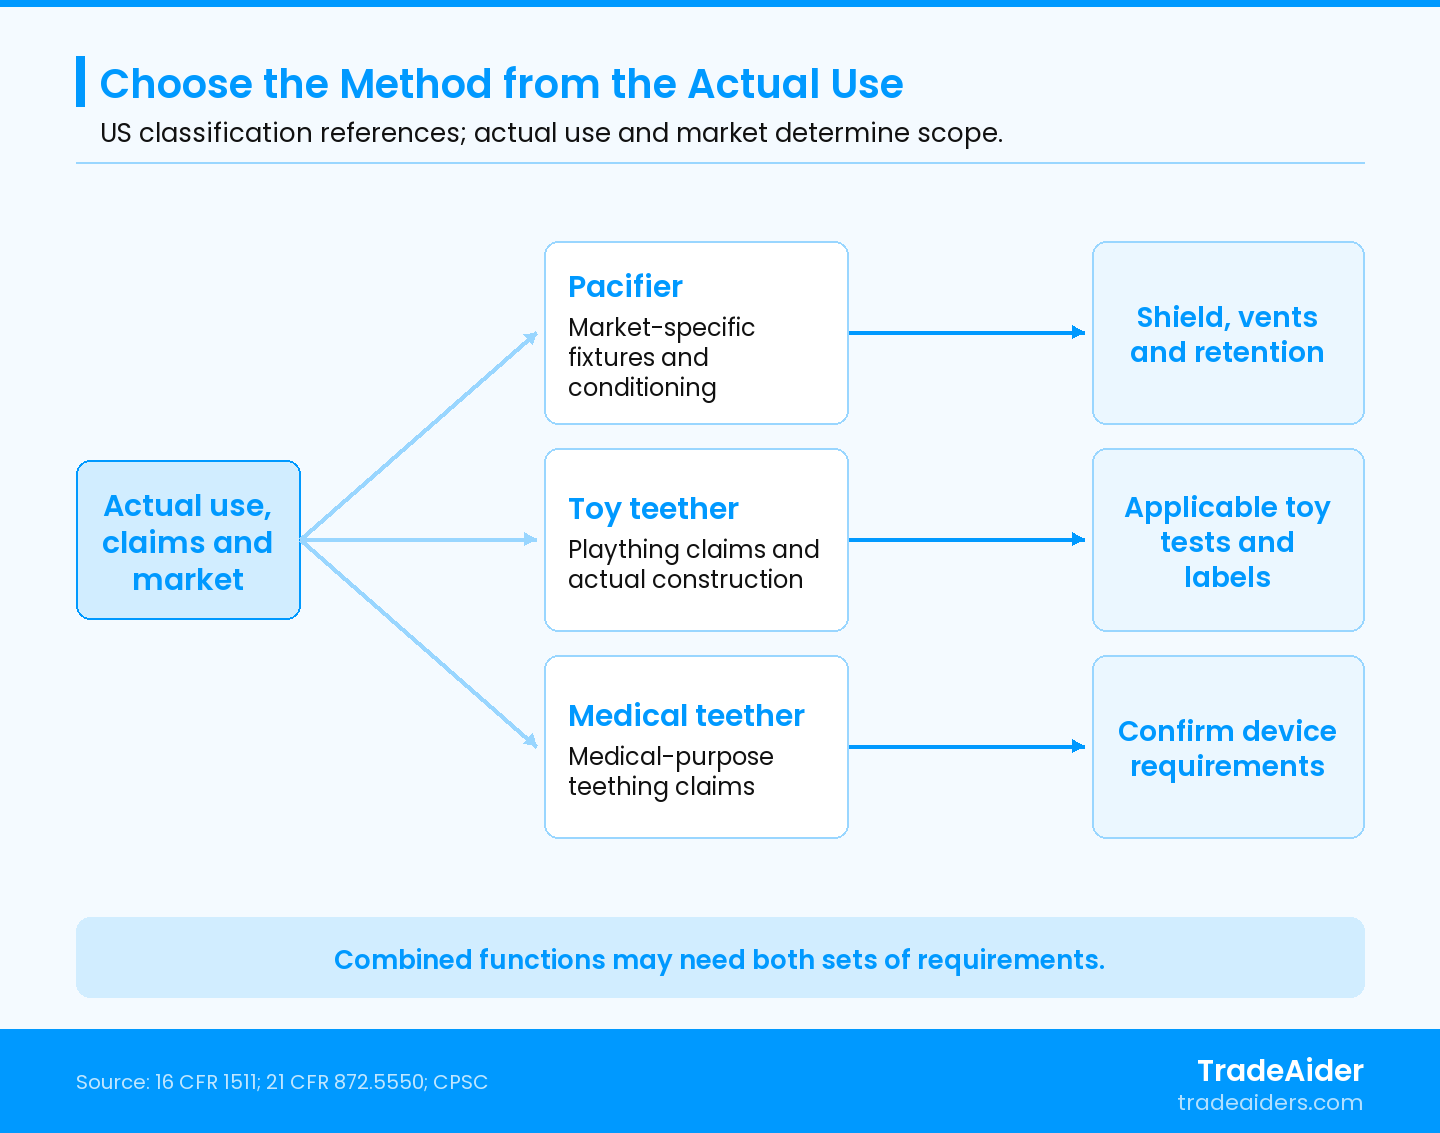
Classify the actual product before choosing its test method. A teether does not inherit pacifier shield and vent limits.
Pacifier Shield and Handle Checks
Use the fixture and geometry for the destination market. A shield measurement against an approved drawing is a useful production check, but formal swallow-prevention testing must use the prescribed apparatus and procedure.
United States: draw-through and protrusion
Under 16 CFR part 1511, a pacifier must not pass through the prescribed shield-test opening when 2.0 lb (8.9 N) is applied to the nipple over 5 seconds and held for 10 seconds. The specified opening and load arrangement are essential; an ordinary round-hole gauge or hand pull is not the method.
The US protrusion requirement limits the portion projecting on the side opposite the nipple to 16 mm when the prescribed plane contacts the guard under 2.0 lb (8.9 N). Record the tested arrangement rather than judging a handle's overall height by eye. For hinged handles or rings, position the hinge axis horizontally as the method requires.
EN 1400: a different shield fixture and handle geometry
The cited EN 1400:2013+A2:2018 method specifies a polyoxymethylene shield template with modulus of elasticity of 3,000–3,300 MPa and hardness of 80–90 Shore D. Use the required fixture and clause, not the US opening. Its geometry requirements distinguish non-flexible knobs, plugs or covers with an effective projection of 10–16 mm, subject to the specified ring exception, from flexible rings and similar features with an effective penetration of 10–35 mm. These are method-specific measurements using the shield template, including its thickness and the required orientations, rather than ordinary feature heights. A non-flexible ring must collapse to no more than 16 mm under 10 N; the relevant penetration is limited to 35 mm and 1.4 times the widest width. Apply the full clauses and their feature definitions; these figures are not interchangeable limits for all handles or teethers.
Measure Pacifier Vent Openings, Including Their Position
For US pacifiers, the guard needs at least two symmetrically located holes. Each must be at least 5 mm in its minor dimension, and its edge must be at least 5 mm from the guard perimeter. Check every required opening for molding flash or obstruction, not just one hole on a clean approved sample.
The cited EN 1400 provisions require at least two ventilation holes, each including a 4 mm diameter area and having an area of at least 20 mm². Hole centers must be at least 15 mm apart, on opposite sides of the shield's minor axis, and the hole edges at least 5 mm from the shield edge. Record dimensions and position: adequate hole area does not compensate for an insufficient edge distance.
Use the applicable method to assess curved or irregular openings rather than estimating area from a single width. Reserve separate results for any relevant surface-integrity or puncture and tear tests; the absence of visible cuts does not demonstrate that the material passes those tests.
Test Pacifier Retention After the Required Conditioning
Nipple and ring retention is assessed under the destination's prescribed sequence. Allocate enough samples for the method and segregate destructive or damaged test units from saleable stock. A fresh assembly that survives a pull may behave differently after the required boiling and cooling cycles.
| Market | Published force and timing | Conditioning and repeat sequence |
|---|---|---|
| United States | 10 lb (44.5 N), applied over 5 seconds and held for 10 seconds, under the prescribed nipple and handle/ring procedures. | Perform the initial structural tests, then six rounds of 5 minutes boiling and 5 minutes cooling in room air at 60–80°F (16–27°C). After the sixth cycle, repeat the structural and shield tests and assess liberated components as specified. |
| Canada | 44.5 ± 1.0 N, at 4.5 ± 1.0 N/s, held for 10 ± 0.5 seconds, for the three specified tensile procedures. | Boil 10 ± 0.5 minutes; cool in air at 21 ± 5°C for 15 ± 0.5 minutes; repeat the tensile procedures, then repeat the heating/tensile sequence nine more times. |
Canada's Pacifiers Regulations specify pulls on the ring axially with the nipple fixed, the ring perpendicular to the guard with the guard fixed, and the nipple under its prescribed arrangement. Schedule 2 begins with the tensile procedures before the heating sequence. Do not substitute the US six-cycle procedure for Canada's ten heating/tensile sequences or omit the initial tests. Assess components released in the tests with the specified small-parts cylinder, without compression, as the applicable rule requires. Record which component separated and its gauge result. Canada also requires the nipple to remain attached, and sets conditions for hinged, collapsible or flexible rings and a maximum circumference of 356 mm for an attached loop. Those Canadian provisions do not override the US restrictions on pacifier attachments.
Check Packaging, Warnings and Product Claims
US pacifiers must carry the prescribed warning: “Warning—Do Not Tie Pacifier Around Child's Neck as it Presents a Strangulation Danger.” 16 CFR 1511.7 requires it on each individual package or container and, when two or more pacifiers are sold in a retail display carton, on that carton as well. Check the required legibility and conspicuous presentation. Also review accessories: 16 CFR 1511.6 prohibits pacifiers sold with the specified ribbons, strings, cords, chains and similar attachments. Do not assume a bundled clip is exempt simply because it is packaged separately inside the set.
For teethers, compare the actual intended-use, cleaning and temperature instructions with the product specification and assessment. Check claims about age, chilling, filling and materials for consistency with the tested design. Do not copy a pacifier warning or a toy label onto a teether without establishing which requirements apply.
US classification depends on actual intended use and claims. 21 CFR 872.5550 defines a teething ring as a device intended for medical purposes to soothe an infant's gums during teething. If the product is a toy, assess its applicable toy requirements instead: CPSC toy guidance identifies ASTM F963-23 for toys manufactured on or after April 20, 2024. A generic product name does not settle whether a particular design follows the toy or medical-device route.
For children's products subject to applicable CPSC rules, check the required Children's Product Certificate and supporting testing, including CPSC-accepted third-party laboratory requirements where applicable. Check permanent distinguishing tracking marks on the product and packaging to the extent practicable under 15 U.S.C. 2063. These records do not replace physical checks of the packed goods.
Match material declarations and relevant chemical test reports to the actual product, including colorants, coatings and fillings. Establish the destination's applicable requirements and test methods with the qualified assessor. EN 1400 addresses soothers; feeding teats belong to a different scope associated with EN 14350. Neither reference is a blanket certificate for every oral product in a sales bundle.
Example: A Mixed Order Needs Separate Findings
Illustrative example: pacifiers and solid teething rings in one shipment
A hypothetical order contains 24,000 units across 3 product lines: US/Canadian pacifiers, EU pacifiers and US solid teething rings. On the EU pacifiers, a required ventilation hole lies too close to the shield edge. The Canadian pacifier file contains only fresh-unit tensile results, omitting the required heating sequence. The teething-ring packaging is missing applicable tracking information.
Record each finding against its product and identified batch. The EU shield issue needs a compliant design and verification under the relevant opening method; passing tensile tests would not resolve it. The Canadian product needs the missing conditioning and test sequence. The teething-ring group needs the required marking correction checked on actual goods, together with satisfactory applicable product results; a packaging correction does not establish its mechanical or material safety.
Assess any separate shipment only where reliable records define the groups and their own applicable checks and compliance requirements are satisfied. Shared cartons or mixed component batches may prevent that separation. The example illustrates different corrections for different findings, not client experience, an inspection sample size or an order-wide defect rate.
Set Product-Specific Sampling and Testing
- Allocate pacifier tests by market; preserve each required fixture and conditioning sequence.
- Choose teether checks by construction, including seams, detachable components and any liquid-filled chamber.
- Match material reports and use claims to the supplied product; a packaging correction cannot close a physical failure.
Use the acceptance quality limit (AQL) sampling calculator for the agreed attribute inspection plan. Define functional and safety-test allocations and acceptance rules separately, covering relevant molds, materials and assemblies. A workmanship pass cannot close a failed shield test, missing conditioning or an unresolved material requirement.
Send product drawings, intended use and age, destinations, materials, relevant standards, existing test reports, packaging artwork and batch details when you contact TradeAider to scope pacifier and teether inspection. Ask the team to confirm the inspection methods, required equipment and any laboratory testing. This gives the visit a specific task for each product rather than one generic oral-product checklist.
Frequently Asked Questions
Can one set of pacifier samples cover several markets?
Only where the required methods, conditioning and sample-use rules permit it. The US, Canadian and EN procedures use different fixtures or sequences. Agree the allocation with the testing team before using samples, particularly for destructive tests. Reusing a unit after the wrong conditioning can invalidate the planned result even when the force value appears similar.
Does every teether need pacifier ventilation holes?
No. Pacifier shield ventilation requirements apply through the pacifier rules and their product definitions. An ordinary teether is assessed through its own construction, intended use and applicable product requirements. If a combined design performs both functions, establish its classification and relevant requirements rather than choosing the less demanding checklist.
What should happen to units damaged during testing?
Identify and segregate them, including units used in destructive or conditioning procedures that should not be sold. Record the extra samples taken and reconcile the shipment quantity afterward. Quarantine also prevents a torn or cracked test unit from being mixed back into packs while the supplier is correcting the affected product group.
Artículos Relacionados


Haga crecer su negocio con el Servicio TradeAider
Haga clic en el botón de abajo para ingresar directamente al Sistema de Servicios TradeAider. Los pasos simples desde la reserva y el pago hasta recibir los informes son fáciles de operar.