
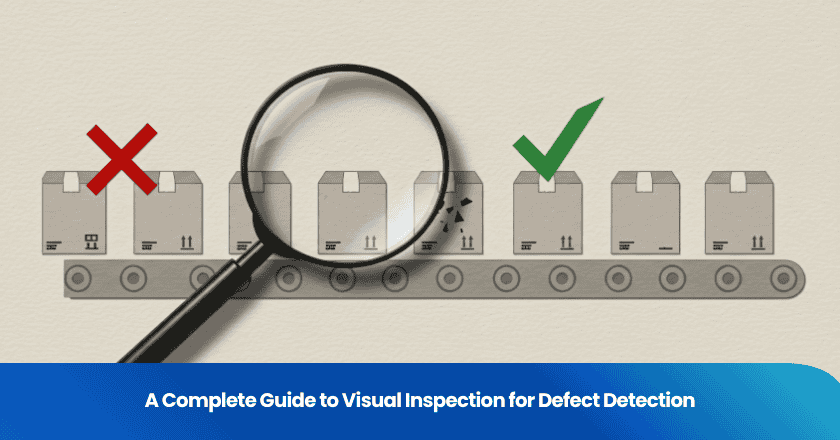
Visual inspection for defect detection is a controlled comparison, not a quick glance for flaws. It can identify observable deviations from an approved reference and support a decision about a defined population. It cannot, by itself, prove material composition, hidden performance, product safety, or market compliance. The useful question is therefore not simply, “Does this item look good?” It is, “Does this item differ visibly from the approved reference under the conditions and lot scope we agreed?”
Key Takeaways
- Set an approved reference before inspectors count scratches, coating variation, print defects, dents, or missing visible features.
- State the viewing conditions, because light, angle, distance, handling state, and surface cleanliness can change what people see.
- Classify each finding, connect the sample to a defined lot, and record the disposition instead of relying on a general cosmetic opinion.
- Escalate a repeating pattern by its traceable production window, then verify the corrected population against the same reference.
Define the Visual Reference Before Counting Defects
Visual inspection and defect detection become repeatable when inspectors use a reference sample to set a common surface baseline under stated viewing conditions. A reference sample is an approved item used to compare visible appearance and details. It gives an observable deviation a shared context instead of a subjective label.
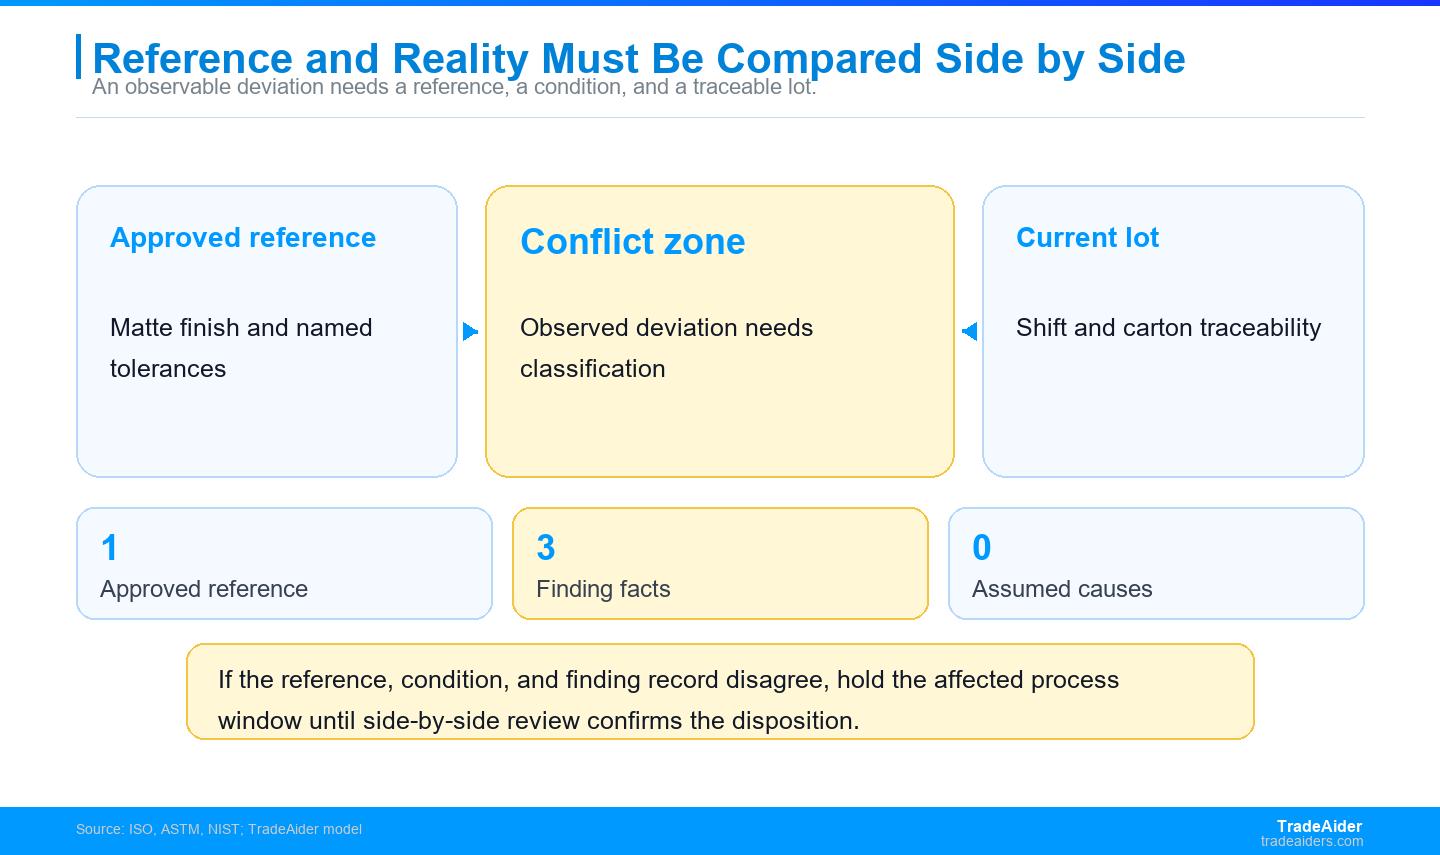
A visual finding becomes decision-ready when the approved reference, observation conditions, and lot traceability are recorded together.
It can be a signed item, a controlled photo set, a production-approved color panel, an annotated drawing, or a product specification that names acceptable and unacceptable features. It should identify the exact configuration being checked, including finish, print version, assembly state, and packaging context. A memory of what the product “should” look like is not a reliable acceptance basis.
Make the reference usable at the point of inspection. Label it with the item version and approval date, say which surfaces matter, and distinguish functional requirements from appearance requirements. A visual check may establish that a logo is visibly misplaced; it does not establish that the ink will remain durable after use. For a broader scope conversation before the visit, review TradeAider's inspection standard.
Build a short comparison note around the sample rather than sending a general instruction to inspect “finish quality.” Name the version, color, material-facing surface, print artwork, acceptable variation, and any part that must be compared after assembly. Say whether an observed difference is a cosmetic review item, an automatic hold, or a question for the buyer. That preparation also makes supplier feedback easier to resolve: both sides can return to the same item and the same acceptance language instead of debating a vague impression after photographs circulate.
For coatings, ISO 4628-1 describes a designation system for the quantity and size of defects and the intensity of appearance changes. The practical lesson is modest but important: describe what changed and how it compares with the agreed reference. Do not turn an appearance observation into a claim about coating chemistry, durability, or cause.
ASTM D2200 likewise covers pictorial surface-preparation guides and requires the applicable guide to be identified in the specification. Your product may use a different guide or a bespoke reference, but the discipline is the same: name the comparison tool before the result is discussed. Before scale-up, confirm who owns approval, where the current item is stored, how the reference travels to the line, and what happens when a new product version is issued. A late replacement image or an unmarked sample can quietly undermine an otherwise careful inspection plan. Bring both samples to the decision point. If the sample or reference needs approval before production scales, arrange a pre-production inspection early.
When a buyer cannot send a physical sample, a controlled photo set can still be useful if it identifies the product version, surface, viewing angle, and details that are intentionally acceptable. It should not be treated as a casual marketing image. The more the reference changes between approvals, the more likely a later visual finding will reflect a document mismatch rather than a production problem. Keep the current comparison material available to the factory, inspector, and buyer before the inspection begins.
Control the Conditions That Change What Inspectors See
A documented process does not make a visual result objective on its own. ISO 9001 specifies quality management system requirements; in an inspection brief, that process mindset translates into defined requirements and a repeatable observation setup. State the light source or environment, the approximate viewing angle and distance, whether the item is clean and assembled, and whether comparison is made beside the approved reference.
Those controls matter because a gloss patch can disappear under one angle and stand out under another. A raised print edge may be obvious at close range but irrelevant at the agreed consumer viewing distance. Protective film, dust, fingerprints, or a partially assembled component can create a false visual signal. The goal is not to impose one universal lighting value. It is to give two trained observers a fair chance to see the same thing and to document when they cannot.
Keep this boundary clear when supplier process evidence is also under review. An audit can reveal whether a factory has controls, while an inspection records what was observed in the current population. Neither result automatically substitutes for the other. To align that distinction with a supplier review, compare the audit standard.
Classify a Finding Before You Count It
A visible difference should be classified before it is counted. ASTM A997/A997M, an investment-casting specification, illustrates the underlying principle by setting visual examination acceptance criteria for a specific product context. Its criteria are not rules for drinkware, electronics, or textiles. They show why an acceptance rule needs to be tied to the product and use case rather than borrowed from a generic defect list.
A decision-ready finding says what was seen, where it was seen, which reference was used, how often it appeared in the selected population, and what action the buyer or factory should consider. It does not guess at a root cause. That distinction keeps a report useful when the next step is containment, rework, engineering review, additional testing, or a product-specific compliance check.
| Record Element | Decision-Ready Entry | What It Does Not Prove |
|---|---|---|
| Observed deviation | Orange-peel texture beside the approved matte finish | The coating process root cause |
| Location and condition | Shoulder area, viewed beside the reference under the agreed setup | All possible appearance conditions |
| Population and action | Shift and carton marks, hold or rework decision, follow-up check | Material conformity or legal compliance |
Photos help when they retain context: include the comparison reference where practical, the affected surface, the lot mark, and a view that shows scale. A close-up without a reference can document that something is visible, but it may not show why the item is outside the agreed appearance range.
Turn a Sample Into a Lot Decision
ISO 2859-1 provides sampling schemes indexed by acceptance quality limit. An Acceptance Quality Limit (AQL) sample is a documented choice of units from a shipment for a defined lot decision. That scope matters. A sample result can support a decision about the selected lot under the agreed plan; it is not a promise that every unit has been observed or that every requirement outside the inspection scope has been proved.
Before counting visual defects, agree the inspection level, sample selection method, defect classes, reference, and accept or reject rule. Then identify the lot with production dates, shift marks, carton marks, purchase-order lines, or other records that match the actual shipment. Mixing a corrected subset with an uncorrected subset can make a sample result hard to interpret, even when the count itself is accurate.
Use the sample plan as a decision framework, not a cosmetic shortcut. If an appearance variation appears concentrated in one marked population, decide whether that population needs separate treatment before it is absorbed into a broader lot. To document the sample basis before the count starts, calculate the agreed AQL sample.
Escalate a Repeating Visual Drift During Production
NIST describes monitoring an observed number or proportion of defectives from samples or lots. For visual work, that does not mean an inspector should invent a control limit on the spot. It means a repeated, traceable observation deserves a different response from a single isolated finding.
When the same deviation clusters by shift, line, mold, workstation, or carton mark, preserve that process window in the record. Confirm whether the comparison was made under the same conditions, photograph representative items, identify the affected population, and bring the buyer or named decision owner into the disposition. A hold can be narrow and practical: it protects the marked window while avoiding an unsupported conclusion about the rest of the order.
Production-stage observation is valuable because the factory may still correct the finish, rework the affected units, or separate a questionable subset before packing hides the trail. Before escalating, compare the affected items with a nearby acceptable unit and the approved comparison material. Confirm that the surface is clean and that the finding is not limited to damaged packaging or transport handling. Then capture the smallest traceable group that lets the factory act: a shift, line, time window, tooling group, or carton mark. The report should say whether production can continue outside that group and what event will trigger a wider hold. This gives the buyer an operational choice instead of an unbounded warning. To catch a pattern while that option remains open, use a during-production inspection.
Worked Scenario: Matte Bottle Coating Drift by Production Shift
The following is an illustrative scenario, not a TradeAider client case. It shows how a visible pattern can support a limited production decision without claiming to diagnose coating chemistry, durability, material composition, or market compliance.
When Shift C's Coating Finish Broke the Reference
An importer is preparing an autumn launch of matte-black insulated drink bottles for retail buyers in the United Kingdom and Australia. The buyer needs a decision while the factory can still rework the finish, not a broad opinion about the whole supplier relationship.
The illustrative order contains 12,000 insulated bottles in 600 cartons. The approved reference has an even matte powder coat, while the visual brief names orange-peel texture, gloss patches, scratches, and coating gaps as separate findings.
The factory has completed six labeled production shifts. Two shifts, covering 4,000 bottles in 200 marked cartons, remain on the floor before final packing; the other four shifts are traceable to separate carton marks.
The first sample from shift C shows orange-peel texture beside the approved matte reference under the agreed light and angle.
A second sample from the same shift shows a gloss patch near the shoulder, while samples from a separate marked shift match the reference.
The inspection record identifies the shift and carton marks but does not establish the coating-process cause.
The repeated appearance drift is more than one isolated cosmetic finding because it appears in two samples from the same traceable shift. The record supports a process-window decision, not a conclusion about coating chemistry or all 12,000 bottles.
Use rework then reinspect for the 4,000 bottles and 200 cartons tied to shifts C and D. Keep the separately marked shifts in their own review population while the affected window is corrected.
Ask the factory to reset the coating setup, segregate the marked process window, and retain the approved reference at the rework station. Record rework completion and carton identities before a follow-up sample is chosen.
Compare reworked bottles side by side with the approved reference under the same stated conditions, then confirm selected cartons carry the corrected shift marking before the final-lot check.
This illustrative scenario is an example of visual trend escalation. It does not determine the root cause, durability, material composition, or market compliance of any bottle.
Keeping the record at shift level gives the buyer a practical way to contain the issue without automatically expanding it to the other marked production. It also gives the factory a concrete rework target. The buyer can ask for the same comparison materials, clear carton identities, and a separate reinspection record when the affected units return. The reinspection request should name the original finding, the rework population, the comparison condition, and the evidence required for a release decision. It should also say whether the buyer wants a new sample chosen from the marked cartons or a broader check after the factory's correction. That traceable handoff is more useful than a promise that the appearance has been “improved,” because it ties the correction to the population that was actually observed. To see the reporting approach behind that handoff, see how TradeAider keeps visual checks decision-ready.
Use Final Inspection to Confirm the Corrected Lot
For TradeAider, a pre-shipment inspection (PSI) is a final inspection of a completed order with at least 80% packed for export. It represents a stable product and packaging population ready for a release review.
Pre-shipment inspection readiness means 100% of the order quantity is completed and at least 80% is packed for export. This timing matters after a visual issue because a final check should represent the product and packaging population the buyer is actually preparing to release. It is not the stage to reconstruct an earlier process window that was never marked or to infer which cartons were reworked from an incomplete record.
For a corrected lot, give the final inspection scope both a normal lot decision and a rework-verification question. The report should say which carton marks or production records identify the corrected population, whether the same approved visual reference was used, and whether any reworked units were selected for a separate comparison. That preserves the difference between confirming a current finished lot and assuming that an earlier rework instruction was completed correctly.
Before the final visit, reconcile the carton count, selected packing status, and rework record with the purchase-order line being released. Ask the factory to keep corrected and uncorrected material physically distinct until the scope is confirmed. If the buyer decides to accept a limited variation, record that decision against the same product version and population rather than relying on an informal message. The final report can then show what was checked, what was separated, and which visible conditions remained within the approved comparison basis.
Also check that final labels, packaging, visible accessories, and presentation match the approved configuration that the buyer intends to ship. Those checks can confirm visible consistency within the agreed scope. They do not replace laboratory testing, material verification, or a review of applicable obligations. Once the corrected lot is ready, book an inspection for your ready-to-ship lot.
Give the Inspector a Visual Brief
A concise visual brief saves time because it tells the inspector what comparison will produce a useful decision. Include the approved reference and version, the surfaces and configurations to check, the viewing conditions, named defect categories, the lot or carton identifiers, the photos needed, the sampling instruction, and the person who owns the disposition. ISO 10005 provides guidance for quality plans for an intended product, project, or contract; use that product-specific mindset instead of sending a vague request to “check appearance.”
Specify what should happen when the inspector sees a difference that is not covered by the brief. The best default is not a guess. It is a documented hold on the relevant marked population while the buyer compares the evidence with the approved item and decides whether rework, concession, or further review is appropriate. Include the contact who can make that call and the time zone for a prompt response. This turns an inspection report into a practical handoff instead of a list of images that must be interpreted later.
For importers buying from China, real-time visibility is most helpful when a reported visual issue already includes the reference, condition, population, and decision owner. It lets the buyer respond to a specific observation while a factory can still act, rather than trying to reconstruct the decision after the shipment is closed. It also gives procurement, product, and quality colleagues one record to review before they approve a concession, rework, additional check, or release. With the brief ready, ask TradeAider to review your inspection brief.
Frequently Asked Questions
What Can a Visual Inspection Actually Detect?
Visual inspection can identify observable deviations from an agreed reference, including scratches, dents, coating variation, print defects, and missing visible features. It is strongest when the reference, viewing conditions, product configuration, and lot scope are recorded in advance. A visual result alone does not establish hidden material composition, product performance, durability, safety, or legal compliance. Those questions may need testing, engineering review, documentation, or another product-specific evidence path.
How Should Buyers Set Visual Acceptance Criteria?
Buyers should set visual criteria with an approved reference, named defect types, viewing conditions, location rules, and a documented disposition for serious findings. Start with the surfaces that affect the product's use, retailer presentation, or brand promise, then state what counts as acceptable variation. Include photos or samples when language could be interpreted differently. Keep the criteria product specific; a tolerance suitable for one finish or sales channel may be inappropriate for another.
Can AQL Sampling Detect Every Cosmetic Defect?
AQL sampling cannot guarantee that every cosmetic defect will be found because it supports a defined lot decision from a planned sample. It becomes useful when the lot, inspection level, defect classes, acceptance rule, and reference all match the population being assessed. If an appearance issue clusters in a marked shift or carton group, treat that traceable window separately rather than assuming the result represents every unit in mixed production.
When Is a Pre-Shipment Inspection Ready to Start?
For TradeAider, a pre-shipment inspection is ready when 100% of the order is complete and at least 80% is packed for export. The buyer should also make the approved reference, current packaging configuration, lot identifiers, and any earlier corrective-action records available. That gives the inspection a stable population and a clear comparison basis, especially when a previously affected subset has been reworked and must be confirmed separately.

Articles Connexes

Développez votre entreprise avec le Service TradeAider
Cliquez sur le bouton ci-dessous pour accéder directement au Système de Service TradeAider. Les étapes simples de la réservation et du paiement à la réception des rapports sont faciles à utiliser.