
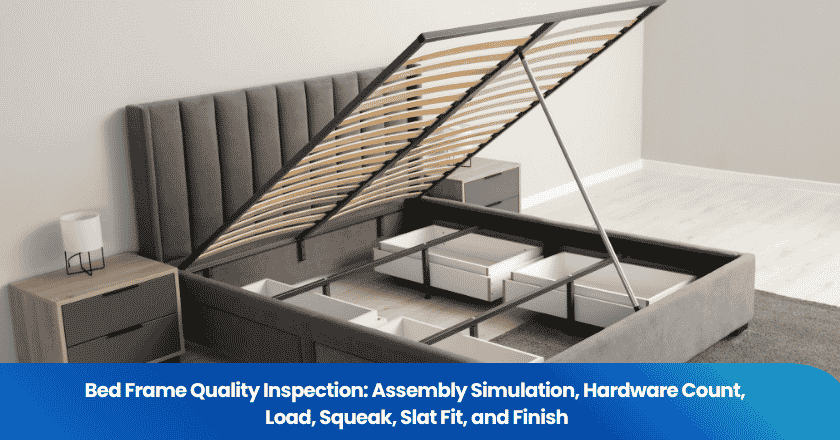
Bed frame quality inspection should start with a complete bed assembled from production cartons, using the parts and instructions the customer will receive. Check that the hardware is correct, joints fit without modification, slats stay supported, and the frame performs under the agreed load without unacceptable movement, damage or noise. A neat headboard and a complete screw bag cannot tell you whether the finished bed will work.
For importers and quality managers, the useful question is where assembly or use could expose a defect that a visual check misses. For ordinary adult bed frames made from wood, metal or upholstered components, the six checks below connect those potential problems with observable conditions. Bunk beds, medical beds and powered or storage-lift mechanisms need additional, product-specific assessment beyond these checks.
Six Checks to Put on the Bed Frame Inspection Sheet
Use the following checks on identified samples from the ordered model and size. Before the visit, fill in the drawing revision, hardware list, assembly instructions, load method and agreed defect limits. Where a criterion is missing, record the observation and obtain the requirement; do not turn an inspector's impression into a pass threshold.
- Assembly simulation: build the complete bed in the instructed sequence. Record any misaligned hole, forced joint, inaccessible fastener or instruction error. Compare dimensions, alignment and assembly requirements with the approved drawing and sample.
- Hardware count and identity: count each fastener type separately, including washers, brackets, tools and declared spares. Check length, thread and head type against the parts list; an equal total count can conceal a wrong screw.
- Slat fit and support: measure spacing and seating separately. Check end supports, holders, retention, center rail and any support legs. Compare with the frame drawing and the intended mattress requirements.
- Load performance: use the specified bed configuration, loading positions, forces or masses, duration and sequence. Record movement during loading and any permanent change afterward against the agreed limits.
- Squeak and movement: repeat the specified use simulation in a quiet area. Locate noise at joints, slat holders or floor contacts, and record its repeatability before tightening or lubricating anything.
- Finish and accessible surfaces: inspect visible faces and hidden contact areas. Compare color and cosmetic defects with the approved reference; separately flag sharp edges, splinters, loose staples and damaged structural joints.
For each sampled bed, leave space for: carton identification, size and variant, parts-list revision, assembly observations, measurements, test conditions, before-and-after photographs, result and follow-up. Keep the original observation alongside any result obtained after an adjustment.
Assemble the Bed as the Customer Would
A meaningful assembly simulation uses a complete set of packed components, not a showroom bed that has already been fitted and adjusted. Select the cartons required for one saleable unit and keep them together. Confirm that the size, color and component codes agree before opening them, especially when the headboard, rails and support system ship separately.
Separate packages can contain essential structural parts. For example, IKEA's US MALM Full bed frame listing says the SKORVA midbeam is included in the price but packaged separately, while the slatted base and mattress are sold separately. That is a model-specific example; use the ordered product's packing list to establish what constitutes a complete set.
Follow the supplied sequence, including any instruction to leave connections loose until the frame is aligned. Use the supplied tools or the tool types specified in the instructions. Do not drill a hole, substitute a fastener or force a rail into place to finish the exercise. If assembly stops, photograph the two mating parts, their orientation and the affected step before the supplier intervenes.
Check the internal mattress opening, rail height and overall dimensions at the specified reference points. On a rectangular frame, compare diagonals as one check for squareness, but judge the difference against the drawing tolerance. Verify that the headboard and footboard sit as intended and that all fitted support feet contact the inspection surface after the prescribed adjustment. A protruding bolt or tilted bracket may explain both poor fit and later movement.
Record whether instructions identify mirrored parts clearly and whether fasteners can be reached with the specified tool. Assembly time is useful only when the method and number of assemblers are recorded; a factory technician familiar with the product is not a reliable proxy for a first-time customer's assembly time.
Count Hardware by Type, Then Check That It Fits
Hardware completeness is a type-by-type comparison with the bill of materials, or BOM—the approved list of components and quantities. Lay out each packet before assembly. Separate similar-looking bolts by measured length, thread and head geometry, and distinguish required parts from deliberately supplied spares. Check washers, dowels, connector nuts, brackets and tools as well as screws.
A pictorial inventory can help match parts to their assembly steps. The MALM assembly instructions show numbered fittings and quantities before the assembly sequence. Use the equivalent approved document for the inspected bed; fittings and counts from another model are not interchangeable acceptance criteria.
During assembly, watch for cross-threading, stripped threads, rotating inserts and bolts that reach the end of a blind hole before clamping the joint. A bolt can feel tight while the bracket remains loose. Conversely, a bolt that is too long may project into a mattress contact area or damage a finished face. Verify the joint condition rather than relying solely on resistance at the tool.
Where tightening torque is specified, use the stated tool and setting and record them. Do not invent a torque value or keep tightening until movement disappears. Excess tightening can crush a wood-based panel or damage an insert. Keep any unauthorized replacement hardware with the failed sample so the buyer can see why the original packed set did not assemble correctly.
Check Slat Spacing, End Seating and Center Support Separately
Slat spacing is the clear gap between adjacent slats; end seating is the portion of a slat resting on or engaged with its support. They answer different questions. Correct spacing helps establish the specified mattress support pattern, while adequate seating and retention keep individual slats in position. Check both against the approved design before loading the bed.
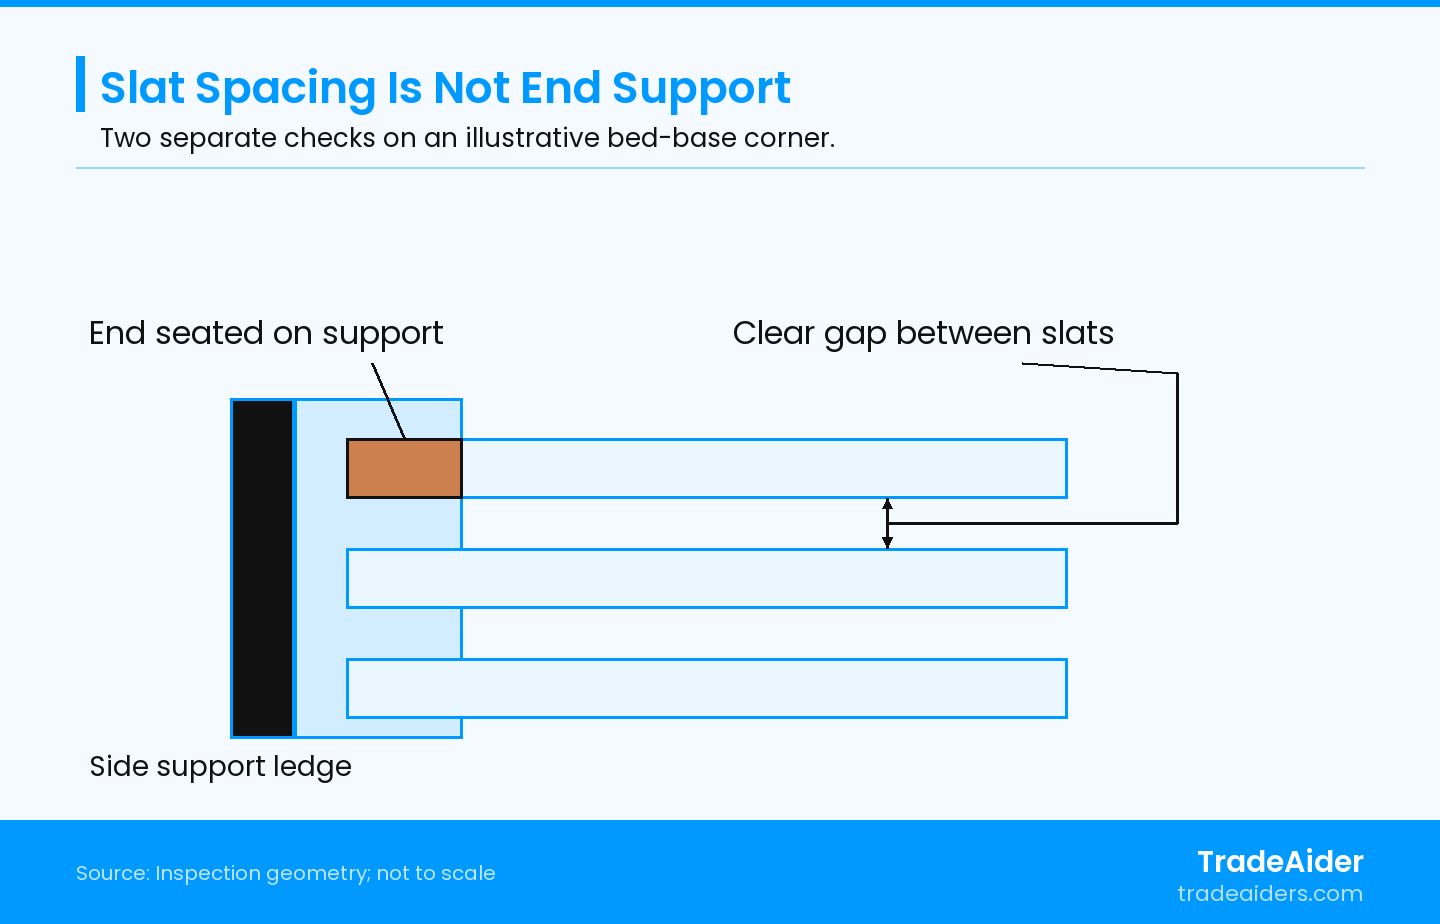
Illustrative top view, not to scale. Check both the gap between slats and each end support against the approved design; the drawing does not prescribe dimensions or a universal construction.
Count the slats and confirm their material, dimensions and orientation. Measure gaps across the bed rather than checking only one convenient location. Inspect each end for full engagement in its holder or the specified overlap on a support ledge. Look for short slats, cracked holders, twisted rails and missing retaining parts. For designs that allow movement, assess retention through the prescribed use simulation rather than imposing a rigid connection that the design does not require.
Mattress requirements also matter. TEMPUR's Australia/New Zealand bed-base guidance specifies slat width and spacing, secure fastening at each end, and center support for bases larger than single size. Those conditions apply to the mattresses covered by that regional guidance. Confirm the actual mattress manufacturer's requirements instead of treating any one brand's spacing as a universal bed-frame standard.
Where a center rail is fitted, check its attachment at both ends and the position of each support leg. An adjustable leg should make the specified floor contact without lifting the surrounding frame. Photograph the underside before and after loading so movement at a holder, bracket or support foot can be compared. Also inspect slat surfaces for splinters and protrusions that could damage the mattress even when the support geometry is correct.
Specify the Load Setup Before Interpreting the Result
A bed frame load result is meaningful only for the configuration and loading method used. Record the frame size, base, mattress or specified loading pad, support-leg settings, load positions, applied weight or force, duration and sequence. A distributed load across the sleeping surface and a concentrated load near an edge stress the bed differently; passing one does not establish performance under the other.
The public scope of BS EN 1725:2023 covers safety, strength and durability of fully assembled adult beds for domestic and non-domestic use. It excludes categories including bunk, high and medical beds. Its stated basis of persons weighing up to 110 kg is not an instruction to place 110 kg on every bed as a factory acceptance test. Obtain the applicable full method and requirements when testing to the standard.
For an agreed factory check, establish the unloaded reference measurements first. During loading, observe deflection—the displacement under load—at the specified points, along with joint opening, support movement and slat displacement. After unloading and any specified recovery period, measure again for permanent deformation. Record cracks, weld separation, loose inserts or detached supports independently of whether a measured displacement is within its limit.
Use suitable equipment and a controlled test area; people standing or jumping on a bed are not calibrated test loads. Stop if a component fails or movement creates a hazard. Repeated durability loading, impact testing and a complete standards assessment require their specified equipment and procedures. A short shipment inspection should state exactly which checks were performed rather than describe the bed as certified from a limited test.
Locate the Squeak Before Trying to Remove It
A squeak check should establish when the sound occurs and which parts move at that moment. Start on a clean, level surface with the bed fully assembled and adjusted as instructed. Use the agreed mattress or loading arrangement, repeat the same movement or loading sequence, and note whether the sound comes from the frame, slat contacts, support feet or another source.
Record the loading location, movement direction and repeatability. A short video can connect the sound with visible movement, although an ordinary phone recording is not a calibrated sound-level measurement. If a numerical noise limit is required, define the instrument, microphone position, background conditions and test sequence beforehand. Avoid an unexplained “noise OK” result that another inspector cannot reproduce.
Hypothetical example: a sampled bed is quiet under a centered load but clicks repeatedly when the prescribed load moves toward one side. Inspection reveals a slat end shifting inside a damaged holder. Tightening the headboard bolts would not address that observation. The useful next step is to document the holder, compare it with the approved part and check whether the same defect appears on additional samples under the agreed follow-up plan.
After an authorized replacement or adjustment, repeat the same sequence and retain both results. Do not add felt, lubricant or extra screws unless they are part of the approved construction or an explicitly approved correction. A quiet retest after an unrecorded modification says little about the packed products the customer will receive.
Separate Appearance Defects from Contact and Structural Defects
Inspect finish under the agreed lighting and viewing conditions, using the approved color and appearance reference. Check headboard faces, rail edges, corners and mating components together so differences in color or sheen are visible. Record defect size and location; a photograph without scale or an identified surface is difficult to compare with a cosmetic limit.
For wood and wood-based components, look for splits, chipped edges, exposed substrate, lifting veneer and damaged inserts. For metal frames, inspect burrs, corrosion, coating damage and visible weld defects. On upholstered parts, check seam alignment, loose threads, exposed staples and fabric trapped in assembly points. Sharp or loose features that can contact a hand or mattress deserve separate attention from a small cosmetic mark.
If coating adhesion testing is specified for a metal frame, ASTM D3359-23 addresses tape-based assessment of relatively ductile coating films on metallic substrates. It does not make an improvised tape pull on any wood, fabric or finish an equivalent test. Agree the method, coating conditions, sample location and acceptance rating, and identify tested pieces that can no longer be sold as undamaged stock.
Turn the Findings into a Clear Supplier Follow-Up
Separate what failed from what could not be judged. A missing bracket, a crack after the specified test and an unavailable load criterion require different follow-up. Identify the affected model, size, cartons and components, then explain the practical consequence: incomplete assembly, lost support, repeatable noise or an appearance mismatch. Keep photographs tied to those observations.
Agree defect classifications and sampling before the visit. TradeAider's inspection standard guidance explains the role of customer requirements and sampling in inspection arrangements. The sampling plan and any separately specified functional-test sample size should be clear; neither supplies a missing bed-specific load or fit tolerance.
For pre-shipment inspection, the order quantity must be 100% complete and at least 80% packed for export. Send the bed-frame drawing, BOM, instructions, approved references, mattress compatibility requirements and test conditions before the visit so the planned checks match the product being shipped.
Contact our team to arrange a bed frame inspection and confirm the assembly, measurement and functional checks for your order.
Frequently Asked Questions
Does one assembled sample cover every bed size?
No. Different sizes may use different rail lengths, slats, center supports or hardware packs. Set sample coverage around the actual construction and risk differences. A result from one size should not automatically be reported as a completed assembly or load check on another.
Can a bed frame be inspected without a mattress?
Many dimensional, hardware and assembly checks can be completed without a mattress. Load and noise checks must use the mattress, pad or other arrangement specified by the chosen method. State that arrangement in the report; substituting a bare-frame test can change load distribution and contact noise.
Does a squeak always mean the bed is structurally unsafe?
No. Sound alone does not establish structural failure, and a quiet bed does not prove adequate strength. Locate the moving contact and assess it against the design and test results. A sound associated with cracking, a loose structural joint or lost support requires investigation beyond cosmetic noise acceptance.
Should extra screws be reported as a hardware defect?
Declared spare hardware is acceptable when it matches the approved packing list. Unexplained leftover parts after assembly need checking: they may be spares, incorrect extras or required parts that were omitted from an assembly step. Reconcile them with the instructions before judging completeness.
Artigos Relacionados


Expanda seu negócio com o Serviço TradeAider
Clique no botão abaixo para entrar diretamente no Sistema de Serviço TradeAider. Os passos simples desde a reserva e pagamento até o recebimento de relatórios são fáceis de operar.