You achieve reliable quality results when you follow systematic inspection at every stage. Inspection qualité principles help you spot defects early and prevent costly recalls. Industry studies show that regular inspections reduce workplace injury rates and lower injury costs. These methods support product consistency and encourage ongoing improvement. Use this guide to strengthen your inspection process and maintain high quality standards.
Key Takeaways
- Define clear quality objectives to align inspection processes with your organization's goals. Use checklists to ensure consistency and accountability.
- Follow recognized international standards like ISO to strengthen your inspection process and meet customer expectations effectively.
- Implement a robust control plan that includes measurable quality objectives, assigned roles, and continuous improvement strategies to enhance product quality.
- Utilize effective sampling methods to select the right sample size based on risk levels, ensuring efficient inspections while maintaining high quality.
- Establish strong feedback loops to drive continuous improvement, allowing for quick responses to inspection findings and enhancing overall quality management.
Quality Standards
Define Objectives
You set the foundation for effective quality control methods by defining clear objectives. Start by aligning your quality standards with your organization’s goals. Use a quality management system to ensure every process supports these objectives. When you focus on total quality management, you create a culture where everyone values quality assurance.
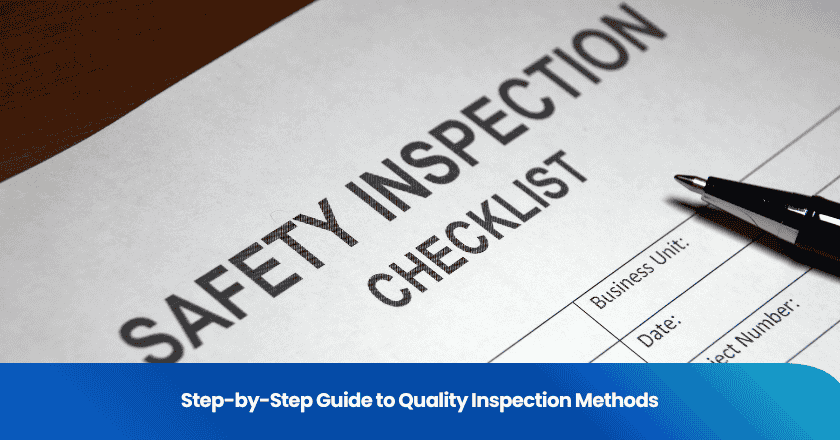
To make your standards actionable, use a checklist for each product or process. This checklist should include specific, measurable requirements. For example, you might list minimum tolerances, physical attributes, or performance benchmarks. A checklist helps you maintain consistency across all inspections and supports quality control methods at every stage.
Tip: Use a checklist to guide your inspection qualité team. This ensures that every inspector evaluates products using the same criteria.
Inspection qualité Principles
You strengthen your inspection qualité process by following recognized international standards. These standards shape your quality control methods and help you meet customer expectations. The table below summarizes some of the most widely used ISO standards in manufacturing:
| ISO Standard | Description |
|---|---|
| ISO 9001 | Guidelines for auditing management systems, focusing on quality management and accountability. |
| ISO 45001 | International standard for occupational health and safety, promoting risk mitigation and workplace safety. |
| ISO 14001 | Framework for environmental safety and sustainability practices in manufacturing. |
| ISO 50001 | Focuses on energy management and reducing carbon emissions. |
| ISO 13485 | Standards for medical device manufacturers ensuring safety and compliance. |
| ISO 22000 | Framework for food safety management systems in food and beverage manufacturing. |
You apply inspection qualité principles by using quality control methods such as pre-production, in-process, and final inspections. Each stage uses a checklist to verify compliance with quality assurance requirements. You also conduct on-site audits to confirm adherence to total quality management practices.
To document and communicate your standards, follow these steps:
- Define quality standards for each product line so inspectors know what to check.
- Set measurable requirements in your checklist to support quality control methods.
- Communicate standards from leadership to all employees to ensure accountability.
- Specify product measurements and tolerances in your checklist.
- Build a feedback system for inspectors to report findings and improve total quality management.
You create a robust inspection qualité process by integrating these quality control methods and principles. This approach ensures your inspections deliver consistent, reliable results.
Product Specifications
Review Specs
You begin every inspection by reviewing product specifications. This step ensures you understand the requirements for quality control and design. You read through the specifications to identify essential criteria and standards. A product inspection checklist simplifies this process. The checklist outlines all necessary items for quality checks and on-site testing. You use it to verify that each product meets the established criteria. This approach increases efficiency and consistency during inspections.
You integrate specification reviews into your quality management system by documenting, monitoring, and periodically reviewing all activities that impact product quality. You investigate complaints and non-conformances to find root causes and implement improvements. You plan to monitor process performance and product quality to identify areas for continual improvement.
Tip: Always keep your checklist updated to reflect changes in product specifications or quality standards.
Critical Features
You focus on critical features during inspections to ensure compliance with specifications. A critical characteristic is an essential feature that must be manufactured according to approved specifications. Non-adherence can negatively impact safety, so you test or inspect these features before shipment.
You systematically examine and evaluate products to confirm they meet specified quality standards and buyer requirements. You check various attributes to detect defects or non-conformities:
- Appearance
- Construction
- Function
- Size
- Weight
- Color
- Packaging
You prioritize these features because they directly affect product performance and customer satisfaction. You document findings and address any issues promptly to maintain high standards.
Note: Inspecting critical features helps you prevent safety risks and ensures every product meets expectations.
Control Planning
Effective quality control Steps
You build a strong foundation for product quality control by developing a clear control plan. Start by setting measurable quality objectives that align with your business goals. Identify key processes and activities that impact product quality control. Assign roles and responsibilities so everyone knows who manages each inspection process and corrective action. Establish inspection and testing procedures, including frequency and acceptance criteria, to guide your inspection process. Create documentation and reporting systems to monitor quality and track inspections. Plan for continuous improvement by regularly evaluating quality metrics and updating your inspection process. Allocate resources and set realistic timelines for implementation.
Tip: Use a control plan checklist to ensure you cover every step in your inspection process and maintain effective quality control.
Essential Steps for a Control Plan:
1. Set quality objectives and standards.
2. Identify key processes and activities.
3. Assign roles and responsibilities.
4. Establish inspection and testing procedures.
5. Develop documentation and reporting systems.
6. Plan for continuous improvement.
7. Allocate resources and set timelines.
Process Control
You enhance your quality control process by applying process control techniques throughout production. These techniques help you reduce defects and improve product quality control. Use statistical process control to monitor your process in real time and distinguish between normal and special cause variations. Apply poka-yoke mechanisms to prevent errors during assembly. Implement the 5S methodology to organize workspaces and make abnormalities visible. Value stream mapping allows you to visualize each step in your process and eliminate waste.
You can also learn from industry leaders who use advanced process control systems. For example, some companies use sensors and analytics to monitor quality metrics and address defects immediately. Others conduct workshops to analyze root causes and develop solutions. These strategies strengthen your inspection process and support ongoing product quality control.
Note: Effective process control reduces defects, improves consistency, and ensures every inspection process delivers reliable results.
Sampling
Sample Size
You design an effective inspection plan by selecting the right sample size for each batch. The central limit theorem guides your decision, showing how sample means distribute normally. This principle helps you monitor sample size requirements and maintain consistent quality while controlling costs. You choose the sample size based on risk level and supplier history. For low-risk products or trusted suppliers, you use General Level I, which requires the smallest sample size. General Level II fits most standard inspection plans and uses a moderate sample size. General Level III applies to higher-risk products and demands the largest sample size for thorough scrutiny.
- GI (General Level I): Use for reduced inspection plans and low-risk batches.
- GII (General Level II): Apply for normal inspection plans and standard risk.
- GIII (General Level III): Select for tightened inspection plans and high-risk products.
You may use statistical methods such as t-tests or chi-square tests for smaller datasets. For larger datasets, regression analysis helps you determine the optimal sample size. You adapt your inspection plan to the batch size and product type, ensuring every inspection delivers reliable results.
Tip: Always match your sample size to the risk level and inspection plan to maximize efficiency and maintain high quality.
Acceptance Sampling
You improve the reliability of your inspection plan by using acceptance sampling. This method examines only a fraction of the production output, reducing costs and increasing efficiency. You compare defects found in the sample against pre-defined acceptance criteria to decide if the lot meets quality standards. You classify defects as major, minor, or critical, then use acceptance quality limits (AQL) to guide your decisions.
You integrate acceptance sampling into your inspection plan alongside process capability studies, statistical process control, and preventive action programs. You draw random samples, inspect each unit, and accept or reject the lot based on the number of defects found. This approach supports consistent quality and strengthens your overall inspections.
Testing Methods
Visual Inspection
You rely on visual inspection methods to identify surface defects and ensure product quality. These techniques range from manual checks to advanced automated systems. You select the most suitable approach based on product type, production volume, and risk level.
You also use spot checks through random sampling and full manual product review to catch flaws early. Remote viewing with visual technology and automated onsite visual checks help you maintain consistent inspections.
Tip: Use magnifiers, calibrated lighting, and digital cameras to improve defect detection and support your analysis.
Functional Testing
You apply functional testing methods to verify that products perform as intended. You tailor these techniques to each product type, focusing on critical features and user requirements. Follow these steps to optimize your testing process:
1. Prioritize tests based on risk to catch significant issues early.
2. Engage testers early in development for better planning and analysis.
3. Strategically apply test automation for repetitive tasks and regression testing.
4. Regularly review and update test cases to reflect changes in functionality.
5. Focus on testing in real device environments to uncover hidden issues.
You use measurement tools such as multimeters, oscilloscopes, and load testers to validate product performance. These methods ensure your inspections deliver reliable results and maintain high quality standards.
Non-Destructive Methods
You use non-destructive testing methods to inspect products without causing damage. These techniques include ultrasonic analysis, X-ray inspection, and magnetic particle analysis. The table below highlights the advantages of non-destructive methods:
| Advantage | Description |
|---|---|
| Ensures High Quality | Maintains strict quality standards from raw materials to finished products. |
| Ensures Safety Standards | Identifies defects that could lead to severe accidents, especially in high-risk industries. |
| Reduces Overall Costs | Prevents damage and costly repairs, potentially reducing maintenance costs by up to 30%. |
| Guarantees Detailed Inspection | Provides thorough inspections without affecting performance, allowing early identification of issues. |
| Reduces Operational Delays | Minimizes disruptions by allowing testing without shutting down operations, improving productivity. |
| Environmentally Conscious | Reduces waste and environmental impact by avoiding destructive testing methods. |
| Maintains High Standards | Helps meet strict safety regulations and avoid penalties in various industries. |
You select non-destructive techniques based on material type, defect risk, and production environment. These methods support your analysis and help you maintain high quality throughout your inspection process.
Inspection Stages
Incoming Inspection
You start by verifying the quality of materials and components as soon as they arrive. This step ensures that only items meeting your standards enter production. Follow these procedures for a thorough incoming inspection:
1. Review all receipts and documentation to confirm that deliveries match your orders.
2. Conduct a visual inspection of materials, checking labeling, packaging integrity, and cleanliness.
3. Select a representative sample for detailed testing, including dimensional and functional checks.
4. Arrange laboratory testing for specific components if required.
5. Immediately flag and document any non-conforming units, then provide feedback to your supplier.
6. Store all new, untested material in a separate area until you complete the inspection.
7. Reject and set aside any material that does not meet your specifications.
Tip: Keeping non-conforming materials separate prevents them from entering your production line and protects your quality standards.
In-Process Inspection
You monitor products during manufacturing to catch errors early. In-process inspections help you identify flaws at each stage, making it easier to correct problems before they escalate. This proactive approach saves time and resources. By evaluating products continuously, you address defects when they are most manageable and less costly to fix. You maintain a steady focus on quality throughout the production process, which reduces the risk of large-scale issues and supports consistent results.
Final Inspection
You perform a final inspection to confirm that finished products meet all quality requirements before shipment. This stage involves a comprehensive audit against your release criteria.
Inspectors check several critical aspects to ensure compliance:
| Criteria | Description |
|---|---|
| Visual Appearance | Check for surface defects and overall look. |
| Functional Performance | Test to ensure products operate as intended. |
| Packaging Integrity | Confirm packaging is intact and meets shipping standards. |
| Device Operation | Power up electronics to verify functionality. |
| Firmware Verification | Ensure correct firmware version is installed. |
| Label Accuracy | Check that labels are correct and compliant. |
| Leak Tests | Test for leaks in medical devices. |
| Alarm Functionality | Validate alarms in medical devices work properly. |
You complete these inspections to guarantee that every product leaving your facility upholds your quality promise.
Reporting
Quality control inspections
You improve your inspection process by documenting quality control inspections with precision and consistency. You use check-sheets to guide inspectors, ensuring every inspection covers all required points. You rely on a quality control plan to outline objectives, standards, and procedures for each inspection. You monitor trends and anomalies with quality control charts, which help you identify areas for improvement. You select the right chart for your needs, such as X-Bar charts for average values, R-Charts for ranges, P-Charts for defect proportions, and C-Charts for defect counts.
Tip: You maintain clear inspection reports to support traceability and accountability throughout your quality control inspections.
Defect Recording
You structure defect recording to facilitate root cause analysis and corrective actions. You collect defective samples, customer return documentation, and production records to preserve evidence. You create a chronological order of events to establish patterns in defects. You analyze the data to determine root causes, such as improper seal formation or inadequate operator training. You communicate findings to management and recommend corrective actions. You track defect rates after implementing solutions to verify their effectiveness.
- You collect and analyze information to identify product and quality problems.
- You ensure the right teams are in place for data collection and investigation.
- You facilitate clear communication to minimize bias in the analysis.
- You implement corrective actions and verify their effectiveness.
Note: You use defect recording to strengthen your inspections and maintain high quality standards.
Communication
Feedback Loops
You drive continuous improvement by establishing strong feedback loops in your inspection process. When you share inspection findings quickly and accurately, production teams respond faster. Crews receive clear direction on next steps, and clients see measurable progress. Consistent inspections ensure that reports flow automatically into management systems, giving office teams real-world visibility for better planning. You communicate findings to all stakeholders, discuss identified hazards, and develop action plans to address them. Taking action matters as much as identifying issues. Early detection of problems reduces the cost of fixing defects and minimizes wasted resources. You improve test accuracy and adapt to changing requirements, which helps you refine your workflow. Feedback loops allow you to identify bottlenecks and inefficiencies, leading to a smoother process and faster improvement. By catching issues early, you reduce time-to-market and support ongoing quality improvement.
Tip: Use timely field reports and regular team meetings to keep everyone informed and engaged in continuous improvement.
Corrective Actions
You implement corrective actions based on inspection data to ensure lasting improvement. Start by conducting a root cause analysis using methods like the 5 Whys or 8D. Develop a corrective action plan that details corrections and sets clear timelines. Communicate the plan to key personnel and assign tasks. Provide the necessary resources for implementation. Follow up to assess effectiveness and document results.
The table below outlines these steps:
| Step | Description |
|---|---|
| 1 | Conduct root cause analysis using techniques like 5 Whys or 8D. |
| 2 | Develop a corrective action plan detailing corrections and timelines. |
| 3 | Communicate the plan and assign tasks to key personnel. |
| 4 | Implement the corrective actions and provide necessary resources. |
| 5 | Conduct follow-ups to assess effectiveness and document results. |
You enhance leadership involvement by communicating changes and providing channels for feedback during implementation. Share updates and lessons learned with all employees. This approach supports continuous improvement and strengthens your quality culture. You ensure that every inspection leads to real improvement and higher quality standards.
You achieve reliable inspection results when you follow each step in your process. Systematic methods help you maintain consistent quality and reduce defects.
- Inspectors verify items meet standards, checking for defects and ensuring high-quality products reach consumers.
- Compliance with safety standards is critical, especially in electronics, where neglect can lead to significant issues.
- Organizations with structured inspections see a 30% increase in successful evaluation outcomes.
You benefit from enhanced customer satisfaction, reduced return rates, and improved operational efficiency. Tracking improvements becomes easier with automation, dashboards, and data analytics. Regular review and improvement of your inspection process support ongoing quality gains.
FAQ
What is the main goal of a quality inspection?
You aim to verify that products meet established quality standards. This process helps you prevent defects and ensures customer satisfaction. Consistent inspections support your commitment to delivering reliable results.
How often should you perform quality inspections?
You should schedule inspections at every critical stage of production. Regular checks help you maintain high quality and catch issues early. You improve efficiency and reduce the risk of costly errors.
Which tools do you need for effective quality inspections?
You use checklists, measurement devices, and visual aids to support your inspection process. These tools help you identify defects and confirm that products meet quality requirements.
How do you document inspection results?
You record findings using standardized forms and digital systems. Clear documentation allows you to track trends, analyze data, and improve your quality management process.
What actions should you take if you find defects during inspection?
You separate defective items and investigate the root cause. You implement corrective actions to prevent recurrence and maintain consistent quality across future inspections.
Grow your business with TradeAider Service
Click the button below to directly enter the TradeAider Service System. The simple steps from booking and payment to receiving reports are easy to operate.

