- About Us

- Our Services
- Your Industry
- Resources
- News & Blog
Verifying suction power and auto-recharge in vacuum & robot cleaner inspection ensures every robot vacuum cleaner performs at its best.
Quantitative measurement, such as checking suction in Pascals or Air Watts, directly impacts a robot's cleaning ability and dirt removal. TradeAider's professional inspectors use these methods:
- Tactile tests for strong suction at the vacuum nozzle
- Paper tests to confirm the robot vacuum cleaner can lift debris
- Suction gauge readings matched to manufacturer claims
Functional checks confirm the robot finds its dock and recharges automatically. Regular vacuum & robot cleaner inspection boosts cleaning results and device reliability. TradeAider's real-time reporting keeps every robot vacuum cleaner inspection transparent and effective.
Key Takeaways
- Verify suction power in kilopascals (kPa) to ensure robot vacuum lifts dirt effectively. Higher kPa ratings indicate better cleaning performance.
- Use specialized tools like suction gauges to measure suction power accurately. Compare results to manufacturer claims for quality assurance.
- Perform routine maintenance, such as emptying dustbins and cleaning filters, to keep suction power strong and extend the vacuum's lifespan.
- Check the auto-recharge function regularly. Ensure the charging dock is clear of obstacles and the sensors are clean for optimal performance.
Suction Power in Robot Vacuum Cleaner Inspection
Suction Power Basics
Suction power stands as one of the most important features in robot vacuums. This measurement shows how well a vacuum can lift dirt, dust, and debris from floors. In robot vacuums, suction power is measured in kilopascals, or kPa. This unit tells users the difference between normal air pressure and the pressure inside the vacuum hose. When a robot vacuum creates a strong pressure difference, it produces high suction. High suction power means the vacuum can pick up more particles, even from deep carpet fibers.
In Europe, kPa is the standard for measuring maximum suction. This value is highest when airflow is blocked, so it shows the peak suction power a vacuum can reach. However, maximum suction does not always mean better cleaning performance. Other factors, such as airflow and air watts, also affect how well a vacuum cleans. Still, kPa remains a key number for comparing robot vacuums.
TradeAider's inspectors use special tools to measure suction power on-site. They check the actual kPa value and compare it to the vacuum's rated specifications. If the measured suction power falls below the claimed value, the vacuum does not pass inspection. This process ensures that every robot vacuum delivers the high suction power promised by the manufacturer.
Why kPa Matters for Robot Vacuums
Kilopascals play a big role in robot vacuums because they show the strength of the vacuum's suction. A higher kPa means the vacuum can lift heavier dirt and larger debris. This is important for cleaning hard floors, carpets, and even pet hair. Robot vacuums with high suction power remove more dust and keep homes cleaner.
Suction power also affects other features. For example, strong suction helps robot vacuums clean corners and edges better. It also supports advanced features like automatic dirt detection and variable suction modes. TradeAider's inspection process checks these features to make sure the vacuum's suction power matches its technical claims. This protects buyers and ensures reliable cleaning performance.
Tip: Always check the kPa rating when choosing a robot vacuum. Higher suction power means better cleaning results and more effective features.
Suction Power Verification Process
Tools for Measuring Suction Power
Inspectors use several specialized tools to measure suction power during a vacuum inspection. Each tool provides a different way to check the vacuum's ability to lift dirt and debris. The following table shows the most common measurement units and devices used in the test process:
| Measurement Unit | Description |
|---|---|
| Air Watts (AW) | Combines airflow and vacuum pressure for cleaning performance. |
| Pascals (Pa) | Measures pressure created by the vacuum, commonly used for small vacuums. |
| PSI | Another pressure measurement unit, mainly in English-speaking countries. |
| CFM | Measures airflow; anemometers are used for this. |
| Suction Gauge | Connects to the intake to measure suction directly. |
A suction gauge remains the most direct tool for measuring suction power. Inspectors attach the gauge to the vacuum intake and record the pressure difference. Air Watts and Pascals also help compare cleaning performance across different models. These tools ensure that the test results are accurate and reliable.
Step-by-Step Inspection Guide
A thorough test process helps inspectors verify the actual suction power of each robot vacuum. The following steps outline the standard inspection method:
- Inspectors prepare all test equipment, including a calibrated suction gauge and airflow meter.
- They check the vacuum for visible blockages or damage before starting the test.
- The inspector powers on the vacuum and sets it to its maximum suction mode.
- The suction gauge attaches to the vacuum intake to measure the pressure in Pascals or kilopascals.
- Inspectors record the suction power reading and compare it to the rated value on the product label.
- They also run a dust pickup rate test to see how much debris the vacuum collects in a set time.
- If the factory does not provide the required test equipment, the inspector marks the test as "Pending" or "Fail" in the report.
Common errors can affect the accuracy of the suction power test. These include:
- Clogged filters restrict airflow and reduce suction power.
- Full dustbins prevent effective operation and cause suction issues.
- Worn or damaged parts may lower suction performance.
Inspectors address these problems before running the test to ensure accurate results. If the vacuum fails to meet its rated suction power, the inspector follows a set of recommended actions:
- Power off and unplug the unit.
- Remove and empty the dustbin.
- Take out the filter.
- Detach the main brush assembly.
- Inspect the brush housing and intake opening.
- Check side brushes and wheel compartments.
- Reassemble all parts securely.
- Run a test cycle on a low-pile rug.
This process helps restore suction and ensures the vacuum meets cleaning standards.
Comparing Results to Product Claims
After completing the test, inspectors compare the measured suction power to the manufacturer's claims. They check if the vacuum delivers the promised suction and cleaning performance. If the measured suction power matches or exceeds the rated value, the vacuum passes inspection. If the suction falls short, the inspector records the failure in the report.
Inspectors also check the dust pickup rate to confirm the vacuum's real-world cleaning ability. They use real-time reporting to upload test results, photos, and comments. This system allows quick decisions about reworking or replacing units that do not meet suction power standards.
Accurate suction power verification protects buyers and ensures every robot vacuum delivers strong cleaning performance. Regular test procedures help maintain high standards for suction, power, and dust pickup rate in every inspection.
Robot Vacuum Auto-Recharge Function Checks
Auto-Recharge Testing Steps
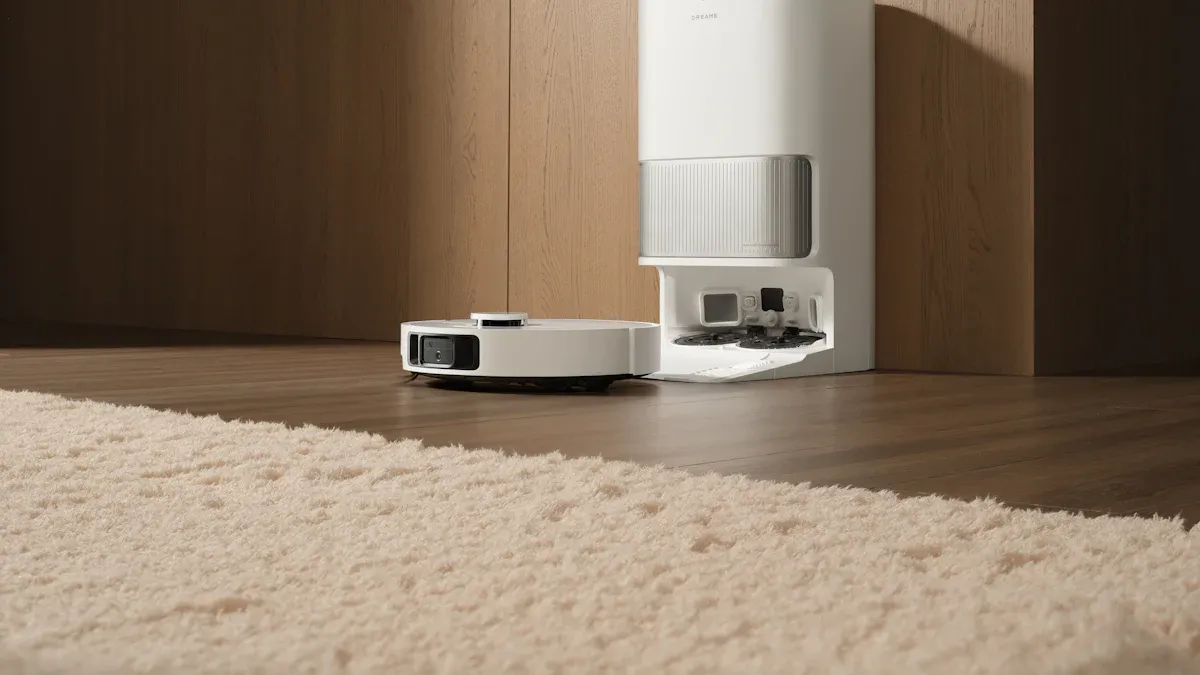
Inspectors check the auto-recharge function to make sure the vacuum returns to its charging base when the battery runs low. They keep the charging base plugged in at all times to activate the auto-recharge feature. The process starts by running the vacuum until the battery reaches a low level. When the battery drops, the robot vacuum should automatically search for its charging dock.
If the vacuum does not begin charging, inspectors follow these troubleshooting steps:
- Turn off and then turn on the main power switch.
- Unplug the cable and plug it back into the charging station.
- Wipe the charging terminals and sensor windows with a dry cloth to remove dust or debris.
- Check for obstacles near the charging station that could block the vacuum's path.
- Make sure the charging station sits on a flat, hard surface and not on a rug or near heat sources.
These steps help inspectors confirm that the vacuum's auto-recharge system works as designed. A working auto-recharge function supports consistent cleaning and keeps the vacuum ready for the next cycle.
Functional and Running Tests
Functional tests measure how well the vacuum finds and docks with its charging base. Inspectors observe the robot vacuum as it navigates back to the dock. They look for smooth movement, accurate alignment, and a quick start to charging. The vacuum should connect on the first attempt, even if it approaches the dock at a slight angle.
The table below shows key indicators of successful docking during auto-recharge tests:
| Key Indicator | Description |
|---|---|
| Alignment Tolerance | Docking system allows minor misalignments for a successful connection. |
| First Attempt Connection | Robot connects on the first try, even if slightly misaligned. |
| Mechanical Design | Tapered rails, spring-loaded pins, and magnets help guide the vacuum. |
| Sensors for Alignment | Smart docks use sensors to confirm full docking before charging begins. |
| Contact Redundancy | Charging continues even if contact points show minor wear. |
| Durability and Speed | Docking system supports frequent, rapid recharging for ongoing cleaning. |
Inspectors also run the vacuum through a full cleaning cycle to test battery life and stability. They check if the vacuum maintains strong suction throughout the cycle. If the vacuum fails to dock or charge, inspectors record the issue in real-time using TradeAider's reporting system. This immediate feedback allows quick action to fix or replace units that do not meet performance standards.
Sensor and Interface Checks
Sensors and interface systems play a big role in the auto-recharge process. Inspectors check the vacuum's sensors for obstacle avoidance and docking accuracy. They make sure the vacuum can detect the charging base and align itself correctly. If the vacuum cannot find the base, inspectors look for common issues such as:
- Clogged charging terminals or dirty sensor windows.
- Obstructions around the charging station.
- Incorrect installation of the charging station, such as placing it on a rug or near heat sources.
- Improper connection of the charger cable.
- Charging station not activated, shown by a missing green LED indicator.
Inspectors clean the terminals and sensors, remove obstacles, and confirm the charging station is set up correctly. They also check the vacuum's interface for clear status indicators and error messages. If the vacuum fails any sensor or interface check, inspectors upload the defect details immediately. This process ensures that only vacuums with reliable auto-recharge and strong cleaning ability reach customers.
Note: Regular inspection of sensors and charging interfaces helps maintain effective cleaning and long-term vacuum performance.
Troubleshooting & Maintenance in Vacuum & Robot Cleaner Inspection
Common Suction Power Issues
Robot vacuum cleaners can lose suction power for several reasons. Users often notice a drop in suction when the vacuum struggles to pick up dirt or leaves debris behind. The most frequent suction problems include:
- Hair wrapping around the brush roll, which restricts movement and reduces suction.
- Clogged filters that block airflow and lower suction power.
- Full dustbins or blocked pathways that prevent the vacuum from working efficiently.
To address these issues, users should:
- Open the dustbin and check if it is full.
- Empty the dustbin, even if it looks only partially filled, as debris can trigger sensors early.
Regular attention to these areas helps maintain good suction power and ensures reliable performance for every cleaning session.
Auto-Recharge Failures
Auto-recharge failures can interrupt cleaning cycles and reduce vacuum efficiency. The main causes of these failures include:
- Incorrect positioning of the charging dock.
- Dirty recharge sensors.
- Charging dock not powered on.
- Cleaning not started from the charging dock.
- Map not matching the actual room layout.
- Obstacles blocking the recharge path.
Users should check each of these factors if the vacuum fails to return to its dock or recharge properly. Keeping the area around the dock clear and ensuring the dock is powered on can solve many auto-recharge problems.
Maintenance Tips
Routine maintenance keeps suction power and cleaning performance at their best. Key practices include:
- Empty the dustbin between jobs to maintain suction.
- Clean or replace filters regularly to prevent clogs and maintain airflow.
- Wash the rotating brush in lukewarm water and remove tangled hair.
- Wipe sensors and charging contacts with a dry, soft cloth for accurate navigation and docking.
- Inspect the main brush roll for obstructions.
- Replace filters as recommended by the manufacturer.
- Clean brushes and filters at least once a week, especially in homes with pets.
- Conduct monthly inspections of wheels, sensors, and internal parts to prevent malfunctions.
Tip: Use maintenance reminders in the vacuum's app to help keep up with regular care.
Following these steps ensures the vacuum delivers reliable suction power, reliable suction and consistent cleaning results over time.
Suction power and auto-recharge checks play a key role in vacuum and robot cleaner inspection. These steps help ensure each vacuum delivers strong suction and reliable power for every cleaning session. Professional inspection and real-time reporting give buyers confidence in product quality. To keep suction at its best, users should follow these maintenance steps:
- Empty the dustbin after each use.
- Check wheels and brushes for tangled hair or debris.
- Clean brush rolls, side brushes, and filters weekly.
- Wipe sensors and charging contacts.
- Deep clean brushes and rollers monthly.
- Replace worn parts every few months.
Regular inspection and care help every vacuum maintain high suction power and extend its life.
FAQ
How do inspectors measure suction power in robot vacuums?
Inspectors use calibrated suction gauges to record pressure in kPa. They compare these readings to the manufacturer's specifications. This process ensures the vacuum meets performance standards.
What happens if a robot vacuum fails the auto-recharge test?
Inspectors document the failure in real-time. They upload photos and comments to the reporting system. The factory can then rework or replace the unit before shipment.
Why is regular inspection important for robot vacuums?
Regular inspection helps maintain strong suction and reliable auto-recharge. It prevents performance issues and extends the vacuum's lifespan. Buyers receive products that meet quality standards.
Which maintenance steps improve suction power?
Tip: Clean filters weekly, empty dustbins after each use, and remove hair from brush rolls. These steps keep suction power strong and ensure effective cleaning.
Can TradeAider provide real-time inspection reports?
TradeAider offers online real-time reports. Clients view videos, photos, and defect analysis instantly. This transparency supports quick decision-making and quality assurance.
Related Articles


Grow your business with TradeAider Service
Click the button below to directly enter the TradeAider Service System. The simple steps from booking and payment to receiving reports are easy to operate.