
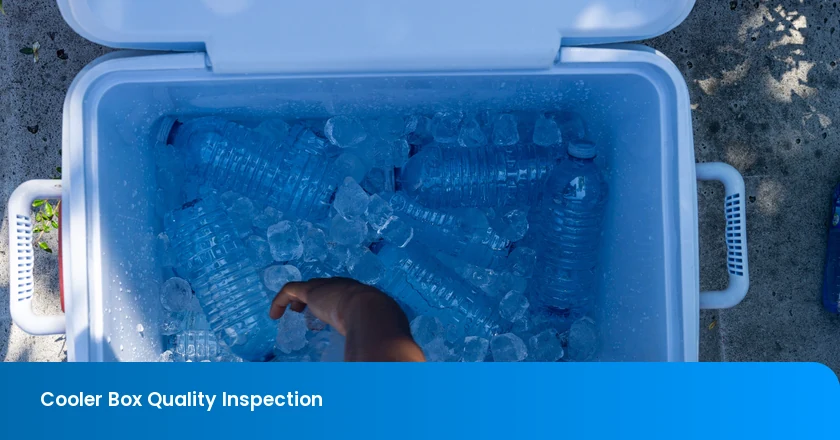
Cooler box quality inspection should establish whether the lid closes correctly, the loaded box meets its defined thermal performance, the hinges and handles withstand the specified use, the drain closes without the permitted leakage being exceeded, and the packed product survives the agreed handling tests. Select finished units from production cartons and compare them with the approved sample, drawing, packing instructions and test specification.
These checks answer different questions. A lid can latch firmly while a damaged seal leaves a gap; a cooler can remain cold in a short demonstration without supporting a multi-day claim. Buyers need observable defects and comparable test results, rather than a single comment that the box is “good quality.” The methods below concern passive, rigid portable coolers. Powered refrigerators, medical shipping containers and other specialized cold-chain equipment require their own qualification procedures.
Prepare Six Cooler Box Checks Before the Visit
Use this inspection sheet to agree the factory operations and their judgment criteria. The buyer supplies model requirements and acceptance limits; the supplier provides the specified fixtures, test loads and packed samples. Identify each sample and record its actual result alongside the applicable check. Decide which tests use separate units so a wet, loaded or damaged sample is not mistaken for an untouched product.
| Check | Factory operation | Compare with |
|---|---|---|
| Lid seal | Check seating, seal continuity and latch engagement; perform any specified spill test. | Approved closure geometry and applicable leakage criterion. |
| Insulation retention | Log the defined internal temperature and ambient conditions over the required duration. | The specified load, starting conditions, measurement positions and endpoint. |
| Hinge cycles | Open and close through the prescribed angle and cycle sequence. | Required cycles and post-test alignment, attachment and function. |
| Handle load | Apply the prescribed loaded-box lifting or carrying procedure. | Total test mass, configuration and attachment/deformation limits. |
| Drain plug | Inspect the complete assembly, check drainage and test the closed drain. | Approved parts, operating positions and defined leak conditions. |
| Carton tests | Test the complete packed unit using the selected handling protocol. | Required orientations and severity, then product and packaging condition. |
EN 12546-2:2000 is a possible reference when its scope and the buyer's specification match. NEN lists it as current and describes portable domestic insulated boxes, chests and bags for generally packaged food or drinks. The scope excludes heat-producing or heat-removing devices, industrial or catering containers, and several other container types. Obtain the complete adopted method; the catalog description does not supply universal inspection loads, cycle counts or thermal limits.
Inspect the Lid Seal in Its Normal Closed Position
The lid seal check should establish that the closure matches the intended design around the whole opening. Where a gasket is fitted, inspect this sealing strip for missing sections, cuts, twisting, poor joints or areas pulled out of their seat. For designs without a separate gasket, compare the mating lid and body surfaces with the approved sample instead of adding a seal requirement the product never had.
Clean away loose debris without modifying the seal. Close the lid normally and engage each latch as instructed. Look for an uneven gap, a lid corner that lifts, or a latch that appears engaged but does not retain the lid. Compare several positions around the rim; a good fit near the latch does not settle the fit at a hinge or corner. Check whether an insert, basket or supplied accessory prevents full closure.
If the product claims spill resistance, use the specified fill level, orientation, exposure time and leakage criterion in a stable fixture or catch tray. An upright drain-leak check does not test the entire lid perimeter. Conversely, turning an ordinary cooler upside down is not a valid universal test: use an inversion or tilt procedure only when the design and agreed requirement call for it. Do not improvise a pressurized air or water test.
Photograph the location of any gap or leak before adjustment. If changing latch tension or reseating the gasket corrects the observation, retain both conditions and ask the supplier why the production unit needed adjustment. Assess fresh units after the correction. Closure appearance and spill performance can support a specific lid finding, but neither replaces the controlled insulation-retention test.
Measure Insulation Retention with a Defined Endpoint
Insulation retention should be judged using the same starting conditions, load and measurement method as the claim being checked. Define whether the result is elapsed time to a specified internal temperature, temperature after a fixed duration, or remaining ice under a particular procedure. These are different endpoints. An internal temperature reading cannot be renamed an ice-mass result, and a brief spot check cannot establish several days of performance.
A concrete manufacturer example shows why the setup matters. Igloo's published testing method describes filling a cooler to 90% capacity with ice initially at 10°F, keeping the lid closed, and continuously tracking internal temperature in a 90°F environment at 70% ± 5% humidity. It concludes the test at an internal temperature of 40°F. Those conditions define that manufacturer's stated method; they are not acceptance requirements for every cooler.
For the ordered model, specify any preconditioning, ice or cooling-pack type and quantity, contents, starting temperatures and lid-opening schedule. Record the loaded arrangement before closing the box. Keep the ambient temperature within the required conditions and retain its log, rather than recording only the room temperature at the start. Direct sunlight, a heater or a nearby air outlet can make an uncontrolled factory position unsuitable for a comparison test.
Sensor location determines what the temperature log describes. An internal air probe suspended clear of the wall, ice and contents measures a different condition from a probe touching the liner or inserted in a test load. Specify the measured medium and positions, secure the sensors, and record the arrangement. Log the surrounding air separately. Route wiring only as the method allows: a cable trapped across the lid seal can change the closure being tested.
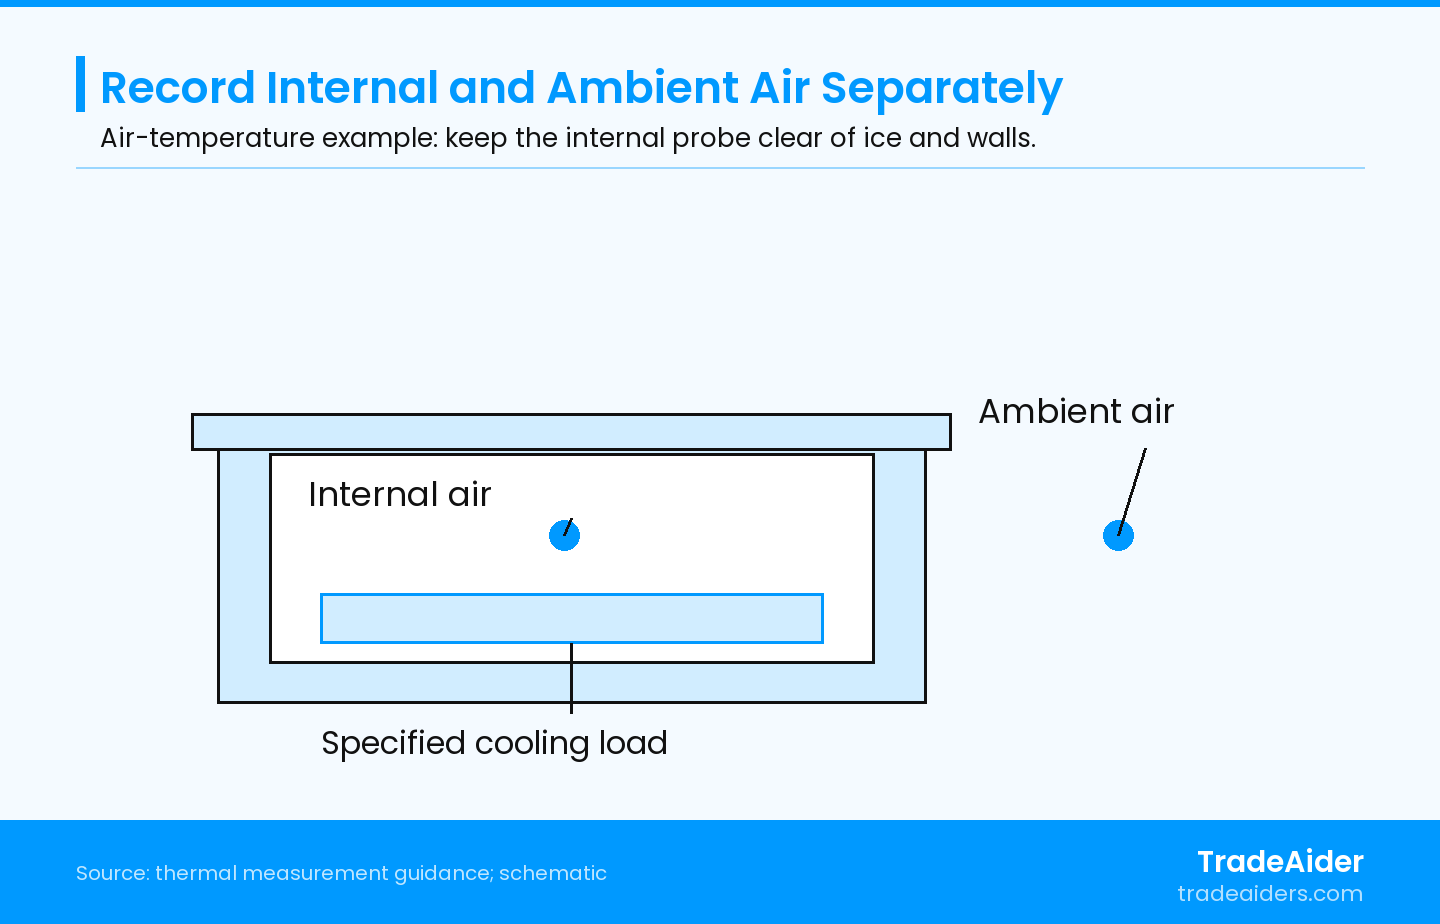
Air-temperature setup example, not to scale. Use the positions and measured medium required by the actual method; this is not a prescribed standard test arrangement.
Use measuring equipment suitable for the temperature range and required accuracy, with its calibration or verification status available. Check the timestamps, sampling interval and any missing readings before comparing the result with the endpoint. If the temperature limit is crossed between readings, describe the observation interval rather than reporting an unsupported exact crossing time. Retain the original data and note openings, power interruptions or setup changes.
Hypothetical Example: Two Temperature Logs That Cannot Be Compared
Suppose the buyer requests an internal-air temperature comparison under the same load and ambient conditions. One factory unit has its probe suspended in the prescribed air space; the other has the probe resting against an ice pack. The second log stays colder, but it is measuring a different condition. The apparent advantage cannot establish better insulation in that unit.
The inspector identifies the placement difference, retains both initial logs and repeats the comparison on suitably prepared samples with matched sensor positions. The new results can then be judged under the agreed method. If a difference remains, investigate the box construction and closure rather than assuming the misplaced probe explained every variation. This hypothetical example concerns comparable measurement; it is not a measured client result or a suggested thermal acceptance limit.
Cycle the Lid, Then Recheck Alignment and Attachment
A hinge-cycle test should reproduce the opening movement defined for the cooler and assess the assembly afterward. Inspect hinge pins, fasteners, mounting areas and the lid stop before starting. Confirm that the lid opens and closes without forcing it past its intended travel. Record existing looseness so later movement is not confused with a condition already present.
Define one cycle clearly, including the opening angle, full return to the required closed position, operating speed and whether latch operation is included. Follow the prescribed count and any conditioning. An automated fixture must act on the intended operating point without introducing an unrelated side load. A few hand-operated openings can reveal poor assembly, but they do not prove compliance with a longer endurance requirement.
After cycling, examine cracks, pin movement, fasteners backing out, increasing play and damage at the lid stop. Close the lid again and compare its alignment and latch operation with the initial condition. A hinge that still moves is not necessarily acceptable if the lid now seats poorly. Where the test plan calls for a post-cycle seal or thermal check, complete that defined check; do not infer the result from hinge appearance.
Do not tighten fasteners midway through a continuous endurance sequence unless the method permits it. If a repair is needed, record the completed cycles and failure condition. The buyer should decide the correction and repeat-test scope rather than treating the repaired sample as if it completed the original sequence without intervention.
Load Handles for the Intended Carrying Configuration
Handle load testing needs a defined total mass and a defined way of lifting or carrying the box. Include the cooler itself in the total mass calculation, along with the prescribed contents or test weights. A capacity label in liters or quarts describes volume; it does not by itself establish the mass the handles must withstand.
Inspect grips, pivots, straps where fitted, fasteners and molded attachment points before loading. Spread the test contents as the method requires and prevent loose weights from shifting unexpectedly. Confirm whether the test uses a swing handle, both end handles, a shoulder strap or a wheeled model's towing handle. Lifting an entire load by one end handle applies a different condition from a two-person carry; use it only where the requirement specifies it.
Operator safety is separate from product strength. CCOHS compact-load guidance recommends planning a clear path, obtaining a secure grip and avoiding twisting during a lift. It does not set a cooler-handle strength threshold. Use appropriate fixtures or assistance for the prescribed test, keep people clear of a possible falling load, and do not make an inspector's ability to carry the box the acceptance criterion.
Apply the specified load, direction, duration and repetitions. Check afterward for cracked mounting areas, pulled-out fasteners, permanent bending, strap damage or a grip that no longer operates correctly. Record where the damage appears and whether the box was lifted in the required configuration. Retightening an attachment after it moves should be documented as an intervention, with the original result retained.
Test the Drain as an Assembly, Not Just a Cap
Drain inspection should cover the cap, sealing components and the connection through the cooler wall. Check that the correct parts are present, threads engage normally, the sealing surface is clean, and any tether does not interfere with closure. Inspect the surrounding liner and outer shell for cracks or gaps. A cap that screws on can still belong to an incompatible assembly.
For example, Igloo's threaded drain assembly listing identifies compatible cooler sizes and includes a cap, grommet, washer and threaded collar as well as the drain plug. That is a product-specific parts example, not a universal construction requirement. For the ordered cooler, compare the complete assembly with its approved parts list and drawing.
Fill the box to the prescribed level with the permitted test liquid, close the drain as instructed and observe the assembly for the specified duration and orientation. Dry the exterior first and use a clean observation surface or catch tray so spilled filling water is not mistaken for leakage. Locate any seepage at the cap, sealing joint or wall fitting before changing the assembly.
Open the drain and confirm the intended flow and operating position. If drainage requires tilting, follow the instructions and use safe support; do not impose a zero-residual-water requirement on a design that was not specified to achieve it. Close the drain again and complete any required repeat leak check. Keep a drain-leak finding separate from a lid spill finding, even when both observations are reported for the same cooler.
Test the Complete Packed Cooler and Inspect What Changed
Carton testing should evaluate the actual shipping arrangement, including the cooler, accessories, inserts, bag, closure and outer carton. Check carton identity, dimensions, condition and the packing layout first. Protect protruding handles, latches and the drain fitting according to the approved design. An empty-carton result cannot establish how those parts behave inside a packed unit.
ISO 2248:1985 describes a vertical drop method for complete filled transport packages, with atmosphere, drop height and package orientation predetermined. The public scope supplies that testing distinction, not a universal drop height or a complete shipping qualification. Use the complete selected method and product criteria; add compression, vibration or other tests where the distribution plan requires them.
Use the specified orientations, sequence and severity with suitable equipment and a controlled area. Mark the tested pack and photograph its original condition. After the sequence, inspect tears, crushed corners and insert movement, then unpack the cooler to examine hidden product damage. Look especially at hinges, lid alignment, handle mounts and the drain, rather than judging only whether the carton is still closed.
Repeat the functional checks required by the protocol after the packing test. A dented corner may be cosmetic, while a shifted lid or cracked drain fitting may change use; judge each against the written criteria. Do not silently replace damaged inserts during the sequence. If the supplier changes packing materials, the buyer needs a defined check of the revised arrangement, not merely a photograph of a fresh carton. Keep tested units separate pending their disposition.
Turn Cooler Findings into Specific Supplier Actions
Give the supplier a finding it can investigate: a gasket lifting at one corner, a temperature test with mismatched probe positions, a cracked handle mount after the prescribed load, or seepage around the drain fitting. Identify the sample, method and failed comparison. The next step depends on what the observation actually establishes.
- Physical defect: preserve the original condition, identify the affected construction or packing feature and check the supplier's defined correction on fresh samples.
- Invalid test setup: resolve the differing load, environment, sensor position or operating sequence before comparing performance.
- Required test not completed: arrange the outstanding evaluation and keep that result unresolved rather than treating a short demonstration as a pass.
TradeAider's inspection-standard guidance explains sampling and checks tailored to customer requirements. Use it to agree sample coverage and defect classification; sampling does not supply thermal endpoints or mechanical test limits.
TradeAider's pre-shipment inspection takes place when the order quantity is 100% complete and at least 80% packed for export. This provides access to finished coolers and actual packing. Confirm fixtures and the available test duration when arranging the scope.
Send the model specification, approved sample, thermal method, hardware loads and cycles, drain requirements and shipping-test plan. Contact TradeAider to arrange your cooler inspection and confirm which checks fit the factory visit and which need separate testing.
Frequently Asked Questions
What if the retention test takes longer than the inspection visit?
Arrange the extended test separately rather than shortening its required duration. Agree who controls the samples and environment, how the logger runs, and how the original data and endpoint are reviewed. A factory visit can document a prepared setup or a completed report, but those activities should be distinguished from supervising the entire test. Confirm the arrangement before booking.
Can one cooler size's thermal report cover every size in the range?
Not automatically; the buyer needs a technical basis for the models covered. Size changes can alter the load arrangement and surface geometry, while lid, liner or insulation changes may alter construction. Compare the tested configuration with each claimed variant and ask a qualified reviewer to justify any grouping. A shared product-family name alone does not establish equivalent thermal performance.
Can water-tested coolers be packed immediately afterward?
Dry and inspect them according to the agreed handling procedure before returning eligible units to packing. Identify the tested samples, remove test liquid and check accessible recesses, the drain and packing-contact surfaces. Do not put damp inserts back into cartons. If a test damaged or contaminated a unit, its separate disposition must be resolved instead of assuming that drying makes it saleable.
Does passing a cooler performance standard establish food-contact suitability?
No, a performance result does not by itself establish suitability for the intended food contact. Determine whether use involves packaged drinks, wrapped food or direct contact with the liner, water or ice, then obtain the relevant material and destination-market support. Match that documentation to the actual construction. Insulation, handle and package results answer different questions from the permitted use of food-contact materials.
Related Articles

Grow your business with TradeAider Service
Click the button below to directly enter the TradeAider Service System. The simple steps from booking and payment to receiving reports are easy to operate.