In industrial manufacturing, the structural reliability of machinery and infrastructure depends heavily on the precision and strength of fasteners. A failure in a single bolt can lead to catastrophic mechanical collapse, resulting in safety hazards and immense financial losses. Ensuring fastener quality requires a dual approach: dimensional verification of thread geometry using Go/No-Go gauges and mechanical validation of load-bearing capacity through tensile strength testing. By adhering to international standards such as ISO 898-1 and ASTM F606, manufacturers can guarantee that their fasteners provide the necessary clamping force and durability required for complex industrial assemblies.

Key Takeaways
- Go/No-Go gauges provide an efficient binary check for thread pitch diameter and functional fit.
- Tensile strength testing measures the Ultimate Tensile Strength (UTS) and Yield Point to prevent structural failure.
- ISO 898-1 property classes (e.g., 8.8, 10.9) dictate the specific mechanical requirements for carbon steel fasteners.
- Thread tolerance verification is essential for ensuring interchangeability and proper torque application.
- Regular manufacturing quality inspections must combine both dimensional and mechanical assessments.
- Comprehensive documentation and traceability are mandatory for compliance with global safety regulations.
The Mechanics of Go/No-Go Thread Gauging
Thread gauging is a fundamental aspect of dimensional metrology. A thread is a complex geometric feature defined by its major diameter, minor diameter, pitch, and flank angle. However, for mass-market fasteners, the most critical parameter is the "Functional Fit," which is evaluated using Go and No-Go gauges. This method determines if the thread falls within the Maximum Material Condition (MMC) and the Least Material Condition (LMC).
Functional vs. Pitch Diameter
The Go gauge checks the Maximum Material Condition—essentially ensuring that the fastener is not too large to fit into its mating part. The Go gauge must thread onto or into the component freely for the entire length of the thread. In contrast, the No-Go gauge checks the Minimum Material Condition, focusing on the pitch diameter. If the No-Go gauge can be easily threaded more than three complete turns, the thread is too thin, and the fastener will lack sufficient shear strength.
| Gauge Side | Material Condition | Requirement | Technical Objective |
|---|---|---|---|
| Go | Maximum Material (MMC) | Pass freely through full length | Ensures assembly and interchangeability |
| No-Go | Least Material (LMC) | Not exceed three complete turns | Ensures thread thickness and shear resistance |
Engineering Focus: Thread "drunkenness" or lead error can cause a Go gauge to bind even if the pitch diameter is correct. Using a standardized Go/No-Go system helps detect these complex geometric errors that simple calipers might miss.
Tensile Strength: Material Science under Stress
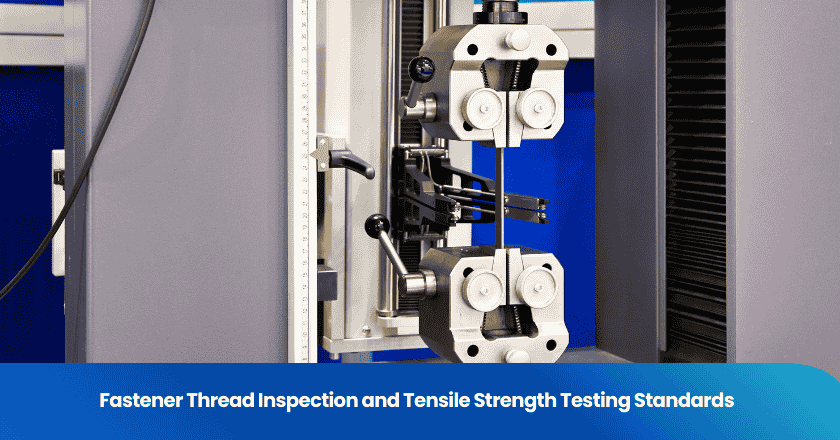
Tensile strength is the maximum stress that a material can withstand while being stretched or pulled before necking or breaking. For fasteners, this is measured using a Universal Testing Machine (UTM), which generates a Stress-Strain Curve. This curve provides three vital pieces of data: Yield Strength, Ultimate Tensile Strength (UTS), and Elongation.
Understanding the Stress-Strain Curve
- Elastic Region: The fastener stretches but will return to its original length when the load is removed.
- Yield Point: The threshold where "Plastic Deformation" begins. The fastener is permanently stretched.
- Ultimate Tensile Strength (UTS): The peak of the curve where the fastener supports the maximum possible load.
- Fracture Point: Where the fastener physically snaps.
High-strength fasteners are typically defined by their property classes. In the metric system, a 10.9 grade bolt has a nominal UTS of 1000 MPa and a yield strength that is 90% of the UTS (900 MPa).
| Property Class | Material | Tensile Strength (MPa) | Yield Strength (MPa) |
|---|---|---|---|
| Class 4.6 | Low Carbon Steel | 400 | 240 |
| Class 8.8 | Medium Carbon Steel (Quenched) | 800 | 640 |
| Class 10.9 | Alloy Steel (Quenched & Tempered) | 1040 | 940 |
| Class 12.9 | Alloy Steel (Precision Temp) | 1220 | 1100 |
Standardization and Regulatory Compliance
Global trade in fasteners requires adherence to strict quality control standards. ISO 898-1 is the primary international standard for carbon steel fasteners, while ISO 3506-1 governs stainless steel. These standards dictate the testing environment, the speed of the tensile machine, and the required wedge angle for wedge-tensile testing—a method that tests the strength of the head-to-shank transition.
Ensuring compliance involves more than just a lab test. A thorough factory audit is required to verify the heat treatment process. If the quenching and tempering cycle is inconsistent, the fasteners may suffer from "Hydrogen Embrittlement," a latent defect that causes high-strength bolts to snap suddenly under a constant load days or weeks after installation.

Practical Quality Assurance Best Practices
Integrating Go/No-Go checks with mechanical testing creates a "Total Quality" environment. During a standardized quality inspection, several on-site protocols should be followed:
- Random Lot Sampling: Samples should be pulled from various points in the production run to account for tool wear.
- Calibration Verification: Ensure that thread gauges are calibrated against a master gauge and that the tensile machine is verified annually.
- Wedge Tensile Testing: Always perform wedge testing for bolts to ensure the head won't snap off due to stress concentration.
- Hardness Mapping: Use Rockwell or Vickers hardness testing as a non-destructive proxy for tensile strength during in-process checks.
For organizations procuring industrial products, maintaining a digital record of these tests is mandatory. Certificates of Conformance (CoC) and formal lab reports should be linked to the batch number for full traceability in case of a field failure.
Frequently Asked Questions (FAQ)
What happens if the No-Go gauge enters the thread?
If the No-Go gauge can be threaded more than three turns, the pitch diameter is too small. This means there is insufficient material to engage with the mating thread, leading to a high risk of "stripping" under load.
What is the difference between axial and wedge tensile testing?
Axial tensile testing pulls the fastener in a perfectly straight line. Wedge tensile testing places a shim under the head to pull it at an angle. The wedge test is more difficult and ensures the head-to-body transition is strong enough to handle misaligned loads.
Can I rely on hardness testing alone?
No. While hardness is related to tensile strength, it cannot measure ductility or elongation. A bolt can be hard enough but too brittle, causing it to snap without warning. Tensile testing is the only way to verify the full mechanical profile.
Why are Go/No-Go gauges better than digital calipers for threads?
Threads are 3D helical structures. Calipers only measure a single 2D point, which might miss "out-of-round" errors or lead deviations. Gauges provide a "Functional Check" that simulates how the fastener will actually behave in a tapped hole.
How often should fasteners be tested?
For critical industrial applications, every lot (batch) should undergo dimensional and mechanical testing. For low-risk applications, a sampling plan based on AQL (Acceptable Quality Level) is usually sufficient to maintain quality without excessive costs.
Haga crecer su negocio con el Servicio TradeAider
Haga clic en el botón de abajo para ingresar directamente al Sistema de Servicios TradeAider. Los pasos simples desde la reserva y el pago hasta recibir los informes son fáciles de operar.


