
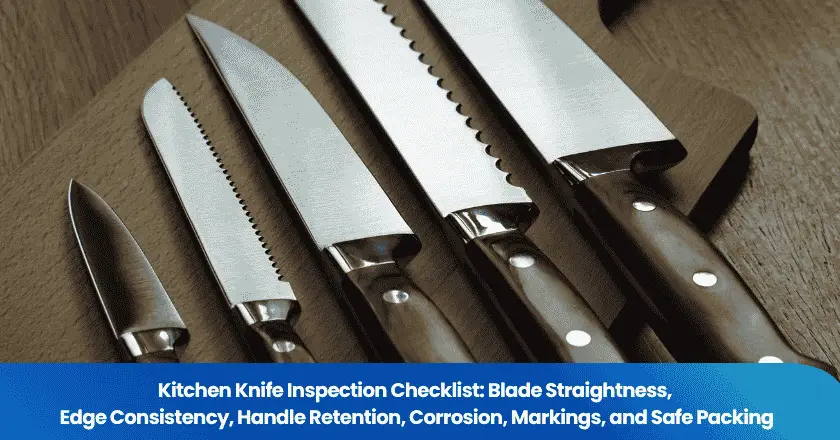
Kitchen knife inspection should check six things before shipment: whether the blade matches its specified geometry, the edge is consistently finished, the handle stays securely attached, the surfaces meet the corrosion requirements, the markings match the product, and the packing keeps sharp parts contained. Start with knives selected from production cartons, not a display sample. Compare them with the approved drawing, sample, artwork and packing instructions, then carry out the agreed functional tests.
A polished blade can hide a poor edge, and an attractive gift box can leave a knife free to move. The practical task is to examine both the knife and the way it reaches the customer. For hand-operated metal kitchen knives, the checks below apply to both plain and serrated edges; ceramic knives and powered cutting equipment need different checks. Factory inspection can reveal workmanship, assembly and packing defects. Material composition, hardness, quantified cutting performance and specialized corrosion claims require the appropriate test equipment and supporting reports.
Six Checks to Put on the Kitchen Knife Inspection Sheet
Use the following checklist for each relevant knife model and packing configuration. Before the visit, the buyer should provide dimensional tolerances, edge requirements, handle test methods, surface acceptance examples and the current artwork. The supplier should make the agreed equipment and packed production samples available. Add the actual result and sample identification beside each check, so a photographed defect can be traced to the knife examined.
- Blade straightness: support the blade at the specified references and examine lateral bow and twist. Measure any deviation using the drawing's method and tolerance; do not judge an intentionally curved cutting profile as a bent blade.
- Edge consistency: examine the sharpened area from heel to tip under suitable lighting and magnification. Look for chips, rolled sections, burrs and interruptions in the required bevel. Compare plain or serrated edges with the correct reference.
- Handle retention: inspect joints, rivets, gaps and alignment, then apply the specified attachment test in a protected fixture. Compare movement, cracks and separation with the written criteria before any repair or retightening.
- Corrosion and cleanliness: inspect the blade, joints and recesses as received. Photograph spots before cleaning; evaluate them against the surface specification and use a separate controlled test where corrosion performance must be established.
- Markings: compare the knife, individual pack and carton with the approved model, material claims, barcode and destination artwork. Check any specified marking durability using its approved method.
- Safe packing: check edge and tip coverage, guard retention, knife restraint and the actual opening sequence. Inspect the closed pack for protrusion and damage, and compare any handling trial with the prescribed conditions.
Prepare a stable, well-lit inspection station with controlled access to exposed edges. CCOHS sharp-blade guidance recommends stable cutting surfaces, keeping the body out of the cutting path, and letting a falling tool drop rather than trying to catch it. Use trained operators, suitable fixtures and protection selected for the task; gloves do not make contact with a sharp edge a valid test.
Check Blade Straightness in the Correct Plane
Blade straightness concerns unintended deviation from the specified geometry. A chef's knife can have a curved cutting edge in side view while remaining straight along its length when viewed from above. Establish which plane and reference line the drawing controls before taking a measurement. Otherwise, two inspectors can describe the same blade as straight and bent while looking at different features.
Remove the blade guard safely and place the knife in the defined support or fixture. Keep the edge clear of hands and the measuring surface. Sight along the blade as an initial screen, then measure suspected lateral bow at the designated positions. A suitable gauge or comparator should reference the specified blade feature, not an irregular handle or bolster. The bolster is the thicker transition between blade and handle on knives that have one. Do not press a suspect blade flat to obtain a passing reading.
Look separately for twist: the blade can change orientation along its length even when one measured line appears acceptable. Record the location and direction of the deviation, the supported condition and the instrument used. A photograph with the knife lying loose on a bench rarely explains a small deviation well; include the reference and a close view of the gauge reading where practical.
Use the drawing's tolerance for the applicable blade type. Thin, intentionally flexible filleting blades need a different supported condition from rigid chef's knives. If the purchase specification only says “straight,” send the measured deviation and setup to the buyer for a decision rather than inventing a millimeter allowance. Keep knives showing cracks, severe distortion or other potentially unsafe damage out of functional testing until a qualified person has assessed them.
Inspect the Edge, Then Test the Cutting Claim
Edge consistency means that the sharpened finish matches the specified design along the working portion of the blade. The bevel is the sloping surface ground toward the cutting edge. Its width need not be identical at every position or on both sides: some knives use asymmetric grinds. Compare the actual pattern with the approved design before treating a visual difference as a defect.
Under consistent lighting, inspect the heel, middle and tip without running a finger along the edge. Magnification can help locate chips, a rolled edge or a burr left by sharpening. For serrated knives, examine tooth spacing, damaged points and the grind of the recesses. These observations should identify a location and condition, such as “chip near the heel,” rather than a general comment that the knife feels blunt. Do not resharpen the selected unit before documenting its original condition.
Visual inspection does not establish quantified sharpness or edge retention, meaning how well cutting ability is maintained through the prescribed test. ISO 8442-5:2004 addresses these properties for hand-operated food-preparation knives and excludes powered blades. Its public scope describes repeated cutting strokes through a synthetic medium under controlled conditions. A paper-slicing demonstration uses a different material and setup, so it cannot be reported as a result under that standard.
If a simple cutting check is part of the factory specification, define the test medium, fixture, procedure and acceptance condition in advance. Keep it separate from the laboratory performance claim. For a standard-based report, confirm the knife identity, edge type, method edition, results and sample condition. As checked in October 2026, ISO lists the 2004 edition as published and under revision; confirm the edition required by the contract before booking a new test.
Check Handle Attachment Before and After Loading
Handle retention is the security of the connection between the handle and blade. First identify the construction. The tang is the part of the blade extending into the handle; its size, fastening and surrounding materials vary. A visible full-length tang or a row of rivets shows construction details, but neither feature alone proves that the handle will stay secure.
Examine the handle alignment, rivet seating, cracks and gaps around the blade transition. Check that seams and exposed metal edges match the approved finish and do not create unintended sharp contact points. Compare a suspected joint gap with an untouched reference sample. Document existing movement before loading, since a later result is easier to interpret when the original condition is known.
ISO 8442-1:1997 is the published cutlery requirements reference for food preparation and is also under revision as of October 2026. If the buyer adopts it, obtain the complete applicable requirements and methods. Its title or catalog entry does not supply a factory pull force, twisting load or acceptance value.
For the agreed attachment test, use a fixture that restrains the blade safely and applies the load at the specified location and direction. Follow the required conditioning, loading sequence and duration. Check for movement between blade and handle, loosened fasteners, cracks or separation after the test, before adjusting anything. Do not improvise a hand-held twisting test around an exposed blade. Where the equipment or method is unavailable, report the attachment observation and the unperformed test separately.
A handle that becomes loose during testing requires investigation even if it can be tightened afterward. The supplier should determine whether the problem lies in fastening, fit, adhesive application or a damaged component. The corrective action should address the cause, and fresh samples should undergo the required test. A repaired test sample shows the repair outcome; it does not represent the untouched shipment.
Separate Surface Spots from Corrosion Performance
Inspect corrosion and surface condition before cleaning the selected knives. Look across the blade faces, edge, blade-handle joint and accessible recesses for spots, deposits, pits and residue. Note whether the issue is on exposed steel, a coated surface or around an attachment. Photograph it close up and in context, and retain a sample if diagnosis is needed.
A removable brown deposit and a corroded pit require different follow-up. Use only the approved cleaning procedure when checking whether a mark is removable, then record what remains. Do not polish the blade until the original condition is lost. The supplier may need to examine finishing residue, cleaning, drying, material changes or contact with contaminated equipment; the visible spot alone does not establish which cause is responsible.
Where salt-spray testing is specified, ISO 9227:2022 defines controlled procedures but leaves product exposure periods and interpretation to the relevant specifications. Its scope also warns against using the results to rank different materials or predict long-term corrosion resistance. The published standard has a 2024 amendment; identify the applicable method and amendments in the test instruction.
Consequently, “passed salt spray” is incomplete without the procedure, exposure, sample preparation and assessment criteria. A passing result does not promise a fixed number of rust-free years. Nor should “stainless” on the blade replace the ordered surface condition or corrosion requirement. If spots are already present in unopened packs, keep that as-received finding distinct from the later controlled test result. Check whether damp inserts, wet packing operations or damaged protective materials are present, without treating their presence as a proven cause.
Match Markings to the Actual Knife and Its Claims
Marking inspection should establish that the knife and its packaging describe the same product. Compare the model, brand, blade size, material statement, country-of-origin information where required, barcode and care instructions with the approved artwork for the destination. Check individual packs as well as export cartons; a correct carton label cannot correct a mismatched knife inside.
Look for missing characters, poor contrast, inconsistent placement and printing or engraving damage. Scan barcodes with the agreed equipment and compare the decoded value with the expected product record. If marking durability is specified, use its defined rubbing or cleaning method. An improvised abrasive wipe can damage an otherwise acceptable mark and produce a result the buyer cannot compare.
Treat steel grades, hardness values and care claims as statements that need the corresponding support. An engraved alloy designation is not a composition test, and blade polish does not establish hardness. Ask the supplier to connect material and performance reports to the ordered model or material lot. Instructions such as “dishwasher safe” should agree with the product's construction and supported use conditions; do not infer them from the word stainless.
For US food-contact claims, FDA component-status guidance explains that the relevant substances and intended uses determine regulatory status. Where a Food Contact Substance Notification is the basis, it is specific to the identified manufacturer, substance and use conditions. This is a US document-review question, especially relevant to coatings or other food-contact materials; it is not a reason to describe every finished knife as “FDA approved” or to apply US rules worldwide.
Check Tip Coverage, Guard Retention and Knife Restraint
Safe knife packing needs both coverage and restraint. The edge and tip should have the protection required by the packing design, while the insert, ties or other restraints keep the knife from moving into an unsafe position. A loose guard can expose the edge even inside a rigid box; a secure handle restraint can still leave the tip able to strike an unsupported wall.
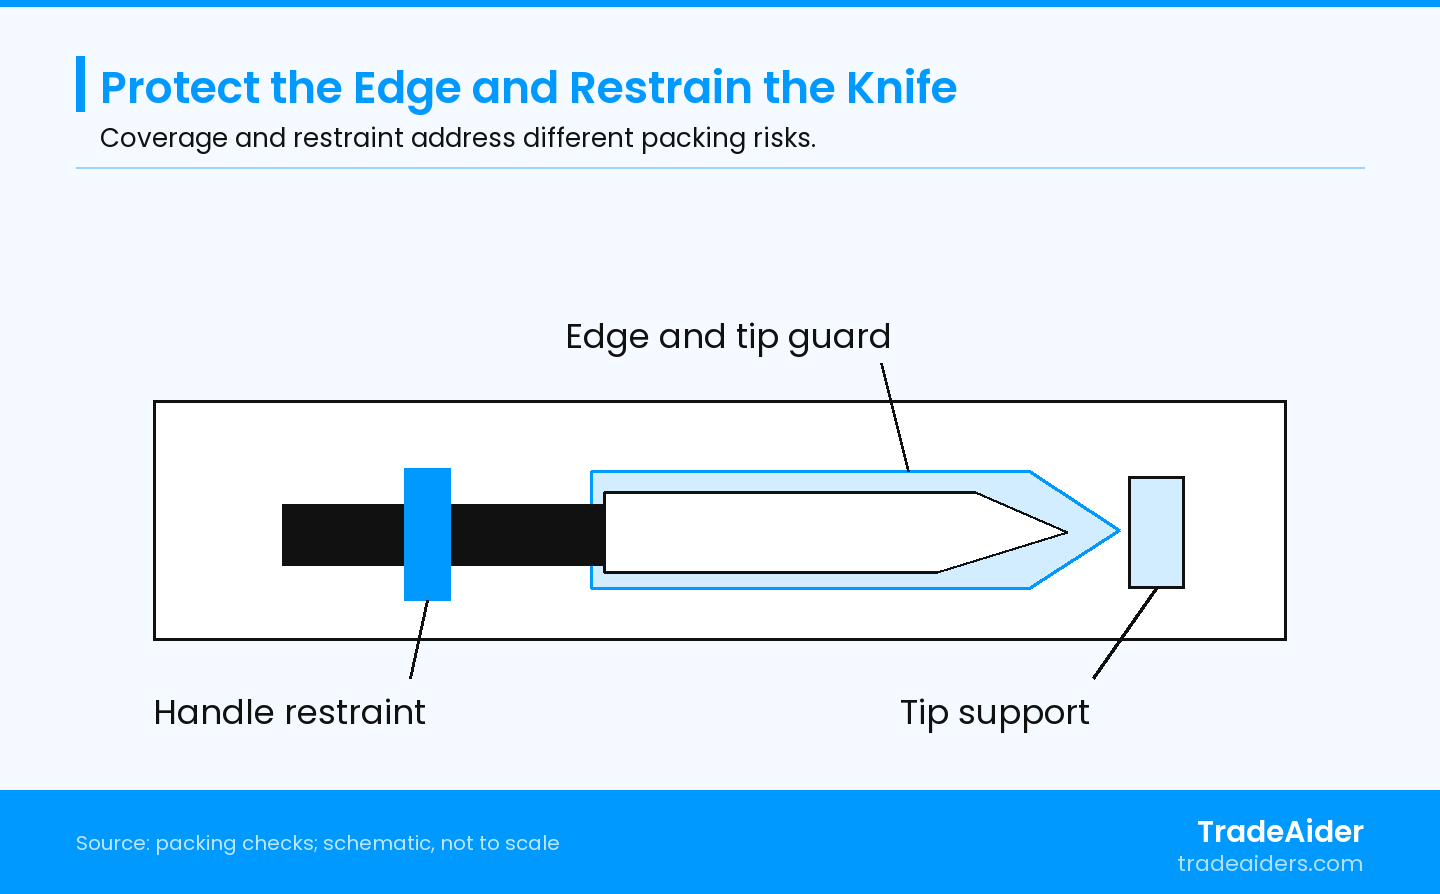
Schematic packing arrangement, not to scale. The guard covers the sharp parts; the restraint and tip support must suit the actual knife and the specified handling conditions.
Take packed samples from the actual production cartons. Examine the outer condition before opening, then follow the intended opening sequence on a stable surface. Keep hands out of the blade path and do not reach blindly under tissue or inserts. Check whether opening the lid releases the knife, pulls off its guard or exposes a sharp part unexpectedly. Record the arrangement before removing components, including the direction of the tip and the locations of restraints.
Compare the guard or sheath with the correct knife model. Check that it covers the specified edge length and tip, stays in place under the agreed handling conditions, and does not force the blade into a bent position. Inspect restraints for looseness, damaged holes and incorrect routing. Check the clearance and supporting material around the tip; the inspection should consider where the knife can move, rather than only where it sits in a carefully arranged open box.
Close the retail pack in its normal condition before the prescribed handling trial. Afterward, open it safely and inspect for guard displacement, a loose knife, cuts in the insert, tip contact damage and protrusion. Use the agreed sequence and severity; do not replace a specified distribution test with informal shaking or dropping. A local packing trial can identify a movement problem, while transport qualification requires the selected protocol for the actual shipping arrangement.
Hypothetical Example: A Covered Tip Still Moves Inside the Box
Suppose a chef's knife has an edge guard and sits neatly in a gift-box insert. During the buyer's specified handling trial, the knife slides lengthwise, the guard shifts and the tip damages the end of the insert. The open-box appearance was acceptable, but the closed pack did not keep the knife in its protected position. The relevant observations are the knife's movement, the guard's new position and the tip damage.
The supplier changes the insert restraint and tip support, then checks fresh packed samples using the same procedure. If the movement and damage disappear, the result supports that correction under those trial conditions. The buyer should also check that the change does not make unpacking unsafe or interfere with the knife finish. This hypothetical example explains packing diagnosis; it does not demonstrate universal protection in transit.
Use the Findings to Give the Supplier a Clear Next Step
A useful knife inspection result names the defect and the comparison that failed: lateral deviation beyond the drawing tolerance, a chipped edge, handle movement after the prescribed test, or a displaced guard. Keep photographs and readings connected to the selected samples. The buyer can then request a specific correction or missing test instead of asking the supplier to “improve quality.”
- Unsafe attachment or exposed sharp parts: isolate the affected samples, notify the buyer and investigate the cause before continuing the relevant test.
- Workmanship or artwork mismatch: classify and count the defect under the agreed plan, request the defined correction and check fresh samples.
- Missing performance result: identify the unperformed test or unmatched report and arrange the required evaluation; leave the claim unresolved.
Set defect classifications and sampling instructions before the visit. TradeAider's inspection-standard guidance describes sampling and checks tailored to customer requirements. Sampling determines which units are examined and how the lot is assessed; it does not create blade tolerances or handle test loads. Potentially unsafe attachment or packing findings need the buyer's specified escalation decision, rather than being averaged into cosmetic results.
For a finished order, TradeAider's pre-shipment inspection takes place when the order quantity is 100% complete and at least 80% packed for export. The packing threshold is particularly relevant here: the inspector needs actual packed knives to examine protection and restraint. Confirm specialized test equipment separately when arranging the visit.
To prepare a knife inspection, send the approved model and sample, drawings, edge and attachment methods, material reports, artwork and packing arrangement. Contact TradeAider to arrange your inspection and confirm which checks can be performed on site and which require separate testing.
Frequently Asked Questions
How should a mixed knife set be sampled?
Treat materially different knives and packing arrangements as separate inspection configurations. List the models and quantities in each set, then agree how the sample plan covers them. A chef's knife and a serrated bread knife need their own relevant edge checks, while the complete set also needs a packing check. Do not let repeated inspection of one model stand in for the others.
Can a test report for another knife model cover this order?
Not automatically; the buyer needs a justified connection between the tested sample and the ordered knife. Compare the blade material, heat treatment, edge design, handle construction and packing where relevant to the claimed result. Ask the laboratory or qualified technical reviewer whether the differences are covered. Similar photographs or the same brand name do not establish that connection.
Should tested or repaired knives return to the shipment?
Keep potentially damaged, destructively tested or repaired samples separate until their disposition is decided. An attachment, cutting or corrosion procedure may alter the knife even when no obvious defect remains. Identify those units and have the buyer and supplier agree replacement or other handling under the inspection plan; a later packing operation should not silently return them to saleable stock.
What if the supplier has no written test limits?
Ask the buyer to resolve the missing criterion before reporting the test as passed. Send the drawing or sample reference, proposed setup and the specific question: for example, which blade plane is controlled or which attachment load applies. Document any measurements already taken as observations. If the criterion cannot be agreed before the visit, distinguish completed checks from the outstanding evaluation.
Related Articles

Grow your business with TradeAider Service
Click the button below to directly enter the TradeAider Service System. The simple steps from booking and payment to receiving reports are easy to operate.